Welcome to Smogon! Take a moment to read the Introduction to Smogon for a run-down on everything Smogon, and make sure you take some time to read the global rules.
Many have known for long time, but I managed to hit 1000 with my rain team around the start of the year, after which I took a lengthy break from playing (IRL keeping me extra busy). I livestreamed the last 100 battles before 1k (VOD available here), featuring a few miracle survivals to my archenemies Ellis and Irene. With their ego most definitely bruised from constantly losing in what should have been a winning matchup for them, they probably retreated to Snowpoint City to train. When I resumed play in May, they quickly took off to the Tower to meet me at battle 1046, and Abomasnow froze Raikou on the switch. It was bound to happen...
As I spent several minutes thinking of my options to deal with it, I apparently lost count of Trick Room turns, which led me to Scizor's needless sacrifice upon Torkoal's entrance (I thought I had 2 turns left to stall, and thus had to sacrifice 2 Pokémon regardless, while there was only 1 turn left and I could have simply protected to keep Scizor safe while sacrificing Raikou only). I still fought to my best odds, and it nearly worked out; I Dragon Pulsed Torkoal to keep it alive while weaking Eruption, just to ensure Rotom would be less likely to Discharge on the following turn (it worked). The next turn was a 50/50 on whether Rotom took the KO on Pelipper or Kingdra, and all I could do was hope it would go for Kingdra, but it didn't... Kingdra really tried its best, critting Rotom with Scald and putting it in range of the next hit, but there was no juice left in the tank... (Kingdra went down to Life Orb as it finished off Rotom).
I expected to eventually lose to this duo, but I'm really kicking myself for that TR miscount; it didn't have to be now...
Here is the team for the final time. The only change is Scizor's EV spread, on which I removed physical bulk to ensure Palmer's banded Dragonite does at least 50% with Thunder Punch, to always get the Sitrus from it and never get 2HKOd. Since that team shows up a lot and Dragonite locks into T-Punch about 80% of the time, this was actually very impactful; depending on rolls, Dragonite was previously able to 2HKO by avoiding the Sitrus activation. Huge bonus from shuffling the EVs, Scizor was now guaranteed to live Milotic's Hydro Pump in rain (which is also important because it shows up on Barry/Palmer), and also Blastoise3's Hydro Pump, which only came into play once.
Now that I've built and tested a bunch of other teams for BDSP Tower, I'm realizing how solid this team was. I would absolutely recommend it to people who are trying to reach the trainer card star. It obviously has some rough matchups, as all teams are bound to have in this tower, but I'm fairly happy with the ways I found to play around them, including Ellis / Irene.
While I encourage anyone playing Tower to be mindful of their plays and to always use DoubleCheck and calc things, here is a link to the document I was using alongside this team to map out the way of approaching the matchups. It can be used as a cheatsheet, but WYSIWYG! (ie. you have to deal with my lingo
). Very long matchup breakdowns are placed as comments rather than just text to have some formatting. The numbers are how many times I faced these trainers.
Jumpman16 : Could you upload a new proof vid (or reupload the same) in higher quality than 240p? With that much pixelization, it's pretty much impossible to make out the text, which beats the point of having the video.
These streaks are approaching the 6-month limit for ongoing streaks without an update.
Past the mentioned date, they will be deemed completed and won't be eligible to be added to.
Reminder that an update doesn't have to mean big streak progress, it can simply be a sign of life to let us know you plan on continuing.
- TheReflexWonder : You had until July 8th to update your latest Shuckle streak. The date is close enough if you'd like to post a follow-up shortly.
- Tersx : You had until July 11th to update your streak. The date is close enough if you'd like to post a follow-up shortly.
- hmsa2012 : You have until July 26th to update your streak.
- GG Unit : You have August 17th to update your streak.
Hey Eisenherz, no problem. I'm not claiming that every match up is a sure win. It's rather I believe, with careful planning, you can have >50% win rate on all match-ups. Most of them are at >95% win rate.
As for the lineup, I found that with this version of Battle Tower, if you want to hard counter hax, you will have to sacrifice win rate in other more frequent match ups. That's why I opted for having just enough tool to deal with hax, and have enough fire power for everything else.
I would say 70% of the matches are just Garchomp smashing, then Raikou anb Suicune cleaning up. The hardest opponents are ice users and fast dragons. Some key changes to deal with them:
- Focus sash over Lum for Garchomp, better match up vs other dragons.
- Double Scald to deal with being frozen.
- Protect to stall vs evasion teams.
As for the notes, I want to share all of them, but the way the extension works, the notes are tied to one serebii URL where they are created. I'm not sure how to extract everything. I'll share some of them as screenshots below. If anyone wants to request the note for a specific match-up, feel free to reach out.
Within each note, I start out by writing down some turn order description and giving a rating over 5 on how hard the match up is (1 is easy, 5 is super hard). After each subsequent rematch (especially after losses), more information is added on different scenarios the match can go, which moves the opponent are more likely use, what could possibly go wrong, etc...
I would love to do a recording. However, I don't have a capture card.
Thanks for answering and elaborating, this does help out and those screenshots you provided are exactly the kind of stuff I was looking for. I'd be interested to see some notes you may have for matchups you rate 5/5, if there are any?
It does make sense you were able to find a >50% win rate on all matchups, but I would argue this generally isn't too helpful in facilities. Even if *all* of them were 95%... how many times have you missed Air Slash in the past? That's the difficulty of facilities, good odds are usually not enough, you get away with it for a while, but not for hundreds of battles. So having even just a couple matchups with (random numbers above 50) a 60% or 70% winrate ends up being fatal before long. With this in mind, your statements about odds kind of work against your team rather than for it, especially when the streak is 200+.
In any case, I've added your streak for now. Since your original post alludes to stopping once PLA releases, do you have any plans on continuing it?
That hasn't happened, and without a loss report for the other streak, I don't think I'd accept a new streak with the same team, for obvious reasons. The goal of that rule is to prevent unfinished streaks from staying open on the leaderboards forever, which had been a common issue. It's applied with some common sense.
Hello! Here I am once again submitting another run right after a leaderboard update, lol. Today, I am submitting a streak of 306 wins in Master Class Doubles. I did forget to screenshot the actual streak number but I do have a video here of the last round I did before I lost. It shows my streak was at 301 but it is a recording of the whole round. Sorry if this causes some problems, and I'm ok with this team not being allowed on the leaderboard because of the lack of a screenshot/video showing my streak number+switch version. Anyway, let's get started!
Bronzong @ Lum Berry
Ability: Heatproof
Level: 50
EVs: 252 HP / 124 Def / 148 SpD
IVs: HT/31/31/31/31/0
Sassy Nature
- Gyro Ball (was Heavy Slam for the first 70 battles)
- Psychic
- Rain Dance
- Trick Room
First off, our setter. The spread is copied from Sincci's team. They ultimately provide more info on the Bronzong spread there but I do have to say it is quite a good set! I originally ran Heavy Slam as I figured it would be slightly better. However, Gyro Ball proved to be better as I had a nasty run-in with Articuno3 where it survived two Heavy Slams after a Granbull Intimidate. I believe that was vs Irene / Darcy. After that round, I switched over to Gyro Ball as Gyro Ball+Heavy Slam has a much better chance to 2HKO that monster. Psychic is used as a second STAB since Bronzong doesn't have any of its usual toys in Gravity, Ally Switch, Body Press, etc. It's pretty great for chip so there's that. Rain Dance is mainly used to shut down Torkoal2 and other strong Fire-types.
Hariyama @ Flame Orb
Ability: Guts
Level: 50
EVs: 252 Atk / 164 Def / 92 SpD
IVs: 31/31/31/xx/31/0
Brave Nature
- Fake Out
- Close Combat
- Knock Off
- Heavy Slam
Old reliable. I missed Hariyama a lot and I'm super happy to see it's slightly better in this Tower compared to the Tree. Anyway, the spread is also taken from Sincci's team. But, this is the same Hariyama I used way back in Tree and I think it's been enjoying its time in Sinnoh! Hariyama provides valuable Fake Out support which helps Bronzong set Trick Room and then it goes to town until it can't go anymore. Close Combat is Hariyama's best Fighting STAB while Knock Off and Heavy Slam are great coverages. Knock Off is also great for removing pesky items like Quick Claw, Bright Powder, Lax Incense... y'know. Flame Orb helps activate its Guts ability so it can slap some stuff around. My original setter was Dusknoir since I wanted Gravity as a result, I did try Stone Edge over Heavy Slam which was ok but Dusknoir proved to be a little too passive for this team so I ultimately went back to Heavy Slam and replace Dusky with the Bronzong above.
Gastrodon @ Life Orb
Ability: Storm Drain
Level: 50
EVs: 244 HP / 252 SpA / 12 SpD
IVs: 31/xx/31/31/31/0
Quiet Nature
-Scald
- Earth Power
- Ice Beam
- Protect
I originally has Relicanth in this slot when my setter was still Dusknoir. Life Orb Head Smashes are really good until they're not. Barry / Palmer's team 3 was causing a lot of problems, mainly Palmer's Milotic. So, I decided to switch out Relicanth for Gastrodon for Storm Drain to make that thing pretty much useless. There's nothing else too special about Gastro. The Life Orb was put on here to give it a little more oomph in its attacks but Gastro is still pretty weak before it gets a Storm Drain boost. I did consider Surf for the final member of the team but decided to go against it since it was rare Gastro was ever out next to the final member.
Cacturne @ Expert Belt
Ability: Water Absorb
Level: 50
EVS: 252 HP / 252 Atk / 4 SpD
IVs: 31/31/31/xx/31/0
Brave Nature
- Seed Bomb
- Assurance
- Low Kick
- Spiky Shield
I really needed some reliable Cresselia killer and something to easily handle dumb stuff like Swampert and Gastrodon. Enter Cacturne. Admittedly, there could be better options to use here but the idea of using a shitmon like Cacturne was too good to pass up. The original Relicanth team was using special Cacturne but this one is a physical variant. Seed Bomb is the best STAB Cacturne has and it does ok damage and Low Kick is the best coverage I can give it. Cacturne also gets Poison Jab which would probably be okay for things like Togekiss but I figured Bronzong's Gyro Ball and Hariyama's Heavy Slam would be good enough. I decided on Assurance for the Dark STAB and let me tell you why. Cacturne sits at 54 Speed which makes it the slowest member in Trick room. Assurance is great for finishing off bulkier stuff when needed and it really comes in handy for Cresselia since the rest of the team has trouble muscling past it usually. Outside of that, Cacturne isn't too strong but it definitely tries its best. Water Absorb is a little useless when I have Storm Drain on the team but I find it to be a little more useful than Sand Veil.
Once again, most of the threats themselves end up being random trainer pairings but I guess the Pokemon on the teams can be considered problematic on their own as well.
Tasha/Darcy - This is mostly aimed at team 2. Drapion has Roar which admittedly, it uses pretty rarely but I still don't like risking it so I decide to use Fake Out on it. My punishment? Pinsir usually goes for Bulk Up which makes it harder to take out on top of it having a Bright Powder. It tends to spam to Bulk Up for a bit so taking it out ASAP is necessary, imo. Drapion likes to set Toxic Spikes and then Roar stuff out but its Payback can also do a decent chunk to Bronzong so watch out for that.
Nadia/Dalvin - This team sucks, lol. You can't Fake Out Crobat or Gengar and you don't really have a safe switch. I tend to sac Hariyama immediately as there doesn't really seem to be a better turn 1 play. Gengar's Bright Powder can be very annoying too AND it has Hypnosis so yeah. Gastrodon is usually tasked with dealing with it but you can miss so watch out for that.
Tiffani/Kenton - You can't Fake Out Lucario because of Inner Focus and it has Dark Pulse! Fun! Luckily, I haven't flinched when trying to set Trick Room in front of it with this team yet but it would for sure suck if I ever did. Lopunny having Charm and Focus Band as well can super annoying.
Ellis/Barrett - This lead is terrible. I've had Porygon-Z dodge so many Close Combats thanks to that stupid Bright Powder. Registeel also has Quick Claw Explosion and Swagger so that's something to watch out for. Gyarados can also be a pain to take out as it boosts up with Dragon Dance. The main thing is to hope you land your attacks and don't get crippled too hard.
Alonso/River - I forget the exact problem with this team but I do know Nidoking can be an issue for Bronzong if left alive. Slowbro usually KOs Hariyama by turn 2 if it used Zen Headbutt turn 1. Losing Hariyama definitely makes this fight a little harder since Slowbro outslows Cacturne in Trick Room and it also has Yawn which can put Gastro and Cacturne to sleep (and Bronzong too after Lum Berry is consumed). Regice is also a pain to KO if both Hariyama and Cacturne are down.
Tavon/Harvey - Haha, these guys suck. Bright Powder+Double Team Scizor, Double Team+Sub+Leech Seed Ludicolo, Sheer Cold Lapras,Guillotine Gliscor. I really don't need to say much here other than hope you can take out the lead fast. The backline is scary too but not too bad since Hariyama handles Lapras really well. Gastro's Ice Beam can fail to OHKO Gliscor thanks to the Yache Berry but Scald makes quick work of it.
Johanna/Blair - Gengar-3 is once again an issue here thanks to Bright Powder+Hypnosis stuff. But this time, it's joined by a Mamoswine so you can actually use Fake Out. Just hope Gengar doesn't put Hariyama to sleep.
Bryon/Kristi -Zapdos likes to spam Double Team here so just hope you can hit it enough times before it finally goes down. It is recommended to KO Froslass with Heavy Slam so Knock Off can't get disabled. However, Froslass usually likes to resist switch-in if you Fake Out Starmie so there's also that. Mind games!
Chester/Tiffani - Zapdos really likes to hit Bronzong with U-turn a lot and with the King's Rock potentially flinching Bronzong, that can be a problem. It's best to Fake Out Rapidash here though since that thing has Horn Drill, and I'd much rather risk the U-turn flinch then getting OHKO'd by Horn Drill. Magnezone's Bright Powder can also make things a little difficult if you can't land an attack.
Aldo/Kailey - Another lead with Hypnosis that you can't Fake Out. Just hope Drifblim doesn't land a Hypnosis on Hariyama and you should be fine.
Anissa/Kegan - Hello Walrein, my old friend. Haxrein is a pain in the ass especially since it needs to be Faked Out here, which can miss thanks to Bright Powder. On top of that, Steelix is slower than Hariyama so it can attack before Hariyama in Trick Room and it does like to randomly Fire Fang Hariyama sometimes. Watch out for that flinch!
Kailey/Jaclyn - More OHKO shenanigans. This time, it's Whiscash. Now, this set very rarely goes for Fissure and usually opts for Amnesia or Spark but the threat of Fissure alone makes this thing a good Fake Out target t1. But of course, King's Rock Zapdos returns and you have to gamble with it potentially flinching Bronzong with U-turn or hitting Hariyama with Drill Peck. Your call.
So, the loss ended up being a pretty silly one. This was probably the 5th attempt with Cacturne (2nd with this specific team) and I was also playing with very little sleep which is not recommended! Anyway, here's the video. It was vs Lionel / Abbey, definitely a problem pair.
Battle 307 vs Lionel / Abbey
Bellossom-2 / Tokroal-2 / Lapras-3 / Cresselia-6 Turn 1 - Went for Fake Out into Torkoal while Bellossom went for After You. Trick Room goes up after Torkoal flinches. Turn 2 - Bronzong gets rid of the Sun with Rain Dance. Torkoal uses Eruption, does pitiful damage. Hariyama hits Bellossom with Knock Off into Bellossom. I really should have used Heavy Slam here but I tunneled on Knock Off. I made this same mistake earlier in the streak but I managed to get a very narrow victory which was great but I should have realized Heavy Slam was better here. Anyway, Bellossom then CRITS Moonblast on Hariayama which really sucked! That KOs and I'm down Hariyama which was NOT expected. Turn 3 - Gastrodon sent in. I decided to weaken the Torkoal with Psychic here but a switch to Cacturne would have been much better. Gastro's Ice Beam KOs Bellossom. Torkoal charged up a Solar Beam so that had to go down next turn. Turn 4 - I was really hoping for Rhyperior to come out here which would have made my life easier but nope, they ended up having Lapras in the back. Anyway, guess who forgot Lapras had Freeze-Dry! Yep, I switched Gastro out to Cacturne to take the Solar Beam from Torkoal, andI was hoping Lapras would go for Hydro Pump or Sheer Cold, but it hit my poor cactus with Freeze-Dry along with Torkoal's Solar Beam going into that slot as well. Cacturne goes down. Turn 5 - Anyway, Gastrodon comes back in but it's already over unfortunately. I don't have enough damage to KO Lapras now, but I still try to salvage! Gastro uses Protect and Bronzong's Psychic finally takes out Torkoal. Turn 6 - Cresselia coms in as Trick Room expires. I try to Protect Gastro again but it fails and Gastro goes down to Psychic+Freeze-Dry. Trick Room goes back up. Final Turns - At this point, it's pretty much over as Bronzong has nowhere near enough damage to take on both Cress and Lapras and then I lose.
This battle definitely could have been salvaged but poor play ended up costing me. I think the crit Moonblast taking out Hariyama really threw me off but also going for Knock off instead of Heavy Slam or even CC was just plain stupid.
There's some other notable battles contained in this playlist but let's go over some of the other ones that were done off camera.
Battle 62 vs Carlo / Alonso
Articuno-4 / Magnezone-2 / Glalie-2 / Latias-2
Turn 1 - Fake Out Articuno, Magnezone hits Hariyama with Thunderbolt and paralyzes. Articuno flinches, Bronzong sets Trick Room. Turn 2 - Articuno goes down to Hariyama's Heavy Slam. No full para was nice here. Bronzong then breaks Magnezone's Sturdy with Psychic. Magnezone then hits Hariyama again with Thunderbolt. Turn 3 - Glalie comes in. Bronzong switches out to Gastrodon, Hariyama KOs Glalie with Close Combat. Magnezone then finishes off Hariyama with Volt Switch. Latias comes in. Turn 4 -Cacturne sent in. Ice Beam+Assurance KO Latias. Turn 5 - Magnezone comes back in and it dies to Gastro's Earth Power.
Turn 1 - Fake Out Rapidash but Zapdos crits Hariyama with Drill Peck, leaving it with 7 HP. Trick Room then goes up. Turn 2 - Switch Bronzong to Gastrodon. Hariyama KOs Rapidash with Knock Off and Zapdos finishes off Hari with another Drill Peck. Turn 3 - Magnezone sent in while I send Bronzong back in. Bronzong misses Psychic on Magnezone, but Gastro lands Earth Power on Magnezone which brings it down to Sturdy. Zapdo then hits Bronzong with U-turn, which brings in Skuntank. Turn 4 - Bronzong KOs Magnezone with Psychic, Gastro KOs Skuntank with Earth Power. Turn 5 - Zapdos comes back in, goes down to Psychic+Ice Beam.
Turn 1 - Fake Out Charizard. Kingdra hits Hariyama with Hurricane which also confuses poor Hari. Trick Room up. Turn 2 - Switch Bronzong to Gastrodon, Hariyama hits itself. Kingdra KOs Hari with Hurricane. Charizard uses Dragon Dance. Turn 3 - Bronzong sent back in, hits Psychic on Kingdra. Gastro KOs Zard with Scald. Kingdra tries to use Hydro Pump but Storm Drain catches it. Thanks Kingdra. Turn 4 - Nidoking comes in. Bronzong hits Kingdra with Psychic again. Gastro KOs Nidoking with Earth Power. Kingdra uses Rain Dance. Turn 5 - Kingdra finally goes down to another Psychic. Gastrodon does nothing. Turn 6 - Trick Room expires, and Regice comes in. Regice uses Protect which causes Gastrodon to whiff its Scald. Trick Room back up. Turn 7 - Psychic+Scaldto Regice. Regice misses Focus Blast on Bronzong. Turn 8 - Regice goes down to Psychic+Scald.
Turn 1 - Fake Out Electrode. Dewgong then freezes Hariyama with Ice Beam. Trick Room goes up. Turn 2 - Switch Bronzong to Gastrodon, Hariyama stays frozen. Dewgong hits Hariyama with another Ice Beam. Electrode whiffs Thunder Wave on Gastrodon. Turn 3 - Gastro's Earth Power KOs Electrode through the Shuca Berry after Fake Out chip. Hariyama remains frozen while Dewgong uses Ice Beam on Gastrodon this time. Turn 4 - Ambipom comes in and Fakes Out Gastrodon. Hariyama is STILL frozen. Dewgong lands another Ice Beam on Gastro. Turn 5 - Gastro uses Earth Power on Ambipom but Hariyama FINALLY thaws and KOs Ambipom with Close Combat. Dewgong finishes off Gastro with Ice Beam. Turn 6 - Trick Room expires, Bronzong back in. Dewgong lands another Ice Beam on Hariyama but Hariyama barely hangs on and then KOs Dewgong with Close Combat. Trick Room back up. Turn 7 - Slowbro comes in. Hariyama Knocks Off Bro's Quick Claw. Slowbro then KOs Hariyama with Psychic. Bronzong resets Trick Room. Turn 8 - Cacturne comes in and KOs Slowbro with Seed Bomb.
The loss definitely burned me out on this team but I'll probably try it again at some point because it was rather fun to play. But I am currently running something else that does feature a really cool Pokemon so I do want to finish that up first.
Jumpman16 : Could you upload a new proof vid (or reupload the same) in higher quality than 240p? With that much pixelization, it's pretty much impossible to make out the text, which beats the point of having the video.
These streaks are approaching the 6-month limit for ongoing streaks without an update.
Past the mentioned date, they will be deemed completed and won't be eligible to be added to.
Reminder that an update doesn't have to mean big streak progress, it can simply be a sign of life to let us know you plan on continuing.
- TheReflexWonder : You had until July 8th to update your latest Shuckle streak. The date is close enough if you'd like to post a follow-up shortly.
- Tersx : You had until July 11th to update your streak. The date is close enough if you'd like to post a follow-up shortly.
- hmsa2012 : You have until July 26th to update your streak.
- GG Unit : You have August 17th to update your streak.
Thanks for answering and elaborating, this does help out and those screenshots you provided are exactly the kind of stuff I was looking for. I'd be interested to see some notes you may have for matchups you rate 5/5, if there are any?
It does make sense you were able to find a >50% win rate on all matchups, but I would argue this generally isn't too helpful in facilities. Even if *all* of them were 95%... how many times have you missed Air Slash in the past? That's the difficulty of facilities, good odds are usually not enough, you get away with it for a while, but not for hundreds of battles. So having even just a couple matchups with (random numbers above 50) a 60% or 70% winrate ends up being fatal before long. With this in mind, your statements about odds kind of work against your team rather than for it, especially when the streak is 200+.
In any case, I've added your streak for now. Since your original post alludes to stopping once PLA releases, do you have any plans on continuing it?
Still on 203. Haven't played any since then. I suppose I should plug here that if anyone has an Entei with a low Attack IV they could trade me (I obviously have plenty of BP to make it worth one's while) that would greatly expedite my getting back to playing. Just kind of a measure twice, cut once thing in combination with wanting to take a little bit of a break after how long it took to do the 6th gen record and how long it took to grind to 200 here. I knew Jumpman16 would almost certainly have something to entertain the people with in the meantime!
It's late, before we know it Professor Gigachad and his prehistoric-age female counterpart will be upon us with their impeccable style and jawlines, but for now - I can finally present an ongoing Master Class Doubles streak of 203 with this eclectic bunch:
Conception
To summarise - after taking one look at the nauseating concentration of evasion-boosting items/moves, the discovery of all teams being fully preset, and the independently controlled Doubles pairings, the idea for a fully accurate 2-turn Sheer Cold setup was born. Still, despite being the main function I'd selected Articuno for, there were two blank moveslots. With an otherwise middling attacking presence, Freeze-Dry made a lot of sense as a damage source when Sheer Cold would not, or could not be clicked. Tailwind would round off the set to boost Articuno against specific threats, and to pave the way for a decidedly more offensive backline. I definitely wanted a supporting Fake Out lead, and it didn't take much pondering to recognise Sableye would be a prime fit (likely escalated further by the restrictive Gen 1-4 availability). A secondary, focused means of speed control, and two, sometimes combined methods for limiting the AI's move choices; all Prankster-augmented to allow Articuno necessary breathing room... and the team in general.
I should note that Encore/Disable was the original crippling plan for Sableye, under the assumption that moves not native BDSP would pass border control once HOME compatibility was made available. Since late last year waiting for my USUM & SwSh-born brethren to make the trip into HD chibi land (and the fact BDSP Articuno was forced Snow Cloak), I was gradually expanding a notepad of how to approach each max rank pair, among the three Barry/Palmer variants closing out each round. Suffice to say, I'm thankful I didn't over-commit to action planning before the fateful news arrived some months later, as many strategies would have to be completely retooled in Encore's absence. Just know that while I've managed to make do, Taunt/Disable's ultimately the lesser duo in this particular context, and as a result, this isn't the 'best' version of the team I'd initially envisioned.
Aside from a type weakness, faster threat etc. standpoint, Articuno's usefulness dwindles against targets that are Sheer Cold-immune, and/or can't KO in a timely fashion with Freeze-Dry. Similarly, Sableye inflicts zero damage after the first turn (unless you count the Struggle condition), and it's not always in its best interest to cripple something afterwards. Both of these shortcomings placed a great emphasis on safe switches, so the backline would need to facilitate effective, repeatable board state repositioning. I decided pretty quickly that Steel and Ground would be favourable to cover all of the frontline's weaknesses between them. The Steel candidate was originally an Expert Belt Heatran, which was appreciated for a time given the Fire immunity and 4x resistance to Ice-types Articuno couldn't pressure much...but this iteration ironically succumbed to opposing Sheer Cold in the form of Walrein, and Double Teaming Mamoswine2, more than once each. While caution must still be exercised regarding the latter, the switch to a rather specialised Sturdy Magnezone proved to alleviate several vulnerabilities Heatran brought to the team, despite not being as powerful a Tailwind recipient/overlapping with Freeze-Dry more.
Garchomp to round out the Ground coverage was something I locked in early and didn't deviate from, being a solid attacker that can still make plenty of inroads without Tailwind, with commendable natural bulk to boot. And as the primary Fire answer with Heatran left by the wayside, Dragon is also a defensive blessing. A HP-invested Sub, SD variant was briefly considered, but after reviewing numerous matchups, I soon concluded that Life Orb max offence was basically non-negotiable.
These factors culminate in the end product here, but how would I describe it? It's a team that can feel rewarding when the AI hands you two Sheer Cold-able targets on a platter, or a Walrein helpless against Magnezone after forcing a 2v1 field. Other times it can feel like an aggravating, slow burn to victory when Articuno's usefulness is reduced to getting a Quash-Tailwind off before getting sacced, or when Sableye's better off fainting after Fake Outing a Dark-type but isn't given that luxury, effectively creating an early 1v2 deficit. In short, I wouldn't say it's a friendly team in troubling circumstances; the nature of some of the AI sets certainly don't help, but when the frontline is unable to make much of an opening impact, every pivot, every subsequent Protect, every crippling choice on a given turn matters, as does tracking Tailwind turns, or ensuring I've dealt with what needs to dealt with before Taunt wears off etc. No shortage of things to manage turn-by-turn, and still here I am praising BDSP's Tower for its fixed roster and AI Multis mechanics - without those, I don't think this kind of team would see the light of day with any degree of longterm success. Yeah 200 wins, whoop de doo; I've been at this long enough, I'm chalking up an undisputed success here.
Speedy arctic bird with enough punch behind Freeze-Dry to OHKO Barry's Torterra, Gastrodon345, Floatzel etc. Didn't see much additional mileage in going beyond that. Articuno possess enough bulk to withstand some T1 super-effective hits when necessary, such as special Entei, non-Specs Raikou, Zapdos to name a couple. The best choice for a STAB attack by far, as not all bulky Waters are ripe for Sheer Colding, and are instead chunked for Magnezone, Garchomp or Articuno itself to finish off later.
Mind Reader has the crucial effect of not being able to miss, nor are Ghost-types immune to its tagging. This means that only Sableye needs to land Fake Out on the evasive targets when strategies call for it, which is unfortunately an unavoidable cause for consternation if said target avoids it.
Sableye @ Sitrus Berry
Ability: Prankster
Nature: Relaxed
Shiny: Yes
EVs: 252 HP / 100 Def / 156 SpD
- Fake Out
- Quash
- Taunt
- Disable
A Fake Out lead next to a Tailwind lead running full bulk and no speed? That's a rare sight! No better option for Foul Play-less Sableye by virtue of its toolkit and ability, and without any opposing Fake Out leads to get the jump over. The defensive split was chosen to survive Eneti5's Banded Sacred Fire and to dump the remaining EVs in SpD, but I sorta forgot that Entei doesn't exist as a lead, so that scenario of Sableye being on the field at full HP against that Entei hasn't occurred once...oh well. I still feel like this is a fine benchmark, and with Sableye entering Sitrus range reliably enough, I haven't felt the need to alter the spread.
Quash is pretty awesome because on top of affecting any non-Dark target regardless of speed (looking at you Garchomp + TW Suicune, Agility Articuno, or Rock Polish Regice), it postpones the chosen move regardless of priority bracket, which means Quick Claw procs get nullified! A few of my Fake Out + Mind Reader into Quash + Sheer Cold strategies centre around this crucial function, with Granbull and Muk being notable offenders.
Taunt's application has been weaved into several matchups on a turn-by-turn basis and varies greatly between targets, from status spammers, slow boosters, or recovery users trying to avoid an impending KO. Sometimes combo'd with Disable to really restrict options available to the AI. However, I maintain that Encore would've simplified the majority of troubling pairs even further. Disable itself is imperative for my win condition against Barry/Palmer's Heracross/Dragonite, and eases numerous other encounters I'm too lazy to currently dig up out of my gargantuan cheat sheet.
Flash Cannon with the SpA investment is enough to OHKO non-Solid Rock Rhyperior4, but I think I speak for everyone when I say we don't care - we're only interested in the next two moves.
Shock Wave feeds into the "if evasive X isn't being Sheer Colded, I wanna hit X with something else on a given turn" premise. Conveniently around the time I decided to shelve Heatran, and certainly influenced by Japanese player Ryo's impressive foray + JustinTR 's subsequent piloting of a team featuring Shock Wave Magnezone. Additionally, due to this team's propensity for switching and general priority in establishing a 2v1 field, the lack of a more offensive held item and less than usual SpA in exchange for Leftovers and some HP investment intend to facilitate this. Would max SpA Thunderbolt be nice? Admittedly I never tested it thoroughly in-game or put it through a mass calc, I'm sure it would be, but I always remind myself - there's simply some sets in here a Magnezone couldn't handily beat without Shock Wave. Moltres4, Articuno3, Glalie2, Scizor2 (this one's a lead which I aim to land FO + Mind Reader on but still) etc...and what's the common denominator? You guessed it, Double Team with no solid means of harming Magnezone, but what's the use if I can't land attacks on them in return!
Magnet Rise is used sparingly (22 hits on a command+f notepad search, which relatively speaking is not a lot), but has rightfully earned its spot as an indispensable utility move. Whether it's magnetising independently or doing so with Quash's aid to circumvent a faster threat, various matchups are engineered to succeed with Magnezone's extended stay on the field against foes that would otherwise proc Sturdy immediately. It also goes without saying that depending on the target(s), Magnet Rise pairs nicely with Garchomp in the select encounters where Magnezone's not in a position to Protect on an incoming Earthquake.
As close as you can get to 'standard', but with a little spice in the form of Aerial Ace. I didn't look back for coverage after ensuring a no-fuss method of KO'ing non-Coba Heracross, Brelooms and Pinsir2, not to mention getting guaranteed chip on other miscellaneous targets.
I have a charming habit of not documenting my EV spreads properly, but calcs fresh in mind for the self-explanatory STABs include:
Garchomp (100% with Sash broken after FO)
Entei45 (87.5%)
Entei 3 (98.5% min after Freeze-Dry chip)
Heatran3 (98.7% min after FO chip)
Not much else to say, saw little reason to deviate from max Atk/Spe.
Battle Vid-I mean, recordings :copium: Sheer Cold secures the 200!
Here's a playlist of me starting from 57 and eventually progressing to 203, in full dead time unedited glory. Watch at your own peril! I've suffered enough losses along the way to where I can't be arsed detailing specific threats and my methods for dealing with them at this stage (of which there are many), but you can probably get a general idea with the content on offer.
Hello! I just got an ongoing streak of 105 in the Master Class Doubles with a very standard DisQuake team. The team is pretty fun and straightforward to use as it doesn't requires setup.
My lead along with Garchomp. Zapdos + Garchomp single-handedly destroy like half of the teams you encounter in the Battle Tower. There are also many other battles where, after Zapdos and/or Garchomp go down, Gardevoir comes in to clean stuff up.
Discharge and Thunderbolt are musts. Discharge and Static para chance put RNG in my favor and they work wonders together with Garchomp's Rock Slide. Thunderbolt provides a way to get rid of bulky Water-types (or at least hitting them harder than with Discharge) with OHKO moves like Dewgong, Lapras and Walrein. Volt Switch comes in handy against slower physical attackers because I can hit one of them on the first turn then switch Hitmontop in to Intimidate them both. Hyper Beam is just there as a last resort nuke to OHKO or hit troublesome mons hard.
Pretty standard Garchomp set. Dragon Claw and Earthquake don't need any explanation. Rock Slide could be replaced by Iron Head but I prefer Rock Slide since it allows me to comfortably deal with Charizard and Moltres, otherwise I'd be out of options if Zapdos goes down. Protect is extremely useful because mons with moves like Ice Beam, Ice Punch or Avalanche like to target Garchomp, so that leaves Zapdos free to attack, or it also lets me switch Gardevoir/Hitmontop in safer.
Yup, Gardevoir without Psychic. Garchomp can hit most Fire- and Poison-types super effectively anyways, and poor Gengar lost Levitate, so I opted for coverage instead. Just like Discharge and Thunderbolt on Zapdos, Dazzling Gleam and Moonblast allow Gardevoir to hit one or both opponents depending on the situation. Energy Ball is there to deal with pesky Water/Ground-types and mons like Donphan, Hippowdon and Rhyperior who usually carry Rock- and Ice-type moves, which are a threat to both Zapdos and Garchomp. I don't use Focus Blast as often but it can help against threats like Abomasnow and also prevents Gardevoir from being walled by Fire- and Steel-types.
Telepathy is such a nice ability for this team and allows me to switch in Gardevoir safely while spamming Discharge/Earthquake to keep offensive momentum.
Hitmontop (M) @ Lum Berry
Ability: Intimidate
Level: 50
EVs: 236 HP / 36 Atk / 60 Def / 84 SpD / 92 Spe
Adamant Nature
- Close Combat
- Fake Out
- Helping Hand
- Wide Guard
The glue of this team. Hitmontop tanks a lot and also spams Intimidate. Fake Out and Helping Hand are great for a hyper offensive team as this one. Wide Guard doesn't just protects the team against moves like Blizzard, Rock Slide or Eruption, it also protects Hitmontop from my own Discharge and Earthquake, which can be very helpful sometimes. Close Combat for STAB and prevents Hitmontop from being a total deadweight in a 1v1 situation.
Lum Berry is there to stop status like freeze (especially after switching Hitmontop in against Abomasnow to use Wide Guard to protect from Blizzard on the next turn), and it also cures paralysis from Zapdos' Discharge if I don't use Wide Guard.
Note: the Pokémon used weren't specifically EV'd for the Battle Tower but for the BDSP Battle Festival Doubles format.
Final Thoughts
This team is by no means perfect. Rock Slide, Hyper Beam and Focus Blast are unreliable. The Ellis and Irene/Lionel and Abbey duos are hard to beat. I have game plans against both but a single crit or a wrong read could ruin my strategy. Anyways, I really liked the team and it can breeze through the Battle Tower with ease thanks to spread attacks, flinches and paralysis.
I'll try to get a 200 streak!
What is it about the Ellis/Irene duo that makes them so hard for literally everybody? I just had a streak end against them with my Dusknoir/Aron team. Eisenherz lost to them too. I swear, they somehow have the perfect counter-gimmick for such a wide variety of teams, from weather sweep teams to Trick Room teams. They suck.
Hello! I've returned with a new team and a new streak! Today, I'm reporting a streak of 238 in Master Class Doubles. It's a classic Endeavor bait team with a pretty cool Endeavor bait mon! Introducing.... Donphan and Friends!
First off, our setter. Everyone who has done Endeavor bait in this Tower has used Dusknoir so I followed in their footsteps and decided on the same setter. I really wish I could use Dusclops though because Dusknoir SUCKS. I hate its Speed tier and it doesn't really feel that bulky a lot of the time. The ability to hold a Lum Berry is a nice plus at least. It's still a pretty okay setter, the only time I don't really get to set is if Kangaskhan2 decides to randomly target it with Fake Out, get flinched by random Rock Slides, Dark Pulses, etc, Taunt, and straight up death by OHKO move. You may notice the absurd amount of physical bulk I gave this Dusknoir. Originally, I used 252 HP / 120 Def / 136 SpD. One of my losses with this team was to Barry/Palmer's Team 2. Every time I fought them, Heracross' Earthquake and Dragonite's Outrage always left Dusknoir with 1-9 HP. I knew it was a roll and one day I would eventually get 2HKO'd by these two monsters. And then, it happened. That loss was heartbreaking, but after talking it over in the Facilities Discord, Eisenherz informed me I could run 252 HP / 228 Def / 28 SpD to guarantee the survival, not including crits, of course. So I ended up going with this. It does make some strong special attackers a little scarier, but I felt this change was worth it. I should also note DaWoblefet provided this spread as well in his post. Anyway, the moves are pretty standard except I decided on Rain Dance over Gravity. I felt since I has using all 100% accurate moves+No Guard on Machamp, I didn't really need Gravity. This was also pointed out to me by Eisenherz. Before we found out transfer moves were dead in BDSP, I had a Dusclops, ready to be evolved, with Seismic Toss for this very team. But of course, that dream is dead. Maybe sometime in the future...? Brick Break is fine anyway, I just wanted to be ~different~. Finally, Pressure is used over Frisk as every team in BDSP's Tower is pre-determined with set abilities and items so Frisk isn't needed if you're using a lookup sheet, which I ended up using Level 51's DoubleCheck.
You are most definitely not seeing things. That is a Level 1 Donphan. This thing comes all the way from Pokemon GO and is ready to take some names and drink her favourite juice. Donphan is a cool Endeavor bait mon. I quite like it because it has priority Ice Shard to pick off 1HP opponents. Endeavor sets up the KOs for the other Pokemon on the team, however, it can't hit Ghosts so it's kinda useless vs those. Charm is just filler and was probably clicked about 4 or 5 times. Donphan has a great Electric immunity, which means it can't be hit by Thunder Wave or other Electric attacks, one small advantage it has over the other available bait mons. It's not immune to Paralysis though as Body Slam can still get it. It's also able to be Poisoned which is not nice, but not a huge deal. To be honest, I believe Donphan can just run Endeavor / Ice Shard / Protect and be just fine. My Donphan has an HP IV higher than 20 which puts it at 13 HP, which doesn't really make a huge difference. It does cause some Berry holders to end up with slightly more HP if brought down to 13 via Endeavor. Donphan also attracts a lot more Ice Beams and Blizzards, from what I've noticed. Probably because it's weak to Ice. It makes dealing with freeze stuff annoying, especially if you actually do get frozen! Lack of Fake Out also makes Donphan useless on Turn 1 vs OHKO move users.
Machamp @ Life Orb
Ability: No Guard
Level: 50
EVs: 252 HP / 252 Atk / 4 SpD
IVs: 31/31/31/xx/31/0
Brave Nature
- Dynamic Punch
- Knock Off
- Stone Edge
- Protect
Our first backup sweeper is Machamp. Machamp's awesome. No Guard allows me to run Dynamic Punch and Stone Edge so I don't have to worry about those missing. Also great vs Double Team/Bright Powder/Lax Incense stuff. The downside is that Machamp can't dodge any attacks, which means if it's targeted by an OHKO attack or something like Hurricane, it's getting hit. Now, this isn't so bad since with the Life Orb, Machamp can handle a decent chunk of the Tower roster. Dynamic Punch is the preferred STAB, although I did consider Close Combat specifically because of these calcs:
252+ Atk Life Orb Machamp Dynamic Punch vs. 252 HP / 252+ Def Walrein: 190-226 (87.5 - 104.1%) -- 25% chance to OHKO
252+ Atk Life Orb Machamp Close Combat vs. 252 HP / 252+ Def Walrein: 226-268 (104.1 - 123.5%) -- guaranteed OHKO
The Defense drops didn't really seem worth it so I stuck with Dynamic Punch. I told myself if I ever get screwed by this Walrein, then I'll switch to Close Combat. I got screwed by it once, but it wasn't really Machamp's fault. Knock Off is great for getting rid of problematic items such as Focus Band, Quick Claw, Bright Powder, and Lax Incense. Finally, Stone Edge is the coverage of choice. I did consider Rock Slide for a little bit, but the spread penalty alone turned me off immediately on it. Machamp doesn't really enjoy taking super effective hits too much, and it really can't take much punishment thanks to the Life Orb but it works out pretty dang well, and it's very good on a Gravity-less Endeavor team.
Octillery @ Mystic Water
Ability: Sniper
Level: 50
EVs: 252 HP / 252 SpA / 4 SpD
IVs: HT/xx/HT/HT/HT/4
Gentle Nature (minted to Quiet)
- Water Spout
- Energy Ball
- Ice Beam
- Protect
And the very reason Dusknoir has Rain Dance in the first place! Octillery is pretty great. Rain and Mystic Water-boosted Water Spout packs a huge punch and can do considerable damage to anything taking the neutral hit. Things weak to it? Dead. Octillery doesn't like being chipped down as a result, so it's only really sent in when it can safely blast off its Water Spouts. It doesn't really use its coverage but of course, they are there for some stuff. Gastrodon is very annoying and needs to be hit with Energy Ball if I can't Endeavor+Night Shade it for whatever reason. Ice Beam is also good for dealing with stuff like Dragonite, Salamence, Garchomp, etc as well if Endeavor+Night Shade is not possible. The 4 Speed IVs are there so Octillery doesn't speed-tie with Dusknoir. It ends up at 46 Speed so I can do Rain Dance+Water Spout combos in Trick Room whenever needed. Finally, Sniper is the ability of choice as Octillery's other abilities aren't too good for this team. Not to say Sniper is bad, as it definitely isn't. Increased crit damage is always welcome!
Like with every team out there, there are very dangerous threats that can ruin your day. Here's some of the important ones for this team:
OHKO Users: Dewgong3 and Walrein2 specifically as they only know OHKO moves. Like Aron, Donphan provides 0 Protection from OHKO moves for Dusknoir, so it's usually a gamble vs OHKO users. The only thing you can do is pray. Of course, it's not always an auto-loss. Haylee/Antony are very beatable without Trick Room if Dewgong and Porygon-Z cooperate after Dewgong lands a Sheer Cold on Dusknoir.
Priority: Using a Level 1 Pokemon in the lead causes a lot of Pokemon with Priority moves to click them very unpredictably. They will select these moves pretty often but other times, they won't. This can really mess with your bait though and cause it go down earlier than expected if you're not careful.
Roar: This one's not so bad and not super common. One of my early losses was because Articuno4 randomly Roar'd Dusknoir before it could set Trick Room. It's incredibly unpredictable and you must prepare for when it does happen. Manectric2 and Donphan2 also carry it.
Mold Breaker: Only Pinsir2 and the Rampardos' carry this ability but it completely ignores your Sturdy and Donphan will die to these guys. The Pinsir in question carries a Bright Powder so missing it usually means death for the poor elephant.
Ghosts: Not are they immune to your Endeavor, but they can also usually hit Dusknoir super effectively. Some of them are scary, others not. Most are dealt with once Donphan is down and Machamp or Octillery can clean them up.
Ellis/Irene: These two, ugh. Because of this duo, I ended up using a completely different turn 1 which entirely relies on me not getting frozen by Blizzard or flinched by Rock Slide, if Bronzong decides to use that. I had a lot of trouble coming up with a way to deal with these two consistently. I eventually figured out the matchup and it's pretty easy. It basically starts off with removing Abomasnow's Hail with Rain Dance and setting Trick Room the next turn so Donphan has a little longer to survive. This is still dangerous as Bronzong can just decide to use Rock Slide and flinch you.
Toxicroak2: This guy knows Taunt and will use it if wants to. It's pretty random though and most of the time, it will try to Sucker Punch one of your leads while you Protect+Trick Room. Absol2 also carries Taunt but it doesn't ever lead so it's not a problem.
Umbreon2/Vileplume2: These two fuckers know Attract and are always Male. Both my Donphan and Dusknoir are female so they can both be targeted if the AI chooses to click this move. Now, I've only ever seen Vileplume try Attract, and it was always into Donphan as it Protected itself so it really didn't matter. I'd use a male Dusknoir instead but of course, Froslass2 also has Attract and that one's always female. Oh well, can't win them all.
Flinching: A minor problem, but can still be bad. As mentioned above, only Kangaskhan2 can target Dusknoir with Fake Out but that's pretty rare. Rock Slide, Dark Pulse, Bite, King's Rock, etc all exist in this Tower just to make me sad. The worst if when you're flinched by a move that normally wouldn't flinch you thanks to King's Rock. Pay attention to when this happens!
Bright Powder/Lax Incense/Double Team: The Evasion brigade can be a huge annoyance if you can't land an attack. Without Gravity, you always have to pray you land your attacks especially if something stacks multiple Double Teams or if Bright Powder/Lax Incense trigger multiple times.
Quick Claw: Not much to say about this one. Obviously, if the AI goes before you while you're using a Trick Room team, it can be bad.
Focus Band: This item can be such a pain in the ass. I've seen it proc multiple times in one battle, it sucks. Thankfully, it's only a 10% chance so it won't happen too often.
Battle 239 vs Margot/Christa
Salamence2 / Moltres3 / Nidoqueen2 / Heracross2
t1: Protect Donphan. Salamence crits Dusknoir with Outrage. Moltres then KOs Dusknoir with Overheat.
t2: Send out Machamp. Salamence hits Machamp with Outrage, gets Confused. Moltres hits Donphan with U-Turn and switches to Heracross. Machamp hits Heracross with Stone Edge. Donphan hits Salamence with Endeavor.
t3: Protect Donphan. Salamence KOs Machamp with Outrage. Heracross whiffs Close Combat.
t4: Octillery sent out. Donphan fails to Protect again. Salamence hits self in confusion and dies. Heracross hits Octillery with Close Combat. Water Spout fails to KO Heracross as a result.
t5: Nidoqueen comes out. Protect Octillery. Heracross whiffs another Close Combat as Nidoqueen hits Donphan with blizzard. Donphan Endeavors Nidoqueen down.
t6: Octillery Protects again. Heracross KOs Donphan with Close Combat.
t7:Heracross KOs Octillery with another Close Combat.
Here are some close calls/interesting fights I had on this run. Once again, I didn't record this run so I'll leave the writeups from my notes.
Battle 15 vs Kegan/Noelle
Staraptor2 / Togekiss2 / Raikou3 / Mismagius3
t1: Protect Donphan, staraptor whiffs Brave Bird. Togekiss flinches Dusknoir with Air Slash.
t2: Staraptor hits Donphan with Brave Bird, Berry Juice burned. Togekiss uses Double Team. Donphan lands Endeavor on Togekiss. Trick Room up.
t3: Togekiss switches out to Mismagius. Endeavor Staraptor. Night Shade to Mismagius. Staraptor hits Dusknoir with Brave Bird.
t4: Switch Donphan to Machamp. Dusknoir KOs Staraptor with Brave Bird. Mismagius hits Dusknoir with Payback.
t5: Raikou comes in. Night Shade Raikou, Knock Off KOs Mismagius. Raikou Paralyzes Machamp with Thunderbolt.
t6: Togekiss comes in. KO raikou with Dynamic Punch, KO Togekiss with Night Shade.
------------------------------------------------------------------------------------------------------------------
Battle 50 vs Titus/Ryne
Heatran5 / Zapdos4 / Rapidash3 / Gallade2
t1: Protect Donphan, Zapdos whiffs Drill Peck. Heatran hits Dusknoir with Dark Pulse, Dusknoir flinches.
t2: Zapdos hits Donphan with Drill Peck, Berry Juice heals Donphan. Heatran hits Dusknoir again with Dark Pulse. Dusknoir lives with 6HP. Donphan hits Heatran with Endeavor. Dusknoir sets Trick Room.
t3: Donphan hits Zapdos with Endeavor. Dusknoir misses Heatran. Heatran KOs Dusknoir with Dark Pulse. Zapdos uses Rain Dance.
t4: Octillery sent out. Protect Donphan. Octillery KOs both Zapdos and Heatran with Water Spout.
t5: Rapidash and Gallade both come in. Gallade hits Donphan with Shadow Sneak. Donphan hits Gallade with Endeavor. Octillery KOs both with Water Spout.
------------------------------------------------------------------------------------------------------------------
Battle 58 vs Ellis/Irene
Abomasnow4 / Bronzong3 / Torkoal2 / Rotom-Wash2
t1: Protect Donphan. Abomasnow hits Dusknoir with Blizzard. Bronzong hits Dusknoir with Rock Slide. Dusknoir flinches.
t2: Protect again with Donphan. Abomasnow+Bronzong hit Dusknoir with Blizzard+Rock Slide. Dusknoir survives with 6HP and sets Trick Room.
t3: Dusknoir dies to Hail. Machamp sent out. Donphan hits Abomasnow with Endeavor. Bronzong KOs Donphan with Body Press. Machamp KOs Bronzong with Knock Off. Abomasnow hits Machamp with Blizzard, deal just over 50%.
t4: Rotom-Wash comes out, Octillery sent in, Abomasnow Protects. Water Spout+Dynamic Punch KOs Rotom.
t5: Water Spout KOs Abomasnow.
t6: Hail expires but Torkoal comes out with Sun. Double Protect Octillery and Machamp. Torkoal whiffs Eruption.
t7: Trick Room Expires. Stone Edge+Water Spout KOs Torkoal.
------------------------------------------------------------------------------------------------------------------
Battle 106 vs Christa/Gunner
Electrode2 / Dewgong2 / Ambipom3 / Slowbro3
t1: Protect Donphan. Electrode and Dewgong whiff Hyper Beam and Ice Beam. Trick Room goes up.
t2: Endeavor+Night Shade KOs Electrode. Dewgong uses Disable on Donphan, disabling Endeavor.
t3: Ambipom sent out. Double Switch Dusknoir and Donphan to Octillery and Machamp. Ambipom and Dewgong hit Machamp with Fake Out+Ice Beam. Machamp not frozen.
t4: Water Spout KOs Ambipom, does some chip to Dewgong. Dewgong dies to Dynamic Punch.
t5: Slowbro sent out. Protect Machamp. Octillery hits Slowbro with Energy Ball. Slowbro whiffs Psychic.
t6: Trick Room expires. Machamp KOs Slowbro with Knock Off.
------------------------------------------------------------------------------------------------------------------
Battle 155 vs Daron/Jess
Latios2 / Dewgong2 / Suicune2 / Gallade2
t1: Protect Donphan. Latios and Dewgong whiff Ice Beam into Donphan. Dusknoir sets Trick Room.
t2: Endeavor+Night Shade KO Latios. Dewgong hits Donphan with Ice Beam. Berry Juice heals Donphan but gets Frozen.
t3: Suicune comes out. Donphan stays Frozen. Dusknoir hits Suicune with Night Shade. Dewgong hits Donphan with another ice beam. Suicune uses Icy Wind but misses Donphan and hits Dusknoir.
t4: Donphan thaws and lands Endeavor on Suicune. Dusknoir KOs Suicune with Night Shade. Dewgong KOs Donphan with Ice Beam.
t5: Machamp sent out. Night Shade+Dynamic Punch KO Dewgong.
t6: Trick Room expires. Gallade comes out. Protect Machamp. Gallade whiffs Psycho Cut. Trick Room up.
t7: Night Shade+Knock Off KO Gallade.
------------------------------------------------------------------------------------------------------------------
Battle 156 vs Bryon/Hernan
Slowking3 / Froslass2 / Moltres2 / Blastoise3
t1: Protect Donphan. Froslass hits Dusknoir with Blizzard. Slowking uses Swagger on Dusknoir but Lum Berry cures Confusion. Trick Room goes up.
t2: Endeavor+Night Shade KO Slowking. Froslass lands Blizzard on both. freezing Donphan.
t3: Moltres comes out. Donphan stays Frozen. Dusknoir hits Moltres with Night Shade. Moltres hits both with Heat Wave and Burns Dusknoir. Froslass KOs Donphan with Blizzard while also hitting Dusknoir. Dusknoir left at 3HP after Burn.
t4: Octillery sent out. Rain Dance+Water Spout KOs both Moltres and Froslass. Dusknoir dies to Burn.
t5: Machamp sent out. Blastoise comes out. Blastoise dies to Energy Ball+Dynamic Punch.
------------------------------------------------------------------------------------------------------------------
Battle 183 vs Clara/Cortney
Suicune1 / Dusknoir2 / Donphan2 / Tyranitar2
t1: Protect Donphan. Suicune sets Hail. Enemy Dusknoir whiffs Night Shade. My Dusknoir sets Trick Room.
t2: Endeavor+Night Shade KOs Suicune. Enemy Dusknoir KOs Donphan with Night Shade.
t3: Machamp sent out. Donphan comes in. Night Shade+Knock Off KOs enemy Dusknoir. Donphan uses Fire Fang on my Dusknoir which burns it but Lum Berry cures the burn.
t4: Tyranitar comes in. Sand is set. Dusknoir uses Night Shade on Donphan. Machamp KOs Tyranitar with Dynamic Punch. Donphan uses Stealth Rock.
t5: Night Shade+Dynamic Punch Donphan. It survives with Focus Band. Donphan roars Dusknoir out, Octillery dragged in.
t6: Trick Room expires. Donphan dies to Machamp's Knock Off.
And that's all! I had many, many attempts with this team. There's even a Sun version where Dusknoir has Sunny Day and I'm using Camerupt over Octillery, but I didn't really enjoy that one. This team was very fun to play until it wasn't. Endeavor bait can only go so far before some kind of bs catches up to you. Oh well.
I did not expect to go as hard as I did on this battle tower. I've followed battle facility challenges for years, but this was the first one that felt so incredibly, potentially hard-earned that I had to give it a try. And since I've always been a fan of Singles, I started thinking of potential teams/strategies for it.
First off, I wanted to use a team that followed a few criteria:
Because of how this tower was designed, I felt that "cheesing" through it with strategies along the lines of past Truant/Entrainment setups or just straight-up stalling strategies were a lot harder to pull off, so I wanted to just make a team of solid, strong attackers that could still set up but wouldn't rely on one single method.
Along with the above, I wanted to use a team that was pretty quick for each battle. Taking 25-45 min. for each trainer can be a drag, and I didn't want my brain rotting away through the process (although some could argue this happened anyway as you do these battles over, and over, and over).
Finally, I wanted a team that had to adapt to each opponent where battles wouldn't always be the same first few moves (so along the same lines of the first two points).
After reviewing different Pokemon, possible moves, teams, and looking at the leaderboard, I ended up deciding on a variant of Sirya's team in the end. It seemed like it had great potential, and I assumed it made it to the top of the leaderboard at the time for a reason. However, I didn't like that his submission mentioned the terrible matchup with Natalia and having that high chance of confusion hits because of Pelipper, so I started with wanting to change this.
Playtesting around via the graciously provided BDSP Battle Tower calculator, I decided to use Choice/Trick Rotom-Wash as a replacement for Sirya's Starmie. At this point, I had already done hundreds of tests with a variety of different Pokemon teams and felt this team would give me the best shot of winning a majority of battles the way I wanted. And the best part: you can breed all three of them!
The strategy for this team obviously varies with each opponent as mentioned in my criteria, but it generally focuses on either doing lots of damage quickly, using Trick/Choice on Pokemon that might lead to stall/sweep set-ups, or setting up either Scizor or Garchomp to sweep if possible. The team is as follows:
Rotom-Wash @ Choice Scarf
Modest Nature
Ability: Levitate
EVs: 20 HP / 4 Def / 252 SpA / 12 SpD / 222 Spe
IVs: 0 Atk
- Trick
- Volt Switch
- Thunderbolt
- Dark Pulse
Rotom-Wash's typing is phenomenal and made better with Levitate. Having Grass as its sole weakness came in handy countless times, and not being able to be paralyzed has definitely been a lifesaver. 0 Atk IVs is obviously preferred, maxed Sp Atk EVs is necessary to finish some Pokemon, especially in tandem with the other team members, and 220 EVs in speed with Choice Scarf was necessary to outspeed a number of Pokemon - Aerodactyl, Crobat, or Choice Scarf Togekiss to name a few. At the same time, being able to underspeed after using Trick was also useful in order to take damage while Volt Switching out, and so a balance was found. 20 HP gives Rotom-Wash the most oomph for taking hits while having its Sp Def being lower than its Def is important against Download Porygon-Z. Also, the AI not realizing that Mold Breaker Earthquake works on Rotom-Wash is both hilarious and needed! Finally, A powerful STAB Thunderbolt works pretty well against Sheer Cold users, and Dark Pulse was for anything immune/resistant to Electric (having a decent chance of flinching was always welcome too).
Scizor was already one of my favorite Pokemon, and using her for the tower just increased the appeal of the steel bug. Scizor is a carbon copy of Sirya's as, honestly, I couldn't really change anything. These specific stats worked for surviving hits it needed to while even giving it a chance versus select Fire moves. Leftovers are great for stalling if needed, but it's also allowed Scizor to survive close hits or unwanted crits. Again, max Atk EVs were needed to finish off certain mons, and the 4 Speed EVs are necessary versus other Scizor. Great for switching into those Grass/Poison moves though that might be directed at Rotom-Wash and then proceeding to set up 1-3 Swords Dances. Nothing too surprising here.
Mama Shark herself. Garchomp needs no introduction on why she dominates in Pokemon, Battle Tower or not. Again, similar to Sirya's with some slight alterations. Notably, The Atk isn't maxed out with EVs going into Def. This mainly exists for Flygon-2 and Swampert-4. Not sure why, but thank the old gods and the new that Flygon randomly has 0 Atk IVs. Good ol' mistakes in the game I actually like to see. Probably the biggest reason Garchomp does so well is just how fast she is along with Substitute. This mainly comes in handy against 0HKO moves as, generally, I can set up Sub over and over while building SD's until I can hopefully sweep. I am not kidding though when I say I have been hit with Sheer Cold 6 times in a row with using this. Needed a new change of clothes after the bullets I sweat from that battle (luckily Scizor dodged the last two Sheer Colds and was able to set up a SD for the win). Having to tie with other Garchomp can be pretty frustrating but definitely increases the chances of winning and makes the maxed out Speed worth it.
As its held item, the Lum Berry has worked wonders for Garchomp. Not only against burns (or anything from Tri-Attack) but also after Statics and Flame Bodies. The berry is actually crucial to strategies against Venusaur and Breloom as well. And after Outrage of course.
After months of using this team, tailoring the stats bit by bit, and calculating probabilities between using different strategies for each opponent, I can safely say that it can beat most opponents with a probability of 99% victory or more. I say "most" loosely here though; there are plenty of opponents where you have a 1-6% chance of losing because of 0HKO moves, Bright Powder/Lax Incense, weird switch-ins, badly-timed critical hits, etc. With this in mind, there are a few trainers specifically that can absolutely wreck you because of weird bad luck and annoying AI decision-making.
Idol Sidney w/ Porygon-Z, Garchomp, and Gengar
Unfortunately, as with most teams, an opponent starting with a fairly quick Tri-Attack can lose you the game. Para/Freeze hax abound, and I've found my only option with this team is to Volt Switch to Garchomp. That, in combination with Gengar's Bright Powder, can cause a loss real quick. A typical battle goes VS to Garchomp, Outrage, if your Garchomp hits before the opposing Garchomp that's always sent out, use Trick on the Gengar, hope it lands, then finish with Dark Pulses/Bullet Punches. If your Garchomp gets hit first, use Trick on the following Outrage, Dark Pulses until faint, use SD x3/Roost with Scizor, and finish (hopefully) the trainer with BP's.
Jogger Sherman w/ Scizor, Gengar, and Umbreon
The biggest weakness of this team is its reliance on physical sweepers. Scizor and Garchomp have amazing synergy, but I wish one of them was a special attacker. Hence, Umbreon can be a real problem. Foul Play finishes Scizor in two hits, and obviously any SDs from either Scizor or Garchomp are not great. The best way I found to handle this battle is to VS to Garchomp, Earthquake as much as possible, use a combination of Thief and BP with Scizor until Umbreon comes out, immediately switch to Rotom-Wash, Trick, and attempt to finish with Thunderbolts and Bullet Punches. The biggest problem here is what move Umbreon uses when you switch in Rotom. If it's anything but Protect or FP, you can be in some serious trouble. If Garchomp somehow survives through Gengar however (or before it comes out), you can sac it to Umbreon to guarantee the Trick on it, and proceed to win.
PI Auston w/ Drifblim, Garchomp, and Tyranitar
This is possibly the worst matchup in the Battle Tower for this team. Anything but Trick at the start of this battle can be an insane risk with +Evasion Garchomp or Tyranitar. Best to start with Trick, Dark Pulse, continue if Garchomp switches in, otherwise switch to Scizor to take care of Tyranitar, Swords Dance 1-2 times with Scizor before taking anyone out, and then Bullet Punch everything. The reason this can be so bad is, funny enough, all because of Drifblim at the start, and the chance of critical hits. One crit throughout much of this battle will end the whole thing. Tyr/Gar just have too much power.
Aroma Lady Haylee w/ Gengar, Flygon, Ludicolo
The previous may be worse than this battle, but oh man is this my least favorite to go through. And it's all because of Ludicolo. I've determined this thing is pure evil. If set up even a little bit, it can take out my entire team. There are a number of reasons for this, but the main idea is as follows: You can't keep Rotom-Wash out since two set-up Pokemon await after Gengar, so one can either Trick Gengar and potentially set up a Pokemon to handle what comes out next, or VS to either Scizor or Garchomp.
However, Trick doesn't work great on this guy. The main reason is that I've seen this Gengar lead with either Thunder Punch, Poison Jab, and Shadow Claw equally randomly. You potentially can switch against Thunder Punch or Poison Jab with Gar and Scizor respectively, but then she'll obviously switch right after leaving no time for setup. Switching Gar into PJ can work, but you depend on this move being used (a similar argument can be made about Shadow Claw). Crits here could also be fatal while trying to set up. Finally, I'd still be wary of a turn 1 Explosion. I don't think I've ever seen it, but I've seen the AI do some wild stuff throughout this experience and wouldn't put it past it. Either way, Trick can work, but it's risky, and the Battle Tower's all about avoiding this kind of risk.
What I generally do is start with VS to Scizor, SD to Roost (although every time so far, Gengar explodes the very next turn), Bullet Punch Flygon once, then immediately switch to Garchomp and hope that it Outrages Gar next turn. This allows them both to faint because of Rough Skin, and Rotom-Wash can come out and Trick the Ludicolo, hopefully securing the win. The main issue comes from Flygon potentially either going Dragon Dance twice or getting a crit Earthquake on Garchomp. This generally leads the AI to EQ Gar instead of Outrage meaning Flygon doesn't faint, and then you're stuck with BPing it with Scizor and allowing Ludicolo to set up its dreaded Substitute. Trick doesn't work on Sub unfortunately, and this would lead to a loss without setup from Scizor.
You can keep Scizor out and just take out Flygon with the one SD to BP's, but hoping for the KO on Ludicolo can be extremely risky as its moveset dismantles this team if it's not choiced. It has been done before though (Ludicolo literally went through my entire team until subbing Garchomp enough finally got Scald to run out of PP).
Appologies for the long section, but I found these were the worst matchups from the entire roster of trainers and should be mentioned in detail. I actually do have appropriate strategies for every single trainer in the Battle Tower, but many can still cause this team to lose.
As mentioned before, I've lost so many times with this team. Sometimes in the 200s, sometimes before hitting 14. Luck obviously plays a part, but so does an appropriate strategy and not making any dumb mistakes like accidentally hitting something you weren't supposed to. Finally, there is one thing I'd like to mention below.
After so many battles, you start to notice certain patterns, not only with moves the AI will choose but also with what trainers you end up battling. I wish I knew how to datamine these games to know exactly how it might work, but the RNG as far as selecting your opponents is definitely not always random. Although I don't fully get it, it does seem like you can sort of control what trainers you get. This is what I found:
I'll start playing the BT, go through what appears to be a string of 30 or more trainers, and then notice certain trainers repeat. Consistently. Like Hiker Aldo always being the second trainer I fight. Or Bird Keeper Anissa going from the 6th trainer to the 5th, then to the 4th, etc. as I do strings of 7. Point is, there is definitely a pool of trainers the randomizer picks from, and I was never able to figure out if it was a daily or weekly thing. It does seem to hold consistency after a number of trainers first a lot of the time though. As in I don't see the same repeats until after doing a good number of battles first.
Additionally, this repeating pool of trainers (maybe of the same 20-30?) seems to end after I fully close the game, but only after a certain amount of time has passed. My theory is that the game takes time to settle on certain trainers and somehow gets stuck on using mostly the same trainers over and over. Maybe the random number generator resets naturally after a week, but this doesn't register with the game until you fully close it. Thus, you may be able to fight the same sort of trainers over and over (with specks of actual random trainers every once in a while) as long as you don't close the game.
After noticing this, I attempted to keep my game open and play as much BT as possible whenever I had trainers I could beat with better odds than others and then close the game when I saw terrible matchups. Although this wasn't super consistent in getting these "easier" trainers, I'd like to think it helped my chances in getting this far. Moreover, I saw that other players had noticed something similar in the Discord as well but on the Doubles side. There's definitely something to this, and it may even apply to other Pokemon games and battle facilities as well.
Sorry this ended up being so long, but I've really been waiting to post this forever. Feels good to finally be here. If you have any questions at all, please don't hesitate to ask. I really love this team, and although it doesn't perfectly go through the tower with insane potential guarantees as others, it can be good enough to get a super-high streak. Also, beating Natalia's rain team is super doable now with only a 4% chance of loss if Kingdra crits Rotom-Wash on one of the turns. Not bad!
Finally, here's the video going from my record to the Switch version/update screen.
I linked a YouTube video showcasing the team as I made my way to 406 at the top (apologies for the sound seeming like it's from 2 sources; not sure why it's like that, but I'm also super new to streaming my Switch). Thanks for reading!
Hi! I’m trying to reach 100 wins on regular BT (at least for now), but I’m struggling a little bit with some matchups (some were my mistakes).
I’m using an auto imposed rule to use only Gen IV mons, so I’d love some suggestions on what I have.
Just to clarify, Gen IV rule includes Pokémons with new pre evos too, for example Blissey is allowed.
Anyway here’s the last team I tried:
Weavile @ Choice Band
Jolly Nature
Ability: Pressure
EVs: 4 HP / 252 Atk / 252 Spe
- Swords Dance *
- Ice Shard
- Icicle Crash
- Throat Chop
* Filler for now until I found Poison Jab in the Underground vendors.
I start with chomp and set Sub > SD and sweep, normally Garchomp does all the job, but Rotom has been a good partner too, one shooting Milotic on first Palmer (I just found Volt Switch on the underground, but idk what to remove. Weavile does the cleanup fine if needed, but I’m always scared of Icicle Crash acc.
I never made it to Palmer 2, but I was close with this team the last time, lost to a Mamoswine, Dragonite & Rypherior. I Tried Heatran for Weavile but a Starmie killed my entire team, so I wanted to outspeed.
On a side note I’m looking for Doubles Gen IV team too, so if you can think a team or a good core to start, that would be great!
Posting a final streak of 840. Please see the original writeup for a basic rundown of the sets. To avoid repetition, this post will focus on details that weren't already mentioned before.
Bronzong has a few qualities that help it achieve and maintain the level of consistency required for longer streaks. Unlike most Trick Room setters in BDSP, its typing typing deters Rock Slide and Air Slash. The former is almost never seen, with Hariyama resisting it as well. That in itself makes some tricky leads, like Irene's Bronzong-3 and Barry's Heracross-5 much less dangerous. The Steel-typing's other important upside is its resistance to Ice-type moves. Switching Snorlax and Octillery in is a lot safer when they don't have to worry about getting frozen by a stray Ice Beam.
One of the advantages Bronzong has over Dusknoir is the fact that it's a genderless mon. The tower features some Attract users as leads, such as Umbreon-2 (Andreas & Kristi), and Vileplume-2 (Andreas & Johanna, Celina & Kendel). Not having to worry about them denying Trick Room helps in the long run. Also, it's best to run a male Hariyama of your own, because Froslass-2 is the only female Attract user in doubles masters. Bryon & Hernan are a good example of this: even if Attract is used on Hariyama on the first turn, Gyro Ball has a guaranteed KO on Froslass-2. With Bronzong moving before Hariyama in TR, a first-turn Attract ends up being a "wasted" move for the AI.
The EV spread uses Gengar-3's Shadow Ball as the special benchmark, and Absol-3's Night Slash as the physical one. The latter only matters against Sylvia & Lyle, who are the sole roster to lead with Absol-3. The other lead in that matchup is Registeel-1, a Curse set. Defeating it first with Fake Out and Close Combat makes the battle more predictable, because Curse boosts can turn CC into a 2HKO, wasting precious Trick Room turns. It's possible to run an EV spread of 252 HP / 108 Def / 148 SpD, but then you'd absolutely have to use Fake Out on Sylvia's Absol-3. Moving 16 EVs around hasn't compromised other survival calcs, so the EV spread remained untouched for the rest of the streak.
Bronzong's set had one thing changed after the previous post, with Psychic taking the moveslot that was originally reserved for Gravity. Psychic is useful against the multitude of Poison-types that resist Hariyama's Close Combat, and it lets Bronzong deal respectable damage to Fighting-types, often 2HKOing those without defensive EVs. To give an idea, here's a short list of problematic mons that Psychic helps with:
- Vileplume sets (Psychic + Heavy Slam is a favourable roll vs the bulkier set #2)
- Muk (both sets fall to Psychic + Heavy Slam)
- Weezing-3 (a Quick Claw set, makes an appearance on Tyrell & Mikel's roster)
- all of the Nido royalty
- Poliwrath-2 (Quick Claw Hypnosis) and Poliwrath-3 (Focus Punch) are both 2HKOed by Psychic alone, so that Hariyama may no longer need to CC them
- Breloom sets (a mixed bag of Focus Punch, Spore, and Effect Spore)
- Toxicroak (set 2 has Taunt and might Fling its Light Ball) can now be finished off by Bronzong, allowing Hariyama to target the other enemy
- Bronzong-3 (Ellis & Irene): Psychic makes the Knock Off roll (with chip damage from Hail) ever so slightly more consistent. It's a niche case, but the entire gameplan depends on that damage range.
- Steelix-2 dies to Psychic + Close Combat in a guaranteed, blessed calc
- Magnezone-2 can now be felled by Psychic + High Horsepower in a similarly lucky calc, unless its Bright Powder trolls
...and that's only some of the 2HKOs, with new three-hit combos being enabled as well. In short, with BDSP's restrictions, Psychic feels like an ideal fourth move for the team.
Iron Head is unavailable in BDSP, leaving Bronzong with only two good options for a Steel-type STAB. It's an interesting comparison, considering that neither Gyro Ball nor Heavy Slam have a static base power. This makes the context, in this case BDSP's tower, extremely relevant. Generally speaking, Gyro Ball is the superior Steel-type move, especially when coupled with Psychic. Gyro Ball's Speed-based damage formula works wonders in an environment full of fast opponents, and Bronzong itself is quite slow at 34 Speed.
In the end, a head-to-head comparison isn't even that helpful - you really have to go through the actual matchups to figure it out case by case. For example, Psychic already covers many of the slower foes that don't take a lot of damage from Gyro Ball. Keeping Bronzong in to use its attacks is often suboptimal in the first place, and Rain Dance tends to have greater value. Hariyama carries Steel-type coverage of its own, which can render Bronzong's equivalent redundant. For example, Hariyama's Heavy Slam KOs the Granbull sets through Intimidate, so Bronzong's move of choice doesn't make a difference in that scenario.
Finding cases where Heavy Slam is objectively better has proven to be very, very difficult. Essentially, the target needs to be both slow and lightweight. Bronzong is actually less heavy than Hariyama, who is already much lighter than the premium Heavy Slam users introduced in later generations. In the end, only a single enemy stood out from the rest: Vespiquen-2. There were a couple of other candidates, like Cradily (sets 2-4), and Shuckle-2, but neither of them pose a threat on the rosters they appear on. Togekiss-2 is another set worth mentioning, but only when facing Kegan & Noelle. Even then, for Bronzong's attack to matter, Togekiss has to not resist switch after a Fake Out.
Vespiquen-2 0 Atk Bronzong Heavy Slam (100 BP) vs. 252 HP / 0 Def Vespiquen: 51-61 (28.8 - 34.4%)
0 Atk Bronzong Gyro Ball (44 BP) vs. 252 HP / 0 Def Vespiquen: 24-28 (13.5 - 15.8%)
0 SpA Bronzong Psychic vs. 252 HP / 252+ SpD Vespiquen: 31-37 (17.5 - 20.9%)
Vespiquen-2 is a Toxic/Double Team/Defend Order/Roost set that is incapable of touching Bronzong at all. It appears as a backline mon on two rosters: Madelyn & Sylvia, and Rusty & Elaine. It's typically the last enemy standing in both matchups, and battles can drag on for a long time thanks to Double Team. Hariyama isn't guaranteed to survive until that point, and a low-HP Octillery can't 2HKO the Careful Vespiquen. Thus, finishing the battle often falls on Snorlax's shoulders, with Bronzong returning to the field to reapply Trick Room on the sixth turn. Toxic puts Snorlax on a timer, and Bronzong running Heavy Slam would make the matchup safer. Every point of damage counts once the evasion boosts start piling up.
The verdict? Use Gyro Ball, it's better against almost everything else.
Hariyama @ Flame Orb
Ability: Guts
EVs: 252 Atk / 164 Def / 92 SpD
IVs: 0 Spe
Brave Nature
- Fake Out
- Close Combat
- Knock Off
- Heavy Slam
Hariyama's set remains unchanged from the first post. As a lucky coincidence, the EV spread has a blessed survival vs Slowking-3's Psychic: 252+ SpA Slowking Psychic vs. 0 HP / 92 SpD Hariyama: 186-218 (84.9 - 99.5%). It's a Bright Powder set, and getting a chance at landing Knock Off is helpful. The calc is particularly relevant when facing Bryon & Hernan or Rusty & Jarred, where said Slowking set appears as a lead.
A longer streak really emphasises the importance of Flame Orb's self-induced burn. Take Thunder Wave for example - as long as you can avoid getting paralysed on the first turn, any subsequent attempts will be aimed at Bronzong. Then, its Lum Berry can cause the AI to "waste" a turn, leaving Hariyama free to do as it pleases. Similarly, the same logic applies to switch-ins for the Hariyama slot. Since a burned mon isn't going to get targeted by status moves, Snorlax and Octillery join the battle without having to fear getting ruined by moves like Thunder Wave and Hypnosis as they enter the field.
The downside of not running Protect is that Hariyama sometimes dies on the first turn. Most of these scenarios feature an enemy lead with either Brave Bird or Psychic, coupled with something that threatens Bronzong, like a strong Earthquake, or Dark Pulse with its flinch chance. Upon closer inspection, teams that are capable of consistently KOing Hariyama can be dealt with by the other three mons. As always, BDSP's rosters being predermined helps a lot. The list below has a few examples of such teams.
This matchup was already covered in the original post, but the short version is that since Crobat-2 has Inner Focus, both of the leads are immune to Fake Out's flinch. Brave Bird's recoil will put Crobat in Psychic's KO range, assuming it targets Hariyama on the first turn. Since Crobat goes for the KO most of the time, it's possible to have Snorlax replace the fallen Hariyama at the end of the first turn. Then, Wide Lens lets Snorlax take out Gengar while Psychic finishes off Crobat, so the matchup ends up being quite consistent.
Fake Out is needed to stop Toxicroak from Taunting Bronzong, so Skarmory gets a free KO on Hariyama. Octillery will demolish everything once Dry Skin Toxicroak is gone.
Fake Out is best used to prevent Togekiss from setting up Substitute or Double Team. This can cause one of the more consistent resist switches in the tower, with the Ghost-type Mismagius waiting in the wings. Staraptor-2 might try to Endure a hit, too. In the end, Water Spout will clean up with a little help from Octillery's teammates. For example, a rain-boosted Water Spout has 14/16 odds of OHKOing Kegan's Raikou-3.
Fake Out gets little value here, but there's no real alternative to sacrificing Hariyama, as neither Snorlax nor Octillery are willing to tank Brave Bird on the switch. Fortunately, the enemy lineup isn't particularly dangerous, and Water Spout is bound to deal heavy damage as long as Regirock's Quick Claw doesn't proc.
Fake Out is needed to stop Garchomp's Earthquake, which lets Gardevoir-3 score a KO for free. Breaking Garchomp's Focus Sash is quite valuable even if Hariyama dies to Psychic in the process. Octillery can join the battle and wipe the enemy's frontline with a rain-boosted Water Spout. It's a blessed calc on Gardevoir, doing 100% minimum. For reasons unknown, the Scarfed Gardevoir has thrown battles in the past by using Thunderbolt and Mystical Fire instead of its STABs.
Another one from the first post's threatlist. Dark Pulse forces a Fake Out on Houndoom, so the matchup can be tricky if Latias high rolls Psychic and KOs Hariyama on the first turn.
Donnie & Sasha break the pattern - letting Hariyama faint on the first turn is the only way to lose this battle. Hitmontop-2 is a support-only set, so switching Hariyama to Snorlax on the first turn while Trick Room goes up results in an easy win. Since Hitmontop can be safely ignored, it doesn't matter if Sasha brings Garchomp or Mamoswine as her second mon.
There was no need to change anything about Snorlax's set, and even the initial EV spread survived all the way to the end. The coverage brought by running four attacks is so valuable that replacing any one of them with Protect would have been a downgrade.
Wide Lens proved to be a real eye-opener in the long run. The original post praised its ability to boost High Horsepower and Hammer Arm's accuracy, which remains true. However, the item's true value lies in its accuracy boost also applying to Double-Edge and Crunch. Providing leeway against opposing Bright Powder and Double Team users is a lifesaver on a team with no other means of boosting accuracy. It's no wonder that most teams on the leaderboard have ways of negating evasion boosts, be it Gravity, Hurricane and Thunder in rain, or No Guard Machamp. Wide Lens would be worth using even if HHP and Hammer Arm had 100% base accuracy - it's simply that good.
Octillery @ Mystic Water
Ability: Sniper
EVs: 244 HP / 12 Def / 252 SpA
IVs: 0 Spe
Quiet Nature
- Water Spout
- Energy Ball
- Ice Beam
- Flamethrower
Octillery's EV spread received a minor change towards the end of the streak. A spread of 244 HP / 12 Def / 252 SpA gives the octopus better odds of surviving a Forretress-3 Explosion plus a Tangrowth-2 Knock Off. It's a rather specific combination of moves that can happen when facing Blair & Kelby, where Octillery is switched into the Bronzong slot on the second turn. Octillery is the team's best answer to the Impish Tangrowth-2, so surviving that combo is important. In practice, Explosion is uncommon: both of the enemy leads carry Rock Tomb, and Forretress-3 is an Earthquake enthusiast. On the special side, the new spread retains Octillery's ability to survive a Dark Pulse and a Sludge Bomb from Weezing-3, with the possible poison proc factored in. This calc is most relevant against Tyrell & Mikel. Skewing the EV spread further in either direction seemed unwise, because the octopus has to tank both physical and special hits in clutch scenarios.
An overall ranking of Octillery's moves in terms of usage and importance would be Water Spout > Energy Ball > Ice Beam > Flamethrower. Energy Ball is great versus opposing Water-types in general, and is particularly crucial against some of the nastier Dewgong, Lapras, and Suicune sets. Ice Beam remains the prime dragon slaying tool, and it lets Octillery nail Grass-types even when it's raining. While Flamethrower is arguably the least valuable move on the set, it's more or less mandatory when it comes to stopping some of the Scizor sets in their tracks.
********************* Threatlist v2
The first post's threatlist remains satisfactory for the most part. However, since Gravity Bronzong turned out to be a lie, Double Team and Bright Powder mons deserve more emphasis. While losing Gravity takes away from the team's ability of dealing with evasion-based hax, some avenues of counterplay still exist. Bringing Snorlax in early helps against some Double Team leads. For example, Wide Lens lets Double-Edge hit targets with a single evasion boost ~82% of the time. Knock Off is an extremely useful tool when it comes to removing items such as Quick Claw, and Bright Powder. Hariyama, Snorlax, and Octillery together sport enough raw power to muscle through most targets in one or two hits, and Double Team users generally lack ways of boosting their defenses in tandem. The tower's ruleset also works against the AI: Double Team spammers can usually be isolated, and forcing a 2v1 evens the odds somewhat. Below is a compilation of some of the evasion users, and how the team deals with them.
Exploud-2 is a weird set: it has an Impish nature, but its attack of choice is Boomburst. ILCA's little error makes the set easy to ignore, and using Fake Out on the Thunder Wave Hypno is the correct play. Ideally, Hypno and Gastrodon should be focused down first. Knock Off removes Hypno's Focus Band (if it doesn't KO outright), and Close Combat has ~84% odds of OHKOing the backline Gastrodon with its Bright Powder factored in. The final obstacle, Dugtrio-3, is effortlessly felled with Trick Room in play.
The backline Marowak-3 is arguably the biggest threat. Conversely, Coby's Dewgong-2 struggles to deal meaningful damage. For example, its uninvested Ice Beam does around 20 damage to Thick Fat Snorlax. In short, it's best to nuke Zapdos and Marowak down first. Elaine & Coby is one of the battles where skipping Fake Out makes sense, and fishing for a first-turn Knock Off on the Bright Powder Zapdos can make a big difference. A combo of Knock Off (non-Guts) + Psychic + Close Combat will bring Zapdos down as long as the attacks connect, so it can theoretically be KO'd on the second turn.
Kristi's side consists of two frail sweepers, which makes them the priority targets. Fake Out takes Starmie's Focus Sash out of the equation. Snorlax is brought in on the second turn, and its most important task will be dealing with Zapdos. Double-Edge is a 2HKO, and Wide Lens helps Snorlax muscle through the increased evasion. Meanwhile, Hariyama can KO both Starmie and Froslass with Knock Off. While it didn't happen during the streak, it's possible that Starmie might resist switch to Froslass, which can lead to Knock Off getting disabled by Cursed Body. The battle would be winnable regardless, since Snorlax can finish off the weakened Starmie in Hariyama's place.
It's possible to KO Ampharos-2 before it uses Reflect: Fake Out followed by Close Combat deals enough damage to do so. While using Fake Out into Static is ill-advised under normal circumstances, the reward outweights the risk in this scenario. Hariyama can "bait" Air Slashes from Moltres, making it less likely to stack multiple Double Teams. In the end, Moltres tends to fall regardless of its evasion boosts: Snorlax's Double-Edge is a 2HKO, and Water Spout can one-tap it as well. The backline Bastiodon-2 is a Quick Claw set with Blizzard, Thunder, and Fire Blast. While it won't be doing too much damage, an unexpected QC freeze or paralysis can complicate things.
A team where every opponent carries either Double Team or an OHKO move, or both in Lapras-2's case. Ludicolo-2 usually spends most of its time stacking evasion boosts or clicking Scald, with Substitute and Leech Seed being very rare picks. Harvey's Scizor-2 is a dangerous Swords Dance set, so KOing it first makes sense. Fake Out is skipped in favour of using Knock Off on Scizor - removing its Bright Powder is worth a shot. It's wise to bring Octillery in on the second turn, with Bronzong failing to achieve much on the field. Close Combat and Flamethrower have 50/50 odds of individually OHKOing Scizor. Gliscor-2 is bound to get ruined by Water Spout once Scizor is gone. Hariyama's Close Combat puts in a lot of work in this matchup, dealing 77% minimum to Ludicolo, and OHKOing the last mon Lapras, if still available.
Scizor-2 returns, although partnered with Hypno-2 this time. The backline Vespiquen-2 is a DT/Defend Order/Toxic/Roost stall set. Kangaskhan-3 is an Endure/Reversal gimmick with no STAB, so it's largely ignored before it gets wiped out by Water Spout. Targeting the Focus Band Hypno is risky unless Knock Off is used beforehand, so the priority ends up being Scizor > Hypno > Vespiquen > Kangaskhan. In practice, the battle starts with a Fake Out on Hypno to stop it from paralysing Hariyama. After that, the following turns are all about stopping Scizor in its tracks. The matchup is quite volatile due to the amount of coinflips involved, but it would take a lot of bad luck for Madelyn & Sylvia to come out on top.
Another Vespiquen-2 matchup, and one that almost ended the streak at battle #817. Suicune-4 is a Bold Calm Mind set with Rest, and Bastiodon-2 is the same previously mentioned Quick Claw set. None of the enemies are particularly threatening by themselves, but dealing with the bulky sets tends to waste most of Trick Room's five turns. Leaving Heracross-3 alive when TR is about to fade would be reckless, so Vespiquen-2 usually gets one or two moves in for free. Failing to hit through its Double Team early can lead to a very losable battle, and stalling out Vespiquen's whopping 72 PP isn't an option with only Bronzong being immune to Toxic. For example, battle #817 lasted for 18 turns until Snorlax finally saved the day. The finishing blow, a Double-Edge crit, had to be dealt through +3 Defense and +3 Evasion.
While the actual losing battle was courtesy of Anissa & Kegan, there are two other pairs of opponents that are worth highlighting. Tyrell & Mikel were already part of the original post's threatlist, while Herman & Natalia are a fresh addition. Tyrell & Mikel are the most dreaded duo, while Herman & Natalia have the unusual ability to cause a loss with no hax involved.
Tyrell's roster immediately sticks out as the more dangerous side. Meganium-3 can provide eight-turn dual screens, which is too long to wait out for most Trick Room teams. Walrein-2 is a typical Sheer Cold set, made even more dangerous by its held Bright Powder. Mikel's side pales in comparison, seemingly fitting better into the "annoying" category. Weezing-3 is a Quick Claw set, but it can be nerfed by Knock Off. Skarmory-2 looks like a meme set, but anything with Double Team and Sand Attack can be tricky.
Ignoring Meganium-3 is risky, and can result in a slow death at the hands of Weezing and Skarmory, with Leech Seed sapping the team down with no recovery available. This approach would also leave Walrein-2 last, as a final nail in the coffin. Trying to burn Walrein down through dual screens and Bright Powder would grant it ample opportunity to land multiple Sheer Colds. Instead, it's best to not let Meganium & Walrein play the game. A combination of somewhat blessed calcs makes nuking Meganium-3 first viable: Fake Out, Close Combat, and Ice Beam together will KO it regardless of which screen it uses on the second turn (usually Reflect). Walrein-2 can be 2HKOed with Reflect up, as even CC + Double-Edge is a favourable roll. Here's how one of the battles began:
T1: Trick Room, Fake Out Meganium. Weezing uses Dark Pulse on Bronzong.
T2: Switch Bronzong -> Octillery, Knock Off on Weezing. Weezing hits Octillery with Dark Pulse, Meganium uses Reflect.
T3: Ice Beam & Close Combat Meganium (KO). Weezing's Sludge Bomb poisons Octillery.
T4: Energy Ball & CC Walrein. Both attacks connect, Walrein goes down. Weezing KOs Octillery with Sludge Bomb.
The second turn works out quite conveniently. Knowing that Meganium can be felled even after Reflect is used leaves Hariyama free to click Knock Off on Weezing, which pushes back CC's debuffs by one turn. At the same time, Weezing's Quick Claw is removed, helping both Hariyama and Octillery survive for longer. Octillery's EV spread lets it tank Dark Pulse, Sludge Bomb, and one round of poison damage. Weezing's targeting can be unpredictable, and it likes throwing in Fire Blasts as well. Once Walrein is removed, the 2v1 is winnable as long as Skarmory doesn't go wild with Double Team.
Of course, not using Fake Out on Weezing-3 lets it fire a Dark Pulse at Bronzong, and a first-turn flinch can ruin the gameplan. Regardless, the risk is still worth taking. After all, gambling with a 20% flinch chance is safer than praying Sheer Cold won't connect. Should a Dark Pulse flinch occur, the backup plan would be trying to ignore Meganium while bringing down Weezing and Skarmory. After that, it'd all come down to refreshing Trick Room around the time Meganium dies, and hoping for the best against Walrein. With screens up, it's likely to get an extra Sheer Cold off. If possible, tanking Meganium's first Leaf Storm with either Snorlax or Bronzong can help conserve Hariyama's HP. That being said, Walrein's OHKO moves don't care about HP values, so all the team would need to do is survive until Meganium goes down.
At the end of the day, none of this might matter because Bright Powder Walrein-2 can theoretically 1v4 the entire team. Such is life without Gravity.
Herman & Natalia team #1 - (Herman: Politoed-4, Zapdos-7 & Natalia: Kingdra-4, Scizor-5)
Herman & Natalia team #2 - (Herman: Politoed-4, Lapras-3 & Natalia: Kingdra-4, Scizor-5)
Tut tut, it looks like rain. No two battles are the same with this duo. The Bold Politoed-4 is too bulky to be quickly burned down by Hariyama, and its partners, Kindgra-4 and Scizor-5, are far too threatening to be left unattended. The gameplan for this battle revolves around forcing a 2v1 by ignoring Politoed while swiftly removing Natalia's side from the field.
Politoed's unpredictable use of its utility moves makes every battle unique. In most cases, it ends up wasting a turn or two using Protect or Helping Hand, making the battle significantly easier. The same can be said about Perish Song, with its countdown and the predictable switch working against the AI. On the other hand, since the rain is up thanks to Drizzle, Hydro Pump is a common occurrence. Indeed, the most dangerous turn of events features Politoed only ever attacking, which it gets to do scot-free with Natalia's side getting nuked first.
The short version of the story is that this duo is capable of causing a loss with no hax required, but it requires a very strict sequence of events. For example, Politoed-4 has to use Hydro Pump six times in a row, and one of the first two has to be on Hariyama. The Choice Band Scizor-5 also has to lock into a priority move, which isn't exactly guaranteed either. While a "haxless" loss requires a specific script, the odds of losing increase greatly when you start introducing crits and secondary effects, like Octillery getting frozen by Lapras-3's Freeze-Dry. Even a simple first-turn Hydro Pump crit on Bronzong can jeopardise the second Trick Room activation on the sixth turn, and battles against Herman & Natalia very rarely finish within the first five turns.
As for the long version... continue reading at your own risk. The "script" below is a re-imagined version of an actual battle against the Zapdos team. To make matters worse, let's pretend that Politoed wastes no turns and only uses Hydro Pump. To keep it fair, let's assume that every attack gets an average damage roll, and that all attacks neither crit nor proc their secondary effects. The sprites and the HP percentages represent their values at the end of that turn.
T1: Trick Room, Fake Out Kingdra. Politoed uses Hydro Pump on Bronzong.
There's no real choice - Kingdra-4 does too much damage in the rain, and must be removed from play as soon as possible. Targeting Politoed before it's isolated is incredibly risky due to Protect.
82% HP | 100% HP
65% HP | 100% HP 100% HP | 100% HP
*****
T2: Switch Bronzong -> Snorlax. Close Combat Kingdra (guaranteed KO). Politoed uses Hydro Pump on Hariyama.
It's best to save Bronzong for a second Trick Room later. Hariyama will survive a non-crit Hydro Pump (plus the burn damage) even with Close Combat's -SpD drop taken into account. Bringing Snorlax instead of Octillery makes sense, because having access to a full-power Water Spout could be useful later. Zapdos, or an isolated Politoed are good targets for it (remember, a full-power single-target Water Spout outdamages a super effective Energy Ball in the rain).
100% HP | 100% HP
100% HP | 10% HP 65% HP | 100% HP
*****
T3: Hammer Arm & Close Combat Scizor. Scizor locks Quick Attack and KOs Hariyama, Politoed's Hydro Pump hits Snorlax. Send Octillery to replace Hariyama.
Doubling into the Choice Band Scizor is the safest play overall: if it doesn't use a priority move, it dies before attacking. If it snipes Hariyama first, then Hammer Arm's chip damage puts Scizor into KO range for Octillery's attacks on the fourth turn.
65% HP | 100% HP
63% HP | 100% HP 65% HP | RIP
*****
T4: Double-Edge Politoed, Flamethrower Scizor. Scizor uses Quick Attack on Octillery, Politoed Hydro Pumps Snorlax. Scizor falls to Flamethrower.
A single Double-Edge primes Politoed for a possible Energy Ball KO later. Unfortunately, a Quick Attack on the octopus deals just enough damage to lower Water Spout's output to a point where Scizor is likely to survive a hit. Luckily, Flamethrower is almost certain to KO Scizor when combined with Hammer Arm, even in the rain. For the record, Water Spout is safe to use in battles where Scizor locks into any other attack, including Bullet Punch.
252+ SpA Octillery Flamethrower vs. 236 HP / 0 SpD Scizor in Rain: 116-140 (66.2 - 80%)
(116, 120, 120, 120, 124, 124, 124, 128, 128, 128, 132, 132, 132, 136, 136, 140)
Water Spout damage after a maximum roll Quick Attack:
252+ SpA Mystic Water Octillery Water Spout (81 BP) vs. 236 HP / 0 SpD Scizor in Rain: 106-126 (60.5 - 72%)
(106, 108, 109, 109, 111, 112, 114, 115, 117, 117, 118, 120, 121, 123, 124, 126)
Water Spout damage after a maximum roll Bullet Punch:
252+ SpA Mystic Water Octillery Water Spout (98 BP) vs. 236 HP / 0 SpD Scizor in Rain: 129-153 (73.7 - 87.4%)
(129, 130, 132, 133, 135, 136, 138, 139, 141, 142, 144, 145, 147, 148, 150, 153)
In short, Hammer Arm + Flamethrower will KO Scizor-5 unless both attacks get the minimum roll.
Trick Room is the key to victory. Finishing Politoed with Energy Ball would let Herman's second mon move first on the next turn, before TR is activated again. Instead, Ice Beam can be used to "waste" a turn while fishing for a freeze, all without triggering Politoed's Aguav Berry. Between Protect and Perish Song, Politoed has decent odds of not attacking on the fifth turn, so the Ice Beam gambit is worth going for.
38% HP
22% HP | 57% HP 12% HP | RIP
*****
T6: Trick Room, Energy Ball Politoed. Politoed's Hydro Pump KOs Bronzong. Politoed faints to Energy Ball. Snorlax is forced back in at the end of turn.
Trick Room being denied leaves the player in a terrible position against the final mystery mon. It doesn't even matter which one Herman brings, because both of Snorlax and Octillery can be outsped and KO'd by either Lapras-3 or Zapdos-7. In practice, this means that only one of Snorlax and Octillery gets to attack, and only once. It's an almost guaranteed loss, unless the enemy whiffs multiple Thunders, or Hydro Pumps in Lapras's case.
Flygon-2 is a Dragon Dance set with Focus Sash and Earthquake, which makes it an excellent Fake Out target. Granbull-3 is a Quick Claw user with no STABs, and its partner being immune to Ground usually results in EQ spam. Intimidate doesn't save Granbull from Hariyama's Heavy Slam, which OHKOs even at -1 Attack. The most dangerous foe is Darcy's backline Articuno-3, who has both Bright Powder and Sheer Cold.
There're two acceptable ways of dealing with this duo. The riskier option takes advantage of Darcy's side's weakness to Steel, and nukes Granbull and Articuno down first. Meanwhile, Flygon-2 is likely to spam DD once Trick Room goes up, which buys some time. Interestingly, this battle features another example of Gyro Ball being better than Heavy Slam on Bronzong - have a look at the calcs below.
-1 0 Atk Bronzong Heavy Slam (80 BP) vs. 252 HP / 0 Def Articuno: 56-68 (28.4 - 34.5%)
-1 0 Atk Bronzong Gyro Ball (110 BP) vs. 252 HP / 0 Def Articuno: 78-92 (39.5 - 46.7%)
-1 252+ Atk Guts Hariyama Heavy Slam (100 BP) vs. 252 HP / 0 Def Articuno: 120-142 (60.9 - 72%)
In practice, Hariyama uses Fake Out on Flygon on the first turn, and KOs Granbull on the second. Gyro Ball combined with Hariyama's Heavy Slam deals just enough damage to KO Articuno-3 before it gets to move on the third turn (Granbull's Intimidate would deny the KO if Bronzong ran Heavy Slam instead). The weakness of this strategy can be summarised in two words: Bright Powder. Failing to hit Articuno through its increased evasion has devastating consequences: not only does it get to click Sheer Cold (or Double Team), but a whiff wastes a valuable Trick Room turn as well. This can easily snowball into a situation where Articuno and Nidoking are still alive by the time TR fades. The battle can go downhill very quickly, especially if Flygon manages to sneak in a boosted Earthquake before it falls.
Fortunately, Octillery's raw power enables a better approach. The second, preferred strategy leaves Articuno-3 for last. Taking the "free" Heavy Slam kill on Granbull is tempting, but having Water Spout KO everything but the Sheer Cold user results in a slightly safer script overall. Here's a summary of how battle #213 played out:
T1: Trick Room, Fake Out on Flygon. Granbull uses Earthquake.
Flinching Flygon is mandatory, because Trick Room could be denied if the AI doubles into Bronzong. Again, breaking Flygon's Focus Sash helps a lot down the line.
T2: Rain Dance, Knock Off on Granbull. Granbull EQ, Flygon DD.
Hariyama forgoes the guaranteed Heavy Slam KO on Granbull. With Rain Dance activated and the Quick Claw removed by Knock Off, only Articuno's Bright Powder stands in the way of a clean Water Spout sweep. Of course, Octillery still has to enter the fray safely. Bronzong survives two Earthquakes from Granbull, as it deals a maximum of 48% to it.
T3: Gyro Ball Flygon, Knock Off on Bronzong. Bronzong falls to the friendly fire. Granbull and Flygon use EQ, KOing Hariyama. Octillery and Snorlax join the battle.
One could argue that friendly fire isn't required in this case, but something has to faint for Octillery to come in safely. Friendly fire is an extreme method of accomplishing just that. Water Spout has a guaranteed double KO lined up, so it doesn't particularly matter if Hariyama lives or dies.
T4: Water Spout KOs both Flygon and Granbull.
Talk about putting all your eggs in one basket, labeled "octopus go kill". Should Hariyama have survived the third turn somehow, Snorlax ought to be switched into that slot.
T5: Water Spout, Double-Edge Articuno.
A rain-boosted Water Spout is guaranteed to KO Nidoking. Articuno will fall as well, as long as its Bright Powder doesn't trigger. Snorlax's Wide Lens "negates" Bright Powder, and Double-Edge alone has ~98% odds of 2HKOing Articuno. For Articuno to win, it has to continuously dodge Water Spout and land a Sheer Cold on Snorlax. Then, it has to hit a second Sheer Cold on Octillery before Water Spout connects, which is very unlikely to happen.
In short, the second strategy is the safer one. Hitting only one Water Spout through Bright Powder is preferable to having to land both Gyro Ball and Heavy Slam. Curiously, KOing Bronzong via friendly fire isn't unique to this matchup. Defeating Tasha & Darcy's second team (Pinsir-2 & Drapion-2 leads) features a similar Water Spout wincon. However, nuking Bronzong has a few extra conditions in that battle: Knock Off needs to remove Pinsir's Bright Powder first, and Bronzong has to be "softened" to a point where Hariyama can KO it.
Barry & Palmer team #3 (Barry: Torterra-5, Snorlax-4 & Palmer: Milotic-8, Heatran-13)
The original post already covered the basics of this matchup. To avoid confusion in the Snorlax mirror, Barry's last mon will always be referred to as "Snorlax-4", while the player's equivalent will be just "Lax".
T1: Trick Room, Fake Out Milotic. Milotic flinches, and Torterra uses Wood Hammer on Hariyama.
T2: Switch Bronzong -> Octillery, Knock Off Torterra. Torterra uses Wood Hammer again, and Milotic lands a Hydro Pump to confirm the kill on Hariyama. Send Lax to replace Hariyama.
T3: Water Spout, Double-Edge on Milotic. Water Spout KOs Torterra. Meanwhile, Milotic doesn't Protect and falls the combined damage of Double-Edge and Water Spout.
T4: Water Spout, Hammer Arm Snorlax-4. Snorlax-4 Curses. Heatran survives Water Spout thanks to its Focus Sash, and hits Octillery with Earth Power in return.
...so far so good. The team's looking healthy, and an untouched Bronzong is waiting in the wings. For the record, Hariyama dying on the second turn is fine, because Lax carries Fighting-type coverage for this exact scenario. Unless...?
T5: Water Spout, Hammer Arm on Snorlax-4 again. "The opposing Snorlax-4 avoided the attack! The opposing Snorlax-4 used Body Slam! Octillery fainted!" Heatran's Earth Power hits Lax at the end of the turn.
The legendary 1% Hammer Arm miss has just occurred at the worst possible time. To be fair, Octillery was likely going to die to Body Slam no matter what, but the real kicker is Snorlax-4 not taking any damage. So, what now?
On the player's side, Bronzong is at full HP, and Lax is on 135 HP (~57%). As for the opponents, Heatran lingers on 1 HP, and Snorlax-4 is in yellow. Lax is sitting just barely outside of Snorlax-4's Body Slam's range, which does a maximum of 130 damage at +1 Atk. Looking closer, Snorlax-4 appears have around 35-40% HP remaining, which indicates at least average rolls on the previous turns. However, it also means that Hammer Arm's damage range of 33-39% might not be enough to KO it.
With Trick Room gone, the Speed tiers look like this: Heatran (129) > Bronzong (34) > Barry's -1 Spe Snorlax-4 (33) > player's -1 Spe Lax (31). Trying to set TR again on the sixth turn would be unwise, because Bronzong might get ganged up on and die for nothing. Bearing in mind that Bronzong gets to move second, it's best to finish Heatran with Psychic. Then, as long as Hammer Arm connects, victory should be within reach. With the gameplan decided, there's a few ways the battle can end:
- If the AI doubles into Lax and KOs it, the most likely result is a loss with Bronzong failing to 1v1 the opposing Snorlax-4.
- If the AI doubles into Bronzong with Earth Power and Crunch, Lax can come out on top as long as Hammer Arm doesn't miss again.
- If the AI attacks different targets and there's no further hax, Bronzong can win by outspeeding and finishing off the low-HP Snorlax-4 on the next turn.
T6: Psychic on Heatran, Hammer Arm Snorlax-4. Heatran uses Flash Cannon on Lax, and Snorlax-4 Crunches Bronzong. Psychic KOs the 1 HP Heatran, and Hammer Arm high rolls and gets the KO.
As mentioned before, Hammer Arm KOing Snorlax-4 this turn didn't matter, because Bronzong would have outsped it on the following turn anyway.
This battle had the worst-timed 1% miss of the entire streak. It's quite fortunate that Hammer Arm isn't used every battle, or else the count would undoubtedly be higher.
Barry & Palmer team #1 (Barry: Empoleon-5, Staraptor-5 & Palmer: Rhyperior-10, Heatran-12)
Funnily enough, two of the warstories ended up being back-to-back battles with Barry & Palmer at #434 and #441, with only seven matches separating the two. This time it's their first team, though.
Using Fake Out on Rhyperior is the safest play, because its Earthquake can OHKO Bronzong with a critical hit. For whatever reason, it likes to click Ice Punch on Hariyama, so the flinch removes the possibility of a first-turn freeze as well. However, this leaves Barry's Empoleon free to fish for a Waterfall flinch on Bronzong. Waterfall combined with an Earthquake is certain to KO Bronzong, and if Bronzong gets flinched on the first turn, Trick Room will be denied completely. The saving grace in that scenario is Close Combat still KOing Rhyperior on the second turn. In the end, neither Palmer's Heatran nor Barry's Empoleon pose a huge threat for the backline, and Staraptor will struggle to win a 1v2. The battle in question went like this:
T1: Trick Room, Fake Out on Rhydon. Empoleon's Waterfall hits Bronzong, and Trick Room is denied by a flinch.
T2: Trick Room, Close Combat Rhyperior. Empoleon Protects, and Rhyperior's EQ KOs Bronzong. Rhyperior falls to CC afterwards. Send in Octillery to replace Bronzong.
T3: Water Spout, switch Hariyama -> Snorlax. Heatran Protects, Empoleon's Drill Peck lands on Snorlax.
T4: Water Spout, High Horsepower Heatran. The AI doubles into Snorlax with Flash Cannon and Waterfall, and the latter scores a second flinch. Meanwhile, Water Spout is enough to KO Heatran.
T5: Water Spout, Hammer Arm. Empoleon Protects.
T6: Water Spout, High Horsepower. Empoleon uses Drill Peck on Octillery before fainting. Only Staraptor remains!
T7: Ice Beam, Double-Edge. Staraptor uses Close Combat on Snorlax before Ice Beam finishes it off.
Notes for each turn:
T3: The plan was to save Hariyama for a second Fake Out later. Heatran Protecting was a surprise - usually it tries to finish off the -1 SpD Hariyama. Magma Storm and Flash Cannon are more likely to KO than Heat Wave, so the odds of Snorlax getting burned on the switch are low. Thick Fat would have softened Magma Storm's initial blow, too.
T4: Doubling into Heatran helps with securing the kill. Water Spout loses its OHKO on Heatran if Octillery takes a hit before attacking.
T5: A full-power Water Spout combined with Snorlax's Hammer Arm is guaranteed to KO Empoleon-5. High Horsepower doesn't deal enough damage thanks to Shuca Berry.
T6: Risking Hammer Arm's 1% miss chance is no longer necessary after a second Water Spout, so High Horsepower's output will suffice (regardless of the berry).
To summarise, quite a few things have to go wrong for Trick Room to be denied. Firstly, Empoleon has to select Waterfall, target Bronzong, and get the 20% flinch. Waterfall is a rare pick on the first turn, with both Drill Peck and Protect being more commonly used. Secondly, Rhyperior has to use Earthquake on the following turn, which is far from guaranteed. An EQ is most commonly accompanied by Empoleon Protecting, but the AI has even shown Ice Punch + Protect. As luck would have it, battle #441 was the only time the AI managed to pull this combo off, which should give an idea of its rarity.
The disastrous Waterfall -> EQ opener was first mentioned on Discord by JustinTR, who was using Bronzong/Hariyama leads on a Cacturne team at the time. Check it out, it's well worth reading!
Have you ever felt as if you baited yourself into a misplay somehow? Yeah, welcome to the club.
T1: Trick Room, Fake Out Leafeon. Heatran Magma Storms Hariyama.
When it comes to Fake Out and stopping flinching moves, Leafeon's Bite is more common than Heatran's Dark Pulse. Heatran-5 also has Bright Powder, so it makes sense to nuke the annoyingly bulky Leafeon first. Besides, Snorlax's High Horsepower will destroy Heatran later in the battle, and Wide Lens helps mitigate Bright Powder.
T2: Psychic & Close Combat Leafeon. A second Magma Storm KOs Hari, send in Snorlax. Cradily replaces Leafeon.
The previous match against this duo happened before battle #200, back when Bronzong didn't have Psychic. Since then, it's been important to be on the lookout for cases where Psychic could improve "old" gameplans. Indeed, it looks like Cradily takes more damage from Psychic than Gyro Ball, so it must be better, right?
T3: Psychic Cradily, High Horsepower Heatran. HHP KOs Heatran, and Cradily uses Mirror Coat. Absol replaces the fallen Heatran.
Nope, Psychic isn't better - not against a Mirror Coat Cradily. The backline Absol-2 carries Sucker Punch, which is now guaranteed to KO Bronzong thanks to Mirror Coat's damage. Oops.
T4: Gyro Ball & Double-Edge Absol. Sucker Punch KOs Bronzong, and Absol survives due to Focus Sash. Cradily lands Stone Edge on Snorlax.
It's now possible to lose to Cradily, of all things. Time to pray for no Stone Edge crits. In hindsight, using Hammer Arm would have avoided the recoil damage, but is the 1% miss chance really worth the gamble?
T5: Ice Beam Cradily, Crunch the 1HP Absol. Absol uses Sucker Punch on Octillery, and Cradily hits Snorlax with Stone Edge again.
Absol-2 has Swagger, so it's best to remove it first. Water Spout would have been a lovely move for this situation, but it's not an option with Storm Drain in play. Trick Room fades at the end of the turn.
As expected, Octillery falls. Cradily is in red, so High Horsepower is enough to finish it off.
T7: High Horsepower. Cradily's Stone Edge misses, and HHP secures the win.
Looking over the calcs again, for Snorlax to die, Cradily would have needed to connect all three Stone Edges and crit twice. An absent-minded misplay could have ended the streak in a humiliating way.
Intimidate limits Hariyama's usefulness, and neither of the enemy leads are great targets for it to begin with. On the bright side, everything apart from Salamence dies to Water Spout, so ensuring safe entry for Octillery is high on the priority list. Moltres picking between Overheat and Sky Attack feels like a coinflip, and the gameplan changes depending on which one it chooses on the first turn. Salamence-2 is a Dragon Dance set that likes to boost its Speed in vain once Trick Room is set, a trait it shares with most of its Dragon brethren.
T1: Trick Room, Fake Out Salamence. Moltres charges up a Sky Attack.
Salamence holds a King's Rock and could pick Earthquake on the first turn, especially with its partner Moltres being immune to it. Thus, Fake Out is used to stop any potential flinches from occurring. Moltres decides to use Sky Attack this time, which usually makes the first couple of turns more predictable.
Sky Attack is an easy way to sacrifice Hariyama, or rather bring Octillery in safely. However, Close Combat's Defense drops are needed to guarantee the KO, or else Hariyama might survive the blow. A rain-boosted Water Spout will KO Salamence-2 after some "chip" damage from Fake Out and CC, so the odd-looking turn makes sense in the end.
...Of course, Moltres whiffs the 95% accurate Sky Attack the one time it needs to hit. Octillery is supposed to be on the field ready to finish the battle in two clicks, yet that plan has gone up in smoke. However, it's possible to regain some of the lost momentum with a risky double switch. The clock is ticking as Trick Room's five-turn timer begins to dwindle - the octopus has to come in no matter what.
T3: Double switch: Bronzong -> Octillery, and Hariyama -> Snorlax. Moltres charges up a second Sky Attack, Salamence uses DD again.
Rain Dance serves a secondary purpose in halving Overheat's potency, prompting a second Sky Attack from Moltres. Fortunately, Salamence stays true to its ways and spams Dragon Dance - an Outrage here could have been devastating. That being said, a rain-boosted Water Spout can KO Moltres with as little as 45% HP remaining, so there was some wiggle room.
T4: Water Spout, Double-Edge Moltres. Water Spout wipes the field.
Moltres-3 carries Bright Powder, so Double-Edge is used as insurance. It's strong enough to 2HKO even if Flame Body burns Snorlax after the first hit, and Wide Lens more or less negates Bright Powder. The backup plan wasn't needed in this battle, because Water Spout connected regardless of its lowered accuracy.
T5: Water Spout KOs the enemy Nidoqueen and Heracross.
An unceremonious finish for the opponents. Octillery gets to flex its power once again, scoring a full team kill with four KOs in two turns.
It's a Bright Powder Walrein lead, so you can probably guess where this is going. The win condition is simple: use Fake Out and Close Combat to deny any attempts at Sheer Cold. The other lead, Steelix-2, is not an immediate threat. Also, it's best to leave Ludicolo-2 for last, so that it can't spam Double Team freely.
T1: Trick Room, Fake Out Walrein. Fake Out misses, and Sheer Cold hits Hariyama. Steelix uses EQ, and Trick Room goes up. Send Octillery to replace Hariyama.
Welp, there goes the gameplan. It's not an automatic loss yet, but Hariyama going down early forces a riskier strategy. After calcing a few different ways of salvaging the battle, it's becoming increasingly apparent that Steelix-2 can no longer be ignored. Luckily, it has Sheer Force instead of Sturdy, so Water Spout should be strong enough to OHKO even after tanking an EQ. However, Steelix has a Speed tie with Octillery, so hard switching to the octopus is too dangerous. Following the age-old motto of "straightforward strategy is best", Octillery is brought in safely at the end of the turn. If Octillery wins the Speed tie, Steelix can be instantly removed from play, and it'll die to Water Spout even if it moves first. Of course, this approach translates to Walrein getting a second shot at Sheer Cold, but there's no way around that reality with Bronzong still on the field. Snorlax will be needed to overcome Walrein's bulk.
T2: Switch Bronzong -> Snorlax, Water Spout. Steelix wins the Speed tie and uses Earthquake. EQ crits Octillery, and Steelix survives. Walrein lands a Sheer Cold on Octillery. Bronzong is forced back in.
The disaster begins to unfold. In true worst-case fashion, Steelix not only wins the Speed tie, but manages to crit Octillery as well. This means that Water Spout is no longer a guaranteed KO. To make matters worse, Steelix is brought down to red, letting its Custap Berry grant it priority next turn. Sheer Cold connecting adds insult to injury, but the luxury of playing around it safely was long gone after the first turn's shenanigans. Still, not all hope is lost. EQ's friendly fire has lowered Walrein's HP to a point where Hammer Arm can KO it. Bronzong will survive the incoming Custap EQ, and Steelix can be finished off with Psychic.
T3: Hammer Arm Walrein, Psychic Steelix. Custap activates, and EQ crits Snorlax. Hammer Arm hits and KOs Walrein. Ludicolo and Kingdra enter the field.
Custap EQ crits Snorlax for good measure. The backline Kingdra-2 can be killed with a blessed combination of Psychic + Double-Edge, so maybe there's a chance...?
T4: Double-Edge and Psychic Kingdra. Kingdra faints, and Ludicolo KOs Bronzong with Scald.
Unfortunately, Ludicolo doesn't miss the opportunity to KO Bronzong. Snorlax is on 85 HP, which means it can tank one more Scald before fainting. The smallest chance of winning remains - if Ludicolo spams Double Team, Double-Edge can 2HKO with above-average rolls.
T5: Double-Edge. Ludicolo uses Leech Seed.
Alas, it wasn't meant to be. As Trick Room ends, so does the streak.
T6: Scald finishes off Snorlax. 'Twas nobly fought.
Nothing to be done, it's one of those battles where the AI decides you lose. To recap, here's a list of things that went wrong:
- A first-turn Fake Out miss, courtesy of Bright Powder
- Two back-to-back Sheer Cold hits
- Losing the 50/50 with the Speed tie
- Devastating crit on Octillery, letting Steelix survive and get a free Custap activation
- An EQ crit on Snorlax, which to be fair might not have mattered
The battle being this close despite all hell breaking loose speaks to the team's resiliency to hax. Had even one of the things listed above not happened, the match might have been salvageable. In the end, there is some comfort in knowing that that the loss was caused purely by hax. Losing to a silly misplay would have stung.
*********************
Overall, the team turned out solid, and their lucky run in the tower exceeded all expectations. Sadly, any obvious improvements to the sets are locked behind transfer-only content. It was fun to play with mons like Bronzong and Hariyama again, despite BDSP's limited roster.
This may sound unrelated, so don’t read too much into it, but could I get your thoughts on Acid Spray? As a move, I mean. Do you find it has desireable qualities that warrant further consideration, experimentation, prioritization, etc
This may sound unrelated, so don’t read too much into it, but could I get your thoughts on Acid Spray? As a move, I mean. Do you find it has desireable qualities that warrant further consideration, experimentation, prioritization, etc
Sure! I'll assume you mean in general, considering Lax doesn't learn Acid Spray (or Fake Tears).
One of the teams I had planned for BDSP featured a Power Weight Carnivine with Acid Spray as a means of supporting a backline Torkoal. Of course, that idea died the moment transfer-only moves were deemed impossible - I think that losing Earth Power (and Weather Ball) hurts Torkoal a lot. I considered Iron Ball Muk too, but not having access to elemental punches is really unfortunate. I feel like most of the "good" Acid Spray users aren't present in BDSP. Ferrothorn is missing, and same goes for mons like Scrafty and maybe Escavalier too...? Assault Vest isn't in the game either, which doesn't exactly help.
Fake Tears is more readily available, though. There's some potential users, like Clefable and the Eeveelutions. Not having Sylveon really hurts, Iron Ball + Fake Tears is a great set with the right special-based partner. Glaceon and Vap exist, but they too would like to run Weather Ball. Even the meme team of Torkoal + Copycat Iron Ball Glaceon suffers from the former's lack of Earth Power.
To answer the question, I think that the potential is there, but any teams I could come up with were denied by transfer moves not being allowed. I can imagine mons like After You Snorlax or Gravity Clefable finding success, so Acid Spray and Fake Tears working isn't unthinkable. Trick Room has some unexplored archetypes in BDSP, and I suppose Acid Spray & Fake Tears fit into that category. The other examples include Boomroom: while Silvally isn't allowed, there's some viable users in Lickilicky and Snorlax (lead Azelf probably doesn't do enough damage). They'd be relegated to the backline, but a simple team of Dusknoir/Hariyama/Lickilicky/Gardevoir sounds decent enough. Belly Drum is yet another thing that could be explored - its premier user, Snorlax, should have all the tools it needs. Then again, while Dusclops and Dusknoir are synergistic setters, neither of them has access to Ally Switch or Helping Hand in BDSP.
BDSP's lack of transfer moves feels like such a crucial factor in determining whether a team has potential or not. Even Bronzong's Rain Dance started off as a filler move, because Ally Switch and Speed Swap weren't available.
Hi! I'm looking to build a smeargle to use in the battle tower singles. Though Jumpman16 's set still sits in top 1 I have yet to see another singles team running him - are there other build/moveset/team ideas for including him?
I was able to get to 99 wins using a slightly modified version of my original Infernape/Garchomp/Suicune team. The main differences being Pressure on Suicune thanks to Bank and slightly modified EV spreads on Garchomp and Infernape.
Before going any further, a huge thanks to the creators of the Battle Facilities Damage Calculator, Trainer + Pokémon lookup spreadsheet, and serebii's bdsp battle tower trainer catalogue. I would not have gotten this far without them.
As a general suggestion to anyone trying to get a long streak with any team
1) Keep notes on every matchup you face. Ideally, you want to come up with a strategy that guarantees a win 90%+ of the time. Do this in a google doc, using a chrome extension, or...whatever works for you.
2) When a battle starts, pull up set info on the trainer you are facing as well as any notes you have for the matchup. If you already have a battle plan, execute it. Update your strategy as needed as you identify weaknesses with it.
3) If don't have a battle plan for a matchup, plan out the entire battle -- or, as much of it as you can -- before turn 1. If you have a win condition, how can you guarantee it? If your opponent has a win condition, how can you deny it? Keep note if the AI makes an unusual play such as hard-switching.
My previous iteration of the team had 0 EVs in SpAtk and 196 EVs in Atk. Infernape's attacking stats are *just* low enough that you basically have to pick your poison. In order to guarantee some kills with Flamethrower, you have to give up some guaranteed kills with Close Combat, and vice-versa. I've gone with a more special attacking spread because I haven't run into a matchup where my odds of winning really diminish without a guaranteed KO from Close Combat. Some kills we guarantee with this SpAtk investment are Tangrowth-2, Meganium-3, Leafeon-2, Crobat-2, Skarmory-4. 90% of the time you click Fake Out turn 1. The only reasons you don't is if the opponent has an ability like Effect Spore or Static and you can't afford for Infernape to take a status effect or if the opponent has Inner Focus. My personal favorite example of not clicking Fake Out turn 1 is facing Crobat-2 lead. You click Flamethrower. Crobat will go for Brave Bird, bringing you down to Sash and putting you in Blaze range which gives you just enough of a boost to guarantee a turn 1 KO after Brave Bird recoil damage.
I switched to 196 SpDef investment from full attack investment after about win 50. I had the thought to make the change relatively early on because I wanted an emergency answer to Latios-5. 196 SpDef investment guarantees survival facing a -2 Draco Meteor from Latios-5. After many games of running calcs both ways for Garchomp's damage, I didn't find a matchup where the extra power is actually needed. That's not to say I won't run into one. The spread also guarantees survival against Blizzard from Bastiodon-2. Iron Head might not be necessary, but there's been a couple times where I have switched out Suicune into Garchomp facing Togekiss-3 on the predicted Grass Knot, SD and swept.
20 Speed EVs are to speed creep all Cress and other Suicune variants. Ideally you would have a Suicune with a 0IV in Atk. Mine is 31 :/. Also, I actually think a more accurate EV spread is 204 HP / 244 Def / 4 SpA / 36 SpD / 20 Spe to deal with a very unique circumstance against Beauty Noelle. Pressure is soooo much better than Inner Focus for (at least) four reasons. First, with fewer PP, the AI has fewer opportunities to hax you. Second, stall wars end quicker, meaning you will spend less time getting higher streaks. Third, stall wars are more forgiving to small mistakes in pp management. Fourth, you can beat Suicune-3, Suicune-4, and Suicune-7 1v1.
Suicune-2, Suicune-3, Suicune-4, and Suicune-7 all have Calm Mind and Rest. The AI will burn through its attack pp once it is at +6 (and often it will do so earlier). For this reason, a viable strategy is to make sure you keep at least one more pokemon alive with your Suicune. Once the opposing Suicune is out of attacking moves, the AI will switch pokemon if the AI has other pokemon to switch to. Regardless, facing Suicune that is out of attacking moves, you can switch stall the rest of the opposing Suicune's pp or switch to Garchomp and set up to +6 and Outrage. If this is not possible and you know the endgame will result in a 1-1, your Suicune against theirs, you need to play the stall war very precisely. As far as I can tell, this is only unavoidable against Ace Trainer Donnie when he has Garchomp-3, Suicune-4, and Latios-5. In this situation, we don't want to be any more than 1 calm mind ahead of our opponent. We want to Calm Mind if we are at the same boost level as the opposing Suicune (or below). Otherwise, we attack (with Scald if we can. don't want to freeze the opponent) if the Suicune is awake, or rest if the opposing suicune is asleep. This means that we will burn through pp at the exact same rate as the opponent. However, we have the advantage that the opponent will burn through their pp 2 turns quicker because their chesto berry use means they will be asleep for 2 fewer turns than us.
Against most trainers, there's an obvious win condition: get Garchomp/Suicune in, set up, and sweep. Sometimes, if you're really lucky, Infernape just sweeps from turn 1. Common threats are:
anything that outruns Infernape and Garchomp, including opposing max speed Infernape and Garchomp (relying on speed ties is a low-percentage play we want to avoid). Scarf Users (Salamence-4 comes to mind), Kingdra in Rain, Gengar, Alakazam, Lati@s, Crobat, Raikou. Though, some of these pokemon don't always outrun Infernape and Garchomp.
Cresselia and Latias variants with Calm Mind + Psyshock or Stored Power (specifically Cresselia-1, Cresselia-7, Cresselia-8, Cresselia-9, and Latias 5. Though Cresselia-1 only shows up in the normal tier boss fight against Palmer and Latias is OHKOd by Outrage from Garchomp).
CM Rest Suicune has to be played around carefully. See the Suicune set commentary for how to do this.
Non-lead Focus Sash users. Lead Focus Sash users immediately have their sash broken by Infernape.
Hax. Specifically Brightpowder and OHKO moves. Often, facing a lead with Brightpowder it's a better play to hard switch Infernape turn 1 than to go for chip damage with Fake Out U-Turn in order to preserve Infernape's Focus Sash.
I lost against Kelton facing Lickilicky lead. Specifically, I lost to the team that has Milotic and Breloom-3 in the back. I got Suicune in on Milotic and was trying to have Suicune die in front of Milotic. Unfortunately, the AI Switched in Breloom as I went for Scald, did not get burned, and proceeded to sweep. After a long time thinking about this matchup, I came up with a strategy that works as long as we avoid getting frozen on a switch from Garchomp -> Infernape with Ice Beam. This 90% success rate is the best I could do. The full strategy for this matchup is the most complicated I have had to come up with.
Turn 1, we need to preserve Infernape at at least 54% health (preferably full health) to be able to come in on Breloom-5 if it's waiting in the wings to Fake Out -> Flamethrower to KO it (Breloom will Mach Punch).
Because we don't know which Lickilicky set we face, and we can't Fake Out -> CC for a guaranteed kill (even with full Atk investment), we have to fake out -> U-Turn on the Lickilicky in case Breloom-5 is in the wings. However, this creates a problem with the Breloom-3 team. If Breloom-3 ever lands on the field in front of Suicune, we lose. So, if we face the special variant of Lickilicky, we need to deny the opponent the ability to bring Breloom in on Suicune.
Turn 1) Fake Out
Turn 2) U-Turn into Garchomp
Turn 3a) if Lickilicky used a special move hard switch back into Infernape on a predicted Ice beam
Turn 3b) If Lickilicky has clicked a physical move, it probably clicked explosion, Garchomp dies, Infernape comes in and wins the game. If it clicked Knock Off or Gyro Ball, click SD then Outrage. If it clicked Power Whip switch back into Infernape (assuming no crits, it lives a hit from Lickilicky + Mach Punch from Breloom). From here, Fake Out > U-Turn back into Garchomp. If Garchomp is still alive, click Outrage. Otherwise, there has now been enough chip on Lickilicky to guarantee a KO with Fake Out -> Close Combat. Once Lickilicky is down, just remember to play around Breloom's sash with switch to Suicune
Turn 4a) Fake Out Lickilicky
Turn 5a) Close Combat on Lickilicky (this is a guaranteed KO with Fake Out and U-Turn chip)
Turn 6a.1 [Milotic]) With Milotic on the field, hard switch to Garchomp.
Turn 6a.2 [Breloom]) WIth Breloom on the field, click Flamethrower, You now can't lose this game because Suicune just beats Milotic
Turn 7a.1) Click Outrage (Garchomp should go down to Milotic Ice Beam, but not before dealing crippling damage to Milotic)
Turn 8a.1) Fake Out on Milotic
Turn 9a.1) Close Combat on Milotic
Turn 10a.1) Breloom is back on the field. Kill it with Flamethrower.
Tough Matchup Examples
You are really at the mercy of the AI here. As far as I can a worst case scenario, you can grind out a coin flip. We don't need Infernape for either win-condition
Turn 1) Fake Out
Turn 2) U-Turn into Garchomp (AI usually clicks CM here)
Turn 3) Swords Dance
Turn 4a [Togekiss]) If Togekiss has switched in, click Iron Head for a KO. If Ninetales is in the back, Garchomp sweeps from here. If Latios is in the back, sack Garchomp to it if/when it comes in to set up to +4 with Suicune
Turn 4b [Latias]) If Latias has stayed in, click Outrage because I think this means she has Ninetales in the back?
Turn 4c [Ninetales]) Click Earthquake for the KO. You sweep from here :D
Turn 4d [Latios]) If Latios has switched in, you need to sack Garchomp and play for a win with Suicune
Playing for a win w/ Suicune against Latios: The idea is to come in after Latios used one Draco Meteor. From here, set up 4 Calm Minds. You need to be +4 to kill Togekiss on the switch which is why we don't bother to get chip on it with Infernape, because this would leave us at +3. After this, Latios will have to use struggle, so it will switch. Click Ice Beam on the switch. Pray she switched to Togekiss because you are all but guaranteed to win if she did. If she switched to Latias, you just keep pressing Ice Beam, but it's a coin flip because. of Super Luck + Scope Lens
This Lapras and Gengar combination is really scary. We need to be wary of the fact that Suicune doesn't reliably beat Lapras because of Water Absorb, a quadruple resistance to Ice Beam, and Sheer Cold. If Suicune is in against Gengar, a critical hit or SpDef drop from Shadow ball at the wrong time both put Suicune in a precarious situation. Also, Suicune needs to stall out Destiny Bond pp before it goes for the kill. But, if it is in against Gengar, it also needs to do damage to it to break sash. Gengar has a high chance to 2HKO Garchomp with Dazzling Gleam.
With all that said, my best plan is
Turn 1) Fake Out
Turn 2) Flamethrower. We can't KO Lapras from this range without a crit with Close Combat and the AI might switch in Gengar after seeing Fake Out. So, we need a strategy that addresses the AIs switch strategy and their stay-in strategy. Flamethrower chip on Lapras always puts it in range of Close Combat (even if Flamethrower crits and activates Sitrus Berry. Close Combat does 75% minimum.)
Turn 3a [Gengar]) Switch to Suicune. We need Infernape healthy to deal with Lapras if it comes back in after we kill Gengar. Garchomp can't OHKO it unboosted without a crit.
Turn 3b [Lapras]) Close Combat. Kill Lapras, we are at 1HP
Turn 4a) Scald. This is has a 97.6% chance to KO. (99.2% of 8 EVs are invested in SpAtk). If this fails to take down Gengar, you are in danger. You need to click Ice Beam and pray you are not knocked out by Gengar
Turn 4b.1 [Gengar]) Stay in and click Flamethrower. Bring in Suicune when you die.
Turn 4b.2 [Miltank]) U-Turn into Suicune (keeping a 1HP pokemon in the back guarantees we don't lose to Destiny Bond + hax.
Turn 5a.1 [Lapras]) Click Ice Beam, die to Thunderbolt, bring in Infernape
Turn 5a.2 [Miltank]) Switch to Garchomp
Turn 5b.1) Calm Mind into 2 Scalds for the KO on Gengar. If you get haxed here, you probably lose because of Destiny Bond shenanigans
Turn 5b.2) set up calm minds and sweep
Turn 6a.1) Close Combat on Lapras, Close Combat on Miltank when it comes in. Finish w/ Chomp
Turn 6a.2) SD twice with Garchomp, Click Outrage.
We have just enough resources to win this game. We Fake Out, then double Close Combat to kill Regigigas. Even with 1 turn of protect stalling, this is a guaranteed 2HKO.
Turn 1) Fake Out
Turn 2) Close Combat
Turn 3) Close Combat
Turn 4a [Salamence]) Switch to Garchomp. Garchomp survives two hits from any move that isn't Outrage. If Salamence Outrages, it will take Rough Skin chip, which puts it in range of a guaranteed KO from Suicune's Ice Beam. Then Suicune will go down to Porygon-Z. If Salamence does not Outrage, Garchomp kills Salamence with its own Outrage, then dies to Porygon-Z. Regardless of which pokemon ends up going down to Porygon-Z, you have Infernape whose Close Combat OHKOs Porygon-Z from full.
Turn 4b [Porygon-Z] Close Combat, then same strat as above for handling Salamence
Hello once again! I'm here to report one final streak of 774 wins in Master Class Doubles. Pretty much the same as my Cacturne team except no Cacturne! After going through another failed attempt with the cactus dude, I felt that it wasn't pulling its weight as much as I originally thought. The team is heavily based on Sincci's 840 team. Without further ado, let's once again meet the team.
So like I said, there really isn't any changes made to most of the team since the last attempt. Bronzong is Bronzong. I've been considering it one of the best Trick Room setters for BDSP Tower during this run. It always felt much better to me than Dusknoir. Of course, it's good when next to the amazing Fake Out support that is Hariyama, but it also felt stronger than Dusknoir. It has a more useful speed tier and can actually OHKO some stuff with its STABs and it can screw over Torkoal2 after setting Trick Room. Heatproof is great for strong Fire attacks, as it allows Bronzong to shrug most of them off. The strongest one, aside from Torkoal2's Eruption, would probably be Moltres3's Overheat: 252+ SpA Moltres Overheat vs. 236 HP / 148+ SpD Heatproof Bronzong: 84-102 (48.8 - 59.3%) -- 97.3% chance to 2HKO. As Sincci has stated before, the spread allows Bronzong to live Gengar3's Shadow Ball and Absol3's Night Slash. There are some attacks that can threaten Bronzong with crits, such as random Earthquakes from Barry / Palmer1's Rhyperior or Earth Powers from Nidoking2.
Rain Dance is great for shutting down some Fire types and sometimes can lock some stuff in on a turn of Solar Beam if Gastrodon is out. It also completely shuts down Torkoal2 on Lionel / Abbey and Ellis / Irene's rosters. It also helps Gastro secure some nice KOs with Scald if they are just out of range. The combo of Gyro Ball+Psychic for STAB is also great for helping the rest of the team secure some nice 2HKOs on bulky stuff. Bronzong isn't too strong on its own, but it can also OHKO stuff like Alakazam, Froslass, Toxicroak thanks to this STAB combo. Like I said in my Cacturne post, I had Heavy Slam on Bronzy before Gyro Ball. I haven't really looked back on it as it was definitely inferior to Gyro Ball. Sincci makes an excellent Gyro Ball vs Heavy Slam comparison in their post.
Hariyama @ Flame Orb
Ability: Guts
Level: 50
EVs: 252 Atk / 164 Def / 92 SpD
IVs: 31/31/31/xx/31/0
Brave Nature
- Fake Out
- Close Combat
- Knock Off
- Heavy Slam
Like Bronzong, Hariyama received no changes. There really wasn't a need to change it as the four moves it has are honestly perfect for it. Fake Out helps Bronzong set Trick Room and Guts-boosted Close Combat is basically a nuke. Also being able to remove problematic items such as Bright Powder, Lax Incense, Focus Band, and Quick Claw with Knock Off is amazing, as always. Great for opposing Psychics and Ghosts too. Heavy Slam can be considered the most "filler" move here as there isn't many Fairy-types that exist in this Battle Tower. It's still good for some of the smaller stuff in case I don't want to lower Hariyama's Defenses with Close Combat. With how heavy Hari is, Heavy Slam can also consistently reach very high power. The only major downside to Hariyama is its speed. 49 is great, and definitely better in this Tower than in Gen 7's Tree, but it still falls short of some stuff such as Rhydon2, Forretress2 and 3, Bronzong2 and 3, and Torkoal2. Bronzong's Rain Dance helps vs Torkoal although Hariyama can still take a lot of damage from Eruption in Rain after a Close Combat or two.
Gastrodon @ Life Orb
Ability: Storm Drain
Level: 50
EVs: 244 HP / 252 SpA / 12 SpD
IVs: 31/xx/31/31/31/0
Quiet Nature
- Scald
- Earth Power
- Ice Beam
- Protect
This is how my team differs from Sincci's. Not knocking Octillery as it definitely is an amazing sweeper thanks to Water Spout + its amazing coverage. However, Gastrodon provides a very useful ability in Storm Drain. One thing I notice when playing BDSP Tower, is there are a lot of strong Water-types that can pack a punch. Plus, Suicune exists to bring pain thanks to its bulk and ability to potentially take multiple turns to KO. With Storm Drain, Gastro can fish for usually one boost from a random Scald or Hydro Pump and just go to town. Gastro's own Scald isn't too strong but with the support of Bronzong's Rain Dance, it gets pretty powerful and has a nice 30% chance to burn, which is great for Focus Band Pokemon that like to cause pain (except for Rapidash2 and 3). Earth Power is the main STAB that is spammed on many of the stuff that isn't immune to Ground. It's good damage and at +1, can OHKO or 2HKO most stuff not named Suicune3. Ice Beam is great coverage for the Dragon and Flying-types that exist in this Tower as well. Most notably, it is used to take care of Barry / Palmer2's Choice Band Dragonite as that thing HURTS and the rest of the team has trouble dealing with it. Protect was kept to help stall out turns if I need to set Trick Room again or to block potential Fake Outs (looking at you, Infernape7).
And finally, Snorlax. As I decided to scrap Cacturne, I needed to find something new to put in its place, However, I decided to once again look to Sincci and went with Snorlax. Lax has amazing Speed for Trick Room, and it's really fat. It can take a plethora of hits. Thick Fat also allows Snorlax to take less damage from Fire and Ice-type attacks. I decided to go with the exact set Sincci use for their Lax just like with Bronzong and Hariyama. I originally wanted to slap Protect on here somewhere and had planned to remove Hammer Arm first. However, I quickly found out Snorlax actually needs all 4 of these moves to function well as they all hold their own purpose - Hammer Arm for dealing with Fighting-weaks, Crunch for Ghosts that Snorlax can't hit too well, High Horsepower for Ground coverage, and Double-Edge for that powerful Normal STAB.
The unfortunate thing about Snorlax, however, is its lack of power. It's rare to see Snorlax get a straight-up OHKO. It's great for getting things in range for the rest of the team though. I'd also like to point out how much of a help Wide Lens has been. Not only does it increase High Horsepower and Hammer Arm's accuracy, but it also helps vs Bright Powder and Lax Incense holders as well as Double Team spammers. Snorlax can have a bit of trouble vs the sets that stack up multiple Double Teams, but having that bit of extra accuracy from Wide Lens can help in some cases.
Gengar3 / Crobat2 / Milotic3 / Pinsir3
In this fight, Hariyama always dies. There isn't really anything to stop it as Crobat always goes for the Brave Bird in that slot. Gastrodon and Snorlax don't really want to take that hit too well, plus there's always the chance of Gengar also using Hypnosis on that slot which can be scary too. In addition to Brave Bird OHKOing Hariyama, Gengar's Shadow Ball has a 6.3% chance to OHKO Bronzong on a crit. This has never happened when fighting these two but I also only encountered them about 6 times during this streak. Gengar's Bright Powder also means Snorlax's Crunch has a 99% chance of hitting. However, outside of the leads, the rest of the team isn't bad at all.
Lucario2 / Lopunny2 / Victreebel3 / Arcanine2
Lucario is the worst. It has Inner Focus which means it can't be flinched by Fake Out, and it carries Dark Pulse which can flinch Bronzong. Luckily, you'll have at least two chances to set Trick Room in front of it since Dark Pulse is a 3HKO. The rest of the team isn't so bad. Lopunny doesn't really use Charm to neuter Hariyama so that's always a plus.
Registeel4 / Porygon-Z2 / Gyarados2 / Suicune4
Luckily, with the way Bronzong and Hariyama are EV'd, P-Z always gets an Attack boost from Download. Registeel, however, sucks. Quick Claw Swagger will always be the absolute worst. I used to Fake Out Porygon in this matchup but that gave Registeel the option to Swagger Hariyama. While Hariyama appreciates the +2 Attack, it definitely does not appreciate being confused. It takes a decent chunk from self hits which can cause problems in the future. Porygon's Bright Powder can also cause Close Combat and even Snorlax's Hammer Arm to miss quite a bit. Gyarados is more of an annoyance as the team doesn't really have a fast way of dealing with it. However, Gastro can at least bait out a Waterfall from it if it chooses to use that while the slug is out.
Slowbro2 / Nidoking2 / Swampert3 / Regice3
Spoiler alert, these guys are the worst. You'll find out why later in the post. Anyway, Nidoking having Wise Glasses along with Sheer Force Earth Power means it has to be the Fake Out target here. This gives Slowbro the chance to whatever it wants. Yawn is whatever as Hariyama will get burned by Flame Orb and Bronzong has a Lum Berry. Zen Headbutt can be annoying as it 2HKOs Hariyama. It very rarely goes for two in a row though. The fight becomes so much harder if Hariyama does go down early though. Regice is hard to break with Snorlax and Gastrodon, and Swampert can shrug off some attacks thanks to the Sitrus Berry. It also has Curse to make itself slower, which is obviously an issue in Trick Room. Slowbro also has a thing to Yawn everything not named Hariyama after turn 1 which is a major headache.
Ludicolo2 / Scizor2 / Lapras2 / Gliscor2
Man, I hate these two. This is one of the few duos where I don't lead with Fake Out, as it's much more important to try and Knock Off Scizor's Bright Powder. This would put it in range of Close Combat, as the usual play after turn 1 is to switch Bronzong out to Gastrodon to try and soak up a potential Scald from Ludicolo. Gastro also easily handles the Gliscor in the back. Ludicolo usually likes to spam Double Team but can also be a minor annoyance with Leech Seed and Substitute. It easily stalls out TR turns thanks to Double Team stacking. Pray you take it out before Leech Seed / Burn take out Hariyama or you're going to have a bad time vs Lapras.
Mamoswine2 / Gengar3 / Tauros3 / Regirock3
Mamoswine is the only Fake Out target here as Gengar is immune. However, Gengar sometimes likes to try and put Hariyama to sleep which is such a pain in the ass as it forces me to switch it out and risk having something get hit by Mamoswine's Fissure. Double Team is also pretty bad. Thankfully, Gengar likes to use Shadow Ball into Bronzong a lot but like with Nadia / Dalvin, the risk of a crit OHKOing Bronzong is still there, albeit a low chance.
Rapidash2 / Zapdos3 / Magnezone2 / Skuntank2
Zapdos has a thing for hitting Bronzong with U-turn which can cause a potential King's Rock flinch. Rapidash also has the wonderful combo of Horn Drill+Focus Band. I usually like to hit it with Knock Off turn 2 to easily remove it. Of course, it can still live the Knock Off with Focus Band but nothing you can really do with that. Skuntank also has a nice thing for spamming Double Team if it's not handled quickly. Finally, we have Magnezone which somehow has Body Press, but of course Chester has the ability to use it because he's a dirty cheater. Having to hit it twice through Bright Powder can be a bit of a pain in the ass. High Horsepower is 94% accurate thanks to Bright Powder+Wide Lens, while the 100% accurate attacks drop to 90%.
Walrein2 / Steelix2 / Kingdra2 / Ludicolo2
Our good pal, Walrein. You might remember this duo causing Sincci's loss. Well, they are for sure a threat. Fake Out is 90% accurate on Walrein thanks to Bright Powder, and Close Combat is also 90%. But it is the most consistent way of dealing with Walrein as the rest of the team needs multiple turns of dealing with it. Outside of Walrein, the rest of the team isn't so bad. Our pal, Ludicolo2, returns with this duo but since it's backline, it isn't an issue. Steelix having Sheer Force and not Sturdy is also a plus as it means Gastro can freely target it with Earth Power and not have to worry about the stupid Custap Berry.
Zapdos3 / Whiscash2 / Weezing2 / Altaria2
Zapdos returns with its stupid King's Rock U-turn. Can't really Fake Out Zapdos here either as Whiscash packs Fissure.... which is really the only scary thing about this set. The rest of the set is pretty trash: Spark, Amnesia, and Rest. Fake Out+Close Combat at least takes out Whiscash though so as long as Bronzong isn't flinched and gets TR, this duo isn't too bad.
Jolteon2 / Granbull3 / Froslass3 / Espeon2
Thunder Wave and Flash on Jolteon, Quick Claw Granbull, and Espeon and Froslass both holding Bright Powder and Lax Incense respectively. These guys suck. Jolteon very rarely goes for Flash t1 at least, but it can be a pain if it does. Granbull is, thankfully, taken out by Guts Heavy Slam after Intimidate but it can still cause random flinches with Quick Claw Ice Fang. Espeon and Froslass both possess one screen each and will use them if you miss.
Meganium3 / Weezing3 / Walrein2 / Skarmory2
This duo is definitely the most threatening duo for this team. Meganium packs dual screens with Light Clay, and is backed up by our old pal, Walrein. Weezing is a very annoying Quick Claw set that loves to either flinch Bronzong with Quick Claw Dark Pulse, or poison Hariyama t1 with Sludge Bomb. It also has Destiny Bond on top of that. Skarmory isn't too bad here but it does have both Double Team and Sand Attack to make things difficult. A lot of the time, this fight can be decided on if Weezing decides to spare Hariyama for two turns and what screen Meganium sets. Luckily, it's taken out by Close Combat+Ice Beam no matter what screen is up, but if Hariyama is lost after bringing Gastro in, you have to gamble on if it will set the other screen or Leaf Storm Gastro. These guys are a headache and a half.
Staraptor3 / Torterra3 / Rhydon2 / Blastoise3
Oh, Mikel, why do you hurt me so? Mikel has another dangerous partner in Lyle thanks to Torterra3. I absolutely hate this thing. Bright Powder+Double Team spam is one thing, but it also has Frenzy Plant and Hyper Beam. Normally, this wouldn't be an issue and would call for an easy Knock Off on turn 1, right? Wrong. Staraptor exists and will Brave Bird the fuck out of Hariyama if not flinched turn 1. This gives Torterra the option to do what it wants, which is usually Leech Seed or Double Team. Torterra also likes to sometimes Frenzy Plant Bronzong to show that it's not afraid to hit Gastro on the switch. This thing has no fears. Trying to hit it through multiple Double Teams+Bright Powder is such a pain in the ass that it sometimes makes me want to throw my Switch across the room. I hate this thing and I hate whoever at ILCA is responsible for making this set. You are my eternal enemy.
Aggron2 / Ambipom3 / Quagsire3 / Golem2
Not so much a threat but the possibility of Ambipom using Fake Out on Bronzong can be frustrating. Fake Out+Thief+Earthquake can potentially KO Bronzong which makes life difficult if you're unable to set Trick Room. Luckily, I've only ever seen it use Fake Out on Hariyama. Aggron can 2HKO Bronzong with Earthquake+Payback but I usually let that happen as this team isn't so bad once Trick Room is up and Gastro is out to take Quagsire's Scald.
Slowking2 / Whiscash2 / Lanturn3 / Hippowdon2
Whiscash returns but is now joined by Slowking, who will KO Hariyama with two Psychics. You can't really Fake Out Slowking either as Whiscash has a high chance of targeting Bronzong with Fissure. Hippowdon also has a really annoying Yawn that it likes to use quite a bit on Gastrodon and Snorlax.
Staraptor2 / Togekiss2 / Raikou3 / Mismagius3
Faking out Togekiss here means Staraptor has a high chance of just killing Hariyama with Brave Bird. Sometimes, it likes to use Endure but that's not always guaranteed. Togekiss has Thunder Wave, Substitute, Double Team and max physical bulk which makes it a pain in the ass to take out. Staraptor's Intimidate also means Heavy Slam+Gyro Ball doesn't 2HKO all the time. As mentioned, this Staraptor likes to Endure quite a bit. Usually after it Brave Birds so Gastrodon can't take it out all the time guaranteed. If Staraptor did KO Hari t1, Scald has a chance of burning it at least. Nightmare duo.
Bellossom2 / Torkoal2 / Lapras3 / Cresselia6 OR Bellossom2 / Torkoal2 / Rhyperior4 / Cresselia6
Both teams here are pretty dangerous. Sincci and I managed to come up with a good way to deal with these two which requires switching out Hariyama to Gastrodon t2 to preserve it since Lapras is painful to fight without it. This strat did not ever get to be used as the only other time I fought Lionel / Abbey was when they had Rhyperior and not Lapras. Anyway, these are one of the big reasons why Bronzong has Rain Dance. Fuck Torkoal.
Empoleon5 / Rhyperior10 / Staraptor5 / Heatran12
Normally, Barry and Palmer aren't too bad. Team 1, however, can cause a very minor problem. Rhyperior is the target to Fake Out here as Expert Belt EQ can OHKO Bronzong on a crit. However, Empoleon knows Waterfall and sometimes likes to use it on Bronzong, which could cause a flinch. This has happened a handful of times during this streak but thankfully, Rhyperior was too stupid to EQ after but it can definitely happen. Other than that, they're not so bad. Empoleon also likes to use Drill Peck and Protect which are both non-issues.
No actual recordings once again but I do have most of the scary battles written down here.
Articuno2 / Blaziken3 / Golduck3 / Hypno3
t1: fake out blaziken. articuno ice beams hariyama and freezes yama. trick room up.
t2: bronzong kos blaziken with psychic. hariyama stays frozen. articuno ice beams hariyama again.
t3: hypno comes in. bronzong hits articuno with gyro ball. hariyama stays frozen. articuno kos hari with ice beam. golduck hits bronzong with zen headbutt.
t4: snorlax sent out. double-edge+gyro ball ko hypno. articuno uses rest and wakes up with chesto berry.
t5: double-edge+gyro ball ko articuno.
t6: trick room expires. golduck comes in. golduck hits snorlax with cross chop, snorlax survives with 38HP. double-edge+psychic kos golduck.
As you can guess, this battle ended up being responsible in changing how I approach these two. Flinching anything that's next to something that can freeze you is always risky. Hariyama getting frozen means I have to gamble with a 10% chance to thaw or waste a turn Scalding myself. Anyway, Hari remained frozen until its demise at the hands of Hypno. Snorlax also not getting crit by Cross Chop was damn good.
Ursaring3 / Exeggutor2 / Rhydon3 / Infernape3
t1: fake out ursaring, exeggutor worry seeds hariyama. trick room up
t2: psychic+close combat still ko ursaring (phew) and now exeggutor leech seeds hariyama. please kill me.
t3: rhydon comes in. psychic+close combat bring rhydon to red. rhydon kos both with EQ, crits bronzong exeggutor whiffs psychic.
t4: gastro/snorlax sent out. EQ chip from rhydon allows gastro to ko eggy with ice beam. snorlax high horsepower finishes off rhydon
t5: infernape comes in, gets ko'd by high horsepower
The Worry Seed caught me off-guard. I don't think I've seen it use it again after this fight. Losing Guts was pretty bad as Hariyama was unable to take out Rhydon before it went down. Plus, I definitely underestimated how strong Rhydon was and to see it KO Bronzong was a little tilting. But it's ok, as Gastrodon / Snorlax managed to save the day.
Politoed4 / Kingdra4 / Zapdos7 / Scizor5
t1: fake out kingdra. politoed hits hariyama with hydro pump. trick room up.
t2: switch bronzong to gastrodon. politoed protects. close combat kos kingdra.
t3: scizor comes in. politoed uses helping hand. scizor kos hariyama with quick attack. scald leaves scizor and burns.
t4: snorlax sent out. politoed uses helping hand. scizor hits gastro with quick attack and crits. snorlax kos scizor with high horsepower. gastro hits toed with earth power.
t5: snorlax hits toed with double-edge, toed heals with aguav. earth power leaves it at red.
t6: rain and trick room expire. politoed uses hydro pump but gastro catches with storm drain. gastro kos toed with earth power.
t7: zapdos comes in. protect gastro. zapdos whiffs hurricane on gastro. snorlax double-edge does ~50% to zapdos. zapdos heals with sitrus berry.
t8: zapdos lands hurricane and kos gastro. snorlax hits zapdos with double-edge, leaves it at red.
t9: bronzong back in. zapdos hits snorlax with thunder. snorlax whiffs high horsepower thanks to bad prediction. trick room up.
t10: snorlax kos zapdos with double-edge.
Losing Hariyama early to Quick Attack was pretty bad. I usually need Hariyama to remove that Aguav Berry on Politoed. It's rare to see Politoed actually attack t1 as it's usually any of the other attacks it has. Ultimately, once Gastro was out, this fight wasn't absolutely horrible. I also tried to predict a Roost from Zapdos as you can see on turn 9. I always get the biggest galaxy brain feel when I do get that predict right but didn't this time. Of course, that didn't really have an impact on the fight.
Hariyama2 / Registeel1 / Honchkrow2 / Latias3[/B]
t1: fake out opposing hariyama. registeel hits hari with flash cannnon. trick room up.
t2: opposing hari gets quick claw and hits hari with brick break. psychic+close combat kos hari. registeel uses curse.
t3: honchkrow comes in. switch bronzong to snorlax. registeel kos hariyama with flash cannon. honchkrow hits snorlax with aerial ace.
t4: gastrodon sent out. double-edge kos honchkrow. gastro scalds registeel and burns. registeel uses curse again.
t5: snorlax high horsepower does pitiful damage. registeel curses one more time and dies to earth power.
t6: trick room expires. latias comes out. latias hits lax with psychic, survive on 42HP. ice beam+crunch both connect and kos latias.
It's always a little risky leaving Tasha's side last, as Bright Powder Latias is a bit of a threat. However, the Registeel in front of it is normally not so bad. Enemy Hariyama getting the Quick Claw+Registeel getting a Flash Cannon KO on the next turn kinda hurt and threw me off for the rest of the battle.
Pinsir2 / Drapion2 / Dugtrio3 / Breloom2
t1: fake out pinsir. drapion hits bronzong with payback. trick room up.
t2: gyro ball hits pinsir but heavy slam misses. pinsir uses bulk up. drapion uses double team.
t3: switch bronzong out to gastro. hariyama lands heavy slam but does not ko. pinsir kos gastro with crit x-scissor. drapion uses double team again.
t4: snorlax sent out. crunch kos pinsir. hariyama misses knock off on drapion. drapion uses double team again.
t5: dugtrio comes out. snorlax lands high horsepower on drapion. hariyama kos dugtrio with heavy slam. drapion uses roar on hariyama, bronzong dragged out.
t6: trick room expires. drapion hits bronzong with payback. snorlax lands high horsepower on drapion. trick room up.
t7: switch bronzong out to hariyama. high horsepower lands again and kos drapion.
t8: breloom comes out. double-edge+close combat kos breloom before it could focus punch.
GOD, I hate Bright Powder and Double Team. I also hate crits! Gastro dying to a crit +1 X-Scissor sucked as it meant I didn't have an easy way of taking out Drapion anymore. Luckily, it didn't try to set Toxic Spikes. Finally able to land attacks on Drapion was a godsend and I'm happy I was able to muscle past this fight. It was truly awful.
Meganium3 / Weezing3 / Walrein2 / Skarmory2
t1: fake out meganium. weezing hits bronzong with fire blast. trick room up.
t2: switch bronzong out to gastrodon. hariyama knocks off weezing's quick claw. weezing hits gastro with dark pulse. meganium sets light screen.
t3: ice beam crits meganium and kos. close combat leaves weezing at red. weezing hits hari with sludge bomb.
t4: walrein comes in. gastro finishes off weezing with scald. hari CC kos walrein.
t5: skarmory comes in. scald+CC kos skarmory.
This is the ideal fight with Tyrell / Mikel. Obviously not a bad fight, just figured I'd highlight it since every other encounter I had with these two was just awful. Ice Beam critting through the Light Screen was awesome and I will eternally love Gastrodon for that.
Ludicolo2 / Scizor2 / Lapras2 / Gliscor2
t1: ludicolo scalds hariyama. scizor double teams. hariyama misses knock off on scizor. trick room up.
t2: switch bronzong to gastro. hariyama misses koff on scizor again, scizor DTs again, ludicolo also DTs.
t3: earth power+CC both connect and ko scizor. ludicolo double teams again.
t4: gliscor comes out and dies to scald. hariyama misses koff on ludi. ludi DTs.
t5: gastro misses ice beam, hariyama lands CC on ludi. ludicolo DTs.
t6: trick room expires. switch gastro back out to bronzong. ludi scalds hari, lives with 36 HP. hari kos ludi with CC.
t7: lapras comes out. lapras kos hariyama with sheer cold. trick room up.
t8: snorlax sent out. hammer arm+psychic to lapras. lapras misses snorlax with sheer cold.
t9: hammer arm finishes off lapras.
Missing Scizor twice forced me to change my gameplan a little vs these two and thankfully, it paid off quite well. The most annoying thing about this fight was Ludicolo using Scald again just as I switched Gastro back out to Bronzong. Lapras targeting the weakened Hariyama with Sheer Cold was also good as it allowed me to get another Trick Room up. Phew.
Abomasnow4 / Bronzong3 / Torkoal2 / Rotom-Wash2
t1: fake out abomasnow. enemy bronzong hits bronzong with body press. trick room up.
t2: abomasnow protects. psychic+knock off fail to ko enemy bronzong. trick room reset.
t3: enemy bronzong faints to hail, rotom comes in. switch hariyama out to gastrodon. rotom whiffs hydro pump into storm drain. abomasnow hits bronzong with shadow ball, trick room back up.
t4: abomasnow protects. psychic+scald leave rotom in red, heals with sitrus berry. rotom kos bronzong with thunderbolt.
t5: hariyama sent out. scald kos rotom, close combat kos abomasnow.
t6: torkoal comes out. switch hariyama to snorlax. protect gastrodon. torkoal uses eruption, pitiful damage to snorlax.
t7: switch gastro to hariyama. high horsepower torkoal. torkoal hits hari with solar beam.
t8: fake out+high horsepower kos torkoal.
This was the first time I've seen enemy Bronzong live the Hail chip+Psychic+Knock Off combo. Tahnkfully, I was able to get Trick Room back up and I was able to use the rare Guts Fake Out! Not that it really mattered. This is also where I found out how little Eruption actually does to Snorlax, even in Sun!
Whiscash2 / Manectric2 / Vaporeon2 / Luxray2
t1: fake out whiscash. manectric hits hariyama with tbolt, paralyzes hariyama. trick room up.
t2: hariyama fully paralyzed. psychic manectric. whiscash kos bronzong with fissure.
t3: gastrodon sent out. hariyama fully paralyzed again. gastro kos manectric with earth power. whiscash misses fissure on gastro.
t4: luxray comes in. hariyama fully paralyzed once more. earth power kos luxray. whiscash uses amnesia.
t5: earth power+close combat do not ko whiscash. whiscash kos gastro with fissure.
t6: trick room expires. snorlax sent out. whiscash uses rest, wakes up with chesto berry. double-edge+close combat ko whiscash.
t7: vaporeon comes in. vaporeon uses acid armor. snorlax crits double-edge, but vaporeon lives close combat.
t8: vaporeon uses aqua ring, then dies to double-edge.
Getting paralyzed sucks. Getting paralyzed by Thunderbolt is even worse. And that's exactly what happened here. On top of that, Hariyama ended up getting fully paralyzed 3 turns in a row. Because of this, Whiscash managed to OHKO both Bronzong and Gastrodon with Fissure, which put me in a very tight spot. Luckily, I was able to remove both Manectric and Luray before they could cause any more damage.
Meganium3 / Weezing3 / Walrein2 / Skarmory2
t1: fake out meganium, weezing hits hariyama with sludge bomb and poisons. trick room up.
t2: switch bronzong out to gastro as quick claw activates and weezing hits hariyama with another sludge bomb. quick claw is knocked off. meganium sets reflect. poison kos hari.
t3: snorlax sent in. protect gastro, double-edge meganium. meganium whiffs leaf storm into protect. weezing crits snorlax with fire blast.
t4: meganium goes down to double-edge+ice beam. weezing hits gastro with dark pulse.
t5: walrein comes in. hammer arm+earth power connect on walrein, spD drop. weezing hits misses fire blast on snorlax, walrein misses sheer cold on gastro.
t6: trick room expires. weezing hits gastro with dark pulse, walrein kos gastro with sheer cold. double-edge kos walrein.
t7: bronzong sent back out. weezing hits bronzong with dark pulse. snorlax hits weezing with crunch. trick room back up.
t8: crunch+psychic ko weezing.
t9: skarmory sent in. hammer arm+psychic do ~40% to skarmory. skarmory double teams.
t10: reflect expires but hammer arm+psychic still do not ko. skarmory double teams again.
t11: skarmory finally dies to crunch.
Yep, they're mentioned twice in this write-up! This time, one of the bad fights. This battle was just awful as Hariyama got poisoned by Sludge Bomb which turned it into a 2HKO. Because of this, I had to cross my fingers that Walrein didn't completely murder me. Hammer Arm+Earth Power+Double-Edge all connecting to take out the Walrein was so, so, so good. I let out the biggest sigh of relief after it went down. Once Weezing was gone, I was able to whittle down Skarmory until it eventually died and I came out victorious.
Slowbro2 / Nidoking2 / Swampert3 / Regice3
t1: fake out nidoking. slowbro hits hariyama with zen headbutt and crits. trick room up.
t2: ko nidoking with psychic+knock off. slowbro kos hari with zen headbutt.
t3: snorlax sent out. switch bronzong to gastro. hit regice with hammer arm. slowbro+regice hit lax with brick break+ice beam, get frozen.
t4: snorlax stays frozen, thaw snorlax with scald. slowbro yawns gastro. regice hits lax with ice beam.
t5: switch gastro back out to bronzong. hit regice again with hammer arm. lax dies to bro's brick break. regice hits zong with ice beam.
t6: trick room expires, gastro back in. regice uses rest, wakes up with chesto. slowbro yawns bronzong. earth power bro. trick room back up.
t7: gyro ball zong, ko bro with earth power. regice hits zong with ice beam. zong falls asleep, wakes up with lum.
t8: swampert comes in. psychic+scald pert, no spD drop or burn. regice hits gastro with ice beam. pert kos both with EQ.
This fight... THIS FIGHT. First off, the crit Zen Headbutt. It didn't really matter but I'm convinced Slowbro went for a second Zen Headbutt because of how low Hariyama was after the first one. It usually likes to use Yawn right after Zen Headbutt. Anyway, after Nidoking went down, Hariyama dies to a second Zen Headbutt. Once Hari was down, I sent out Snorlax. Two Hammer Arms+Earth Power can handle Regice so I Hammer Arm and switch but as you can see, Snorlax gets frozen by an Ice Beam from Regice. Also, Slowbro hit it with Brick Break. Can this get any worse. Snorlax stays frozen but I thaw myself with Scald. Snorlax took a lot more damage than I expected from Gastro's Scald but it probably should have been expected as it was Life Orb boosted. Anyway, Regice his Lax again with Ice Beam and Snorlax Yawns. This forces me to switch Gastro out and I managed to get a second Hammer Arm which does not crit and leaves Regice in the red. Slowbro KOs Lax with Brick Break. I managed to get Trick Room back up once Gastro was back out. Slowbro dies to an Earth Power before Trick Room was set again and another after Trick Room was set again. This leaves Gastro and Bronzong vs Regice and Swampert. I need a crit+SpD drop from Psychic or a burn from Scald. Psychic+Scald gets neither as Regice chips Gastro down with Ice Beam and Swampert finishes the fight with an EQ. GG. :(
------------------------------------------------------------------------------------------------------------------------------------------------------------------
And that's all. This is probably going to be my last attempt in BDSP. I was very much looking forward to eventually hitting the big 1k, but I guess it wasn't meant to be. Oh well. Here's hoping Scarlet and Violet have a good battle facility.
I decided to keep the run going a bit more until life started getting really busy, but I've made it to 504! Probably it for a while since the new games are coming out soon. I actually did update the stats slightly for the team from before since it does turn out that their attack stats don't need to be maximized to get good-enough results, and I was able to "even out" survival against certain critical hits, ensuring these battles aren't automatic losses when critted.
The team is mostly the same, and the original write-up on it can be found above on this page.
Rotom-Wash @ Choice Scarf
Modest Nature
Ability: Levitate
EVs: 36 HP / 4 Def / 236 SpA / 12 SpD / 222 Spe
IVs: 0 Atk
- Trick
- Volt Switch
- Thunderbolt
- Dark Pulse
Just raised the HP a bit more and took off some Sp Atk since it didn't seem as necessary when the points really matter. The added HP does end up increasing chances against certain critical hits and allows for longer survival which can be helpful.
Based on Scizor's base stats, I ended up playing around with the EVs on the calculator, and, specifically, this spread allows survival as it did before, but, Scizor went from having a zero chance of surviving against a crit from Earthquake by Waitress Jaime's Rhyperior (50% survival now). This was in tandem with a crit Shadow Ball from Ace Trainer Ellis's Gengar (also 50% survival).
No changes here. You are perfect Garchomp, and don't let anybody tell you otherwise.
Again, I think this team is truly amazing because of how fast it carries you through the tower and how accessible the Pokemon are via breeding.
The battles I had previously mentioned still aren't great, but the new EV spread does make these matchups a tiny bit better. Specifically, I did figure out some things I could change for a couple of them to increase the chances of winning:
Jogger Sherman w/ Scizor, Gengar, and Umbreon
I've learned that, if even one Swords Dance is set for a Pokemon, it seems Umbreon automatically goes for Foul Play. Using this, Scizor can set up one before Umbreon comes out, switch to Rotom-Wash, use Trick, and the rest of the battle shouldn't be too bad.
Aroma Lady Haylee w/ Gengar, Flygon, Ludicolo
Similarly, this battle gets way better now with a different strategy (as long as Explosion isn't the first move). Start with VS to Scizor, Swords Dance, Roost (if Gengar hasn't exploded), and Thief (if Gengar is still around).
Once Flygon comes out, use a single Bullet Punch (again, there's just enough Atk EV to make this work). At most, Flygon has 13% of its health left and will most likely go from a Dragon Dance to an Earthquake. Switch to Rotom-Wash to discourage its next move from being EQ, then go to Garchomp to take the likely Outrage (Swords Dance until Garchomp faints). Rough Skin is just enough to take Flygon (and Garchomp) out, enabling you to have Rotom-Wash out against the Ludicolo, securing the win with Trick.
The strategy depends on Flygon not doing unnecessary DDs to EQ on Garchomp, but hopefully, this scenario won't ever occur, and you're good. Also, this doesn't quite work if you get a crit off of the BP from Scizor on Flyon, but it just means having to stall out the Ludicolo instead (or take the chance of switching in Rotom-Wash and hoping Ludicolo doesn't use Substitute).
There are still a good number of battles that aren't great, but the stat changes seem to help make this team better than ever. If anyone decides to use this team and has questions about going against certain trainers, I would love to answer them, so please feel free to reach out.
Just in case, I went ahead and linked a video of the updated record with my Switch version. Not sure when I'll pick the streak up again, but I can see it going past 1000 if given the time. I may also edit my notes into an understandable document at some point and link a download, but time will tell.
Hi I did some Battle Tower stuff (plan too do some more before Scarlet and Violet releases) tho I'm too lazy to do a video so Imma just post my teams without being added to the leaderboard. S/O to this thread since it was/had great resources!
My singles team was the usual Starmie-Dragonite-Magnezone so nothing much to say/show.
Pretty much the only notable thing on here is that I ran Chesto Rest on Magnezone since it doesn't really have anything better to put in that last slot, as shown in other teams on here. It was also nice alongside Sturdy at times, not to mention just having healing somewhere on this team. Also had CM+Stored Power Clefable over Starmie originally, but needed the speed. Overall, I ended up at a streak of 66, which is pretty low, but I can probably do much better if I were to try again.
And yes, I did go out of my way to breed genderless 0 Atk IV mons without any 6IV Dittos. Worth it? Probably not!
I've played a lot more Doubles than Singles though, and have more teams for it in-game. Not gonna go into too much detail about most of them though.
I have no idea why I thought Pelipper+Blastoise in the back would work on here, but it was fun with all that speed control. Also Pelipper could cancel Hail, which was snazzy. Lefties+Protect+Water Spout Blastoise was cool though, even if gimmicky, maybe it could work on another team with better support.
Smeargle @ Focus Sash
Ability: Own Tempo
Level: 50
EVs: 4 HP / 252 Def / 252 Spe
Timid Nature
IVs: 0 Atk
- Spore
- Spiky Shield
- Destiny Bond
- Follow Me
I now know Sleep sucks in Battle Tower. You're relying on luck to keep the oppenents asleep long enough to set up, and Battle Tower is no place for luck shenanigans. I really like Breloom though, as a mon in general, so maybe I'll try something like Toxic Orb+Toxic Stall in Singles or something.
Cherrim @ Leftovers
Ability: Flower Gift
Level: 50
EVs: 244 HP / 44 Def / 220 Spe
Timid Nature
IVs: 0 Atk
- Solar Beam
- Sunny Day
- Helping Hand
- Heal Pulse
Lucario @ Choice Scarf
Ability: Inner Focus
Level: 50
EVs: 28 HP / 228 Atk / 252 Spe
Jolly Nature
- Close Combat
- Crunch
- Rock Slide
- Final Gambit
Honestly this was a fun team. Would have prefered more Sun abusers, specifically in the last slot, but getting Flower Gift boosts is still nice. When building the team I considered a couple of stuff, like Scarf Heatran, but in the end went with Scarf Tyranitar (had to go Unnerve over Sand Stream though). And then I was swept by Roark's Scarf Aerodactyl's Rock Slide, so I changed to Lucario. The team was originally meant to be lead Cherrim+Explosion Torkoal or Memento Ninetails, but realized that was such a waste of a slot, luckily early in the building process. Cherrim delt with a little bit of 4mss, since it gets some decent support moves, like Aromatherapy and Healing Wish. Sadly no Pollen Puff in this game though. Also I honestly don't remember what these spreads did since this is relatively old.
But there is one team I thought I would talk about more, getting me to a 115 Streak. I know not the highest relative to others on here, but I'm still proud. Also this was majorly based on Eisenherz's rain team, so thanks and stuff!
FreeShipping (Pelipper) (F) @ Focus Sash
Ability: Drizzle
Level: 50
Shiny: Yes
EVs: 252 SpA / 36 SpD / 220 Spe
Modest Nature
IVs: 0 Atk
- Hurricane
- Surf
- Tailwind
- Protect
Pretty much Eisenherz's set, with a couple of modifications. Lowered the Speed a little since nothing within between 117 and 113 seemed to threatening. This also allowed Pelipper to speed tie with Tyranitar-2, which hypothetically allowed it to potentially activate Drizzle after Sand Stream. Was considering investing more bulk to allow it to survive 2 of Kingdra's Surf in the Rain, but took too much investment for comfort. Also had Protect anyway if need-be. Surf is the chosen Water attack for Pelipper since it trigger's Cradilly's Storm Drain while still attacking. It was fun to spam. It also allowed me to hit stuff like Heatran when paired with Gastrodon, given it did still give Gastrodon the boost.
Also got lucky and got an almost perfect shiny Wingull while breeding, just traded to Sword and used a bunch of Exp Candies to get to lvl 100 and bottle cap.
Super Soaker (Kingdra) (F) @ Life Orb
Ability: Swift Swim
Level: 50
EVs: 252 SpA / 4 SpD / 252 Spe
Modest Nature
IVs: 29 HP / 0 Atk
- Surf
- Dragon Pulse
- Scald
- Protect
Again based on Eisenherz's set, though it is pretty much standard Kingdra. Went Surf over Ice Beam, same purpose as Pelipper. Kept Scald however since it was nice to have a Water attack that didn't also hit teammates. And then Dragon Pulse sat there for STAB on Water-resists like Latios and Ludicolo. Managed to get the 29 HP IVs, which minimized recoil from Life Orb. Otherwise, just you standard Kingra set.
Also fun fact, since I had nobody to trade with, I had to hunt this via the overworld Kingdra in the Isle of Armor, specifically looking for the needed HP and Atk IVs for the set and found a square shiny of it. (wrong IVs though so I had to switch to another account's save file to hunt for the IVs)
Left-Handed (Scizor) (M) @ Sitrus Berry
Ability: Technician
Level: 50
EVs: 20 HP / 180 Atk / 4 Def / 132 SpD / 172 Spe
Adamant Nature
- Swords Dance
- Bullet Punch
- X-Scissor
- Protect
Guess who I have to thank for this set? That's right, Eisenherz. Not to mention Scizor is great on Rain in general. This set had no changes to the moveset, just the EVs. They're still pretty similar, I just took EVs from Atk and put them into HP so it could be divisible by 4 for the Sitrus Berry. I didn't use Swords Dance too often, but it did come in clutch multiple times when facing something like Cresselia-3 (so I would only have to worry about hitting it once rather than multiple times after it used Double Team)
Mr. Wiggles (Cradily) (M) @ Iapapa Berry
Ability: Storm Drain
Level: 50
EVs: 244 HP / 116 Def / 108 SpA / 36 SpD / 4 Spe
Calm Nature
IVs: 0 Atk
- Leech Seed
- Protect
- Giga Drain
- Sludge Bomb
The star of the show. It provided coverage for mons that are otherwise dangerous to Rain, like Gastrodon and ironically other Cradilly. Also eased the matchup against Ellis and Irene, given they were still a large pain. I admittidly thought at first thought that Storm Drain also healed on top of boosted SpAtk, but IG that woulld be a little too OP. Storm Drain still came in handy a lot though. Originally, the set was more of a meme better used in Singles, with Big Root+Recover>Protect. I admittidly don't remember the reason for the stat spread at all, though I can easily guess the 244 HP was for Iapapa Berry numbers and the 4 Spe was just for speed creeps. Despite how initially week Cradily may be, when boosted up with Storm Drain, it can really put in the work. Protect is an obvious staple in doubles and work great with Leech Seed. Leech Seed let Cradily beat mons that would have otherwise walled it like Heatran-3 and Skarmory while regaining health so they couldn't wear it down in return. Once I found myself with Cradily as my last mon vs. Palmer and Barry's Heatran and Snorlax, and actually managed to stall them out (given it was thanks to a double Protect near the end). With Giga Drain for the nice STAB+healing, Sludge Bomb was my other choice of attack. Cradily it a decent answer for grass resists, doing a solid amount of damage even if neutral thanks to those Storm Drain boosts. It also hit Grass mons and could potentially Poison the foe, making it pair really nicely with Leech Seed.
This was mostly a standard a rain team, except for Cradily in the back. Having no naturally fast mons like Raikou sucked, but Pelipper's Tailwind, Kindgra's Swift Swim, and Scizor's Bullet Punch somewhat helped make up for that. The Pelipper+Kingdra lead worked great as expected, often being able to spam stuff. However, I also found myself often switching one of them into Cradily first turn and using Surf with the other for some early-game boosts. Scizor was definitely the least used (new Smogon tier name tm) on the team, since it didn't contribute to the Surf+Storm Drain strat. But when it was needed to check something, revenge kill, or do a last-minute sweep, it was easily able to put in the work.
Ending at a 115 streak, my loss was against Titus & Edmund. I blame myself for playing so sloppishly and not looking at sets. The most notable point in the match was when Articuno-1 froze my Scizor with Blizzard. So I thought I would make a "pro gamer move" and unfreeze Scizor with Kingra's Scald and take out the Cresselia-3 next to Articuno with X-Scissor (since I couldn't Bullet Punch Articuno due to priority). So, I used Scald and unfroze Scizor. However, X-Scissor failed to take out Crasselia, and Scald had put Scizor in Hail range. I was able to get to the last mon eventually, but at that point my only mon remaining was Cradily against their Victreebel-2, who was able to live a Sludge Bomb and 2HKO with Power Whip (y u no miss such hax smh). So, if I had only kept Scizor alive, even if frozen, it would have completely walled Victreebel while waiting to be unfrozen and then taken it out.
Overall, I'm really enjoying Battle Tower, especially compared to SWSH's facility. Less reliance on filling specific roles in Singles and using specific strats like weather and FEAR Aron in Doubles to do well would be nice, but I think I'm just saying that bcuz of my enjoyment of teambuilding. And teambuilding was where the tower sets, speed tiers, and calcs on here have really come in handy for making absurdly specific EV spreads. So S/O to the creators!
Finally, IDK if others can relate, but I gotta say losing feels kinda weird. Like, when your team often just sweeps though most battles you feel like you're the king/queen of the world and nothing can stop you. Hell, at some points I would get cocky and think of how easy it would be for me to beat the other records on here. And then you lose, not knowing whether to do something else or restart since you're still "in the zone". Or should I say Magnezone. get gotten.
I was able to get to 99 wins using a slightly modified version of my original Infernape/Garchomp/Suicune team. The main differences being Pressure on Suicune thanks to Bank and slightly modified EV spreads on Garchomp and Infernape.
Before going any further, a huge thanks to the creators of the Battle Facilities Damage Calculator, Trainer + Pokémon lookup spreadsheet, and serebii's bdsp battle tower trainer catalogue. I would not have gotten this far without them.
As a general suggestion to anyone trying to get a long streak with any team
1) Keep notes on every matchup you face. Ideally, you want to come up with a strategy that guarantees a win 90%+ of the time. Do this in a google doc, using a chrome extension, or...whatever works for you.
2) When a battle starts, pull up set info on the trainer you are facing as well as any notes you have for the matchup. If you already have a battle plan, execute it. Update your strategy as needed as you identify weaknesses with it.
3) If don't have a battle plan for a matchup, plan out the entire battle -- or, as much of it as you can -- before turn 1. If you have a win condition, how can you guarantee it? If your opponent has a win condition, how can you deny it? Keep note if the AI makes an unusual play such as hard-switching.
My previous iteration of the team had 0 EVs in SpAtk and 196 EVs in Atk. Infernape's attacking stats are *just* low enough that you basically have to pick your poison. In order to guarantee some kills with Flamethrower, you have to give up some guaranteed kills with Close Combat, and vice-versa. I've gone with a more special attacking spread because I haven't run into a matchup where my odds of winning really diminish without a guaranteed KO from Close Combat. Some kills we guarantee with this SpAtk investment are Tangrowth-2, Meganium-3, Leafeon-2, Crobat-2, Skarmory-4. 90% of the time you click Fake Out turn 1. The only reasons you don't is if the opponent has an ability like Effect Spore or Static and you can't afford for Infernape to take a status effect or if the opponent has Inner Focus. My personal favorite example of not clicking Fake Out turn 1 is facing Crobat-2 lead. You click Flamethrower. Crobat will go for Brave Bird, bringing you down to Sash and putting you in Blaze range which gives you just enough of a boost to guarantee a turn 1 KO after Brave Bird recoil damage.
I really like the team! I was wondering if you could explain the EV's for Infernape a little more. I've looked at the OU sets for the monke and seems like they usually don't put all the speed investment there. Do you feel 252 is necessary? Or maybe shift some of that into the at/spa? Also, any reason why 60 for atk instead of the 64? Just wondering on the numbers. I really like this lead and may run a variant with overheat instead of FT and grass knot instead of U-turn.
and for chomp, any reason iron head over poison jab? Thanks!
Just raised the HP a bit more and took off some Sp Atk since it didn't seem as necessary when the points really matter. The added HP does end up increasing chances against certain critical hits and allows for longer survival which can be helpful.


 @
@

 @
@

 @
@

 @
@

 ). Very long matchup breakdowns are placed as comments rather than just text to have some formatting. The numbers are how many times I faced these trainers.


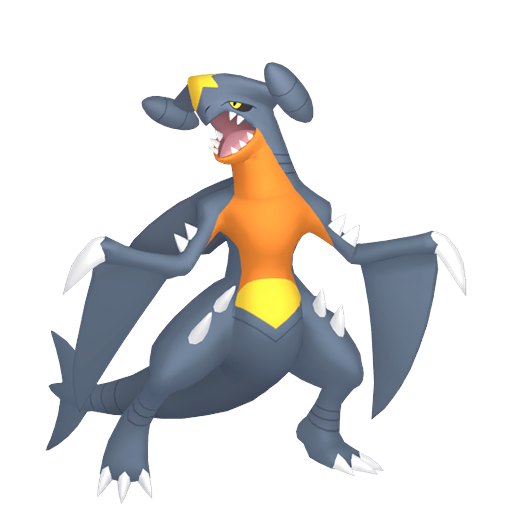


 Vespiquen-2
 Gengar-3,
  Milotic-3 & Dalvin:
  Crobat-2,
  Pinsir-3)
 Skarmory-3,
  Glalie-3 & Carlo:
  Toxicroak-2,
  Medicham-2)
 Jynx-3 & Sherman:
  Shuckle-2)
 Staraptor-2,
  Raikou-3 & Noelle:
  Togekiss-2,
  Mismagius-3)
 Ambipom-2 & Dalvin:
  Marowak-3,
  Armaldo-2)
 Regirock-4 & Barrett:
  Regice-2,
  Electivire-2)
 Gardevoir-3,
  Nidoking-3 & Mayra:
  Garchomp-2,
  Cradily-2)
 Latias-2,
  Suicune-3 & Kaila:
  Houndoom-3,
  Hitmontop-2,
  Alakazam-4,
  Mamoswine-3)
 Hypno-2,
  Gastrodon-2 & Hans:
  Exploud-2,
  Dugtrio-3)
 Zapdos-1,
  Ludicolo-2,
  Dewgong-2)
 Politoed-3 & Kristi:
  Starmie-2,
  Froslass-2)
 Moltres-4,
  Regigigas-5 & Jaime:
  Ampharos-2,
  Bastiodon-2)
 Lapras-2 & Harvey:
  Scizor-2,
  Gliscor-2)
 Kangaskhan-3 & Sylvia:
  Heracross-3 & Elaine:
  Meganium-3,
  Walrein-2 & Mikel:
  Weezing-3,
  Kingdra-4,
  65% HP |
  100% HP
 100% HP |
  100% HP
 Flygon-2,
  Granbull-3,
  Articuno-3)
 Torterra-5,
  Heatran-13)
 Empoleon-5,
  Rhyperior-10,
  Leafeon-2,
  Absol-2)
 Salamence-2,
  Nidoqueen-2 & Christa:
  Steelix-2,