Challenge 4th Generation Battle Facilities Discussion and Records

I've been building up a streak in the DP Battle Tower and ran into a strange contradiction.

Azelf, Timid, 29IV, 252 Spe = 182

vs.

Aerodactyl, Jolly, 16IV (It was Set 5, Fight 7; maybe 31IV?), 252 Spe = 191 (200 if 31IV)
King's Rock
Rock Slide
Iron Head
Ice Fang
Thunder Fang

Either way, Azelf shouldn't be outspeeding it, but it did. Threw me for a loop against a mon who can already decide that you just lose if it feels like it.

No outside effects, no speed control. Couldn't figure out what happened. I got the set's spread from Bulbapedia:

https://bulbapedia.bulbagarden.net/...rainers_(Diamond_and_Pearl)/Bird_Keeper#Paula
https://bulbapedia.bulbagarden.net/wiki/List_of_Battle_Tower_Pokémon_(Diamond_and_Pearl)/Group_2

Both pages agree.

But upon cross-referencing it with the PsyPoke page, it said Aero has no Speed investment, and instead has Special Attack, and that in fact a bunch of mons have useless EVs like that:

http://www.psypokes.com/dp/battletower_pokemon.php?region=kanto

Which, I mean...knowing DP, I wouldn't be surprised. People play Pt/HGSS a lot more, so I doubt it's as well-researched.

Is anyone familiar with this discrepancy?
 

atsync

Where the "intelligence" of TRAINERS is put to the test!
is a Pokemon Researcheris a Contributor to Smogon
Natures of Battle Tower Pokemon in DP are random. While the sets technically have defined natures, the game does some weird thing in the background in an attempt to prevent shiny Pokemon from appearing that results in the nature being overridden (this feature was removed in PtHGSS so shiny Pokemon can appear in facilities in those games).

"Diamond and Pearl have their own pool of Battle Tower sets, compared to the one used in Pt/HG/SS. Both pools are 950 entries long, but many of the Pokemon use different moves and/or items. Notably, the sets in D/P have specific natures defined for them, but the game doesn't actually use those natures, and selects random ones instead. It turns out that this is an anti-shiny mechanism. It was possible to run into shiny opponents in Hoenn's tower, but a lot of people didn't like being "trolled" by these random shiny rolls that came up where they were impossible to catch. So in D/P they set about changing that, but they did it in such a way that they roll a whole PID first (including the part that influences nature, clobbering whatever was there before), then check if it's shiny, and if it is then reject it and keep trying again until it's not. They could have started with some default PID and only rerolled if that came up shiny, but they didn't. Go figure."


That Aerodactyl set has Speed EVs according to Smogon's list. So I reckon the Aerodactyl just rolled a neutral/negative nature which allowed Azelf to move first.
 
But upon cross-referencing it with the PsyPoke page, it said Aero has no Speed investment, and instead has Special Attack, and that in fact a bunch of mons have useless EVs like that:

http://www.psypokes.com/dp/battletower_pokemon.php?region=kanto

Which, I mean...knowing DP, I wouldn't be surprised. People play Pt/HGSS a lot more, so I doubt it's as well-researched.

Is anyone familiar with this discrepancy?
That's an issue with the coding/format on Psypokes. What they have listed as SA is actually Speed, their SD is Sp.att, and their Spd is Sp.def. Basically, it needs to be corrected like this:

SA = Speed
SD = Sp.Att
Spd = Sp.Def

Which means that this Aerodactyl has maxed EVs in Attack and Speed, just like the Smogon main site and Bulbapedia has listed.
 
Hello :wo:

After countless unsuccessful attempts with Porygon-Z at the Battle Hall, I sought help from the Internet... but the only help I received was someone doing Garchomp propaganda. It got on my nerves so I decided to use Salamence.
It worked well : I got the gold print despite having imperfect IVs and movesets.
Nothing really interesting for experienced players, but I hope it can help beginners.


spr_hs_373_1.png


SALAMANCA (Salamence) (F) @ Focus Sash
Ability: Intimidate
Level: 59
EVs: 252 Atk / 6HP / 252 Spe
IVs: 15 HP / 24 Atk / 1 Def / 29 SpA / 19 SpD / 25 Spe
Adamant Nature
- Outrage
- Fly
- Dragon Dance
- Fire Fang

spr_hs_373_1.png


Salamence (M) @ Focus Sash
Ability: Intimidate
Level: 50
EVS: 252 Atk / 6HP / 252 Spe
IVs : 6 HP / 30 Atk / 25 Def / 21 SpA / 27 SpD / 28 Spe
Adamant Nature
- Outrage
- Earthquake
- Dragon Dance
- Fire Fang

I used psypoke to know the IVs.
I didn't really use Dragon Dance, except against Forretress so I guess a Earthquake - Fly - Outrage - Fire Fang set could be better.
Argenta's first Pokémon was Blissey and her second one was Muk with Acid Armor.

1 : Ice
2 : Water
3 : Dark
4 : Rock
5 : Steel
6 : Ground
7 : Psychic
8 : Bug
9 : Normal
10 : Flying
11 : Ghost
12 : Dragon
13 : Fighting
14 : Electric
15 : Grass
16 : Poison (saved the 10th fight for Argenta)
17 : Fire

Tricky Opponents :

Weavile
: The 10th Ice type Pokémon. Interestingly, I've never fought one in the Dark type category.
If you face one, it's over ! This is why you need to go for the ice first.

Walrein : The other 10th Ice type Pokémon. Salamence can 2HKO it with Outrage but Walrein's Blizzard can freeze it so be careful. Slowbro is a similar case.

Dewgong : If Dewgong goes for Rest instead of Ice Beam first, it can be dangerous if Salamence gets confused after 2 turns of Outrage.

Scizor : The problem with Scizor is that it's very unpredictable. If you use Fire Fang and it decides to go for Counter+Bullet Punch, it's over. Otherwise you can deal with it by using Earthquake 2 times or Fly and then Fire Fang.
Scyther : Same as Scizor, it's unpredictable. Just don't use Fly on Scyther and it should be okay.

Luxray : The one that ended my run at 173. Salamence used Earthquake, it used Thunder Wave and Salamence got paralysed 2 times.
If you're lucky this shouldn't happen.

Other dangerous opponents : Froslass, Gengar and Whiscash.
Never faced any of them but Gengar is faster (if you fight it late) and can use Hypnosis. I don't know how to deal with Gengar, this is why I've left the 10th Poison fight for Argenta.
Froslass is also faster and is holding the Bright Powder. I guess the only way to take it down is to OHKO it with Outrage after it misses Blizzard or uses Hail.
Whiscash is slower but is holding the Lax Incense and runs Blizzard. I'm glad I haven't encountered any !

S5PcHAV.jpeg
iFTY238.jpeg
 
Last edited:
Hello :wo:

After countless unsuccessful attempts with Porygon-Z at the Battle Hall, I sought help from the Internet... but the only help I received was someone doing Garchomp propaganda. It got on my nerves so I decided to use Salamence.
It worked well : I got the gold print despite having imperfect IVs and movesets.
Nothing really interesting for experienced players, but I hope it can help beginners.


spr_hs_373_1.png


SALAMANCA (Salamence) (F) @ Focus Sash
Ability: Intimidate
Level: 59
EVs: 252 Atk / 6HP / 252 Spe
IVs: 15 HP / 24 Atk / 1 Def / 29 SpA / 19 SpD / 25 Spe
Adamant Nature
- Outrage
- Fly
- Dragon Dance
- Fire Fang

spr_hs_373_1.png


Salamence (M) @ Focus Sash
Ability: Intimidate
Level: 50
EVS: 252 Atk / 6HP / 252 Spe
IVs : 6 HP / 30 Atk / 25 Def / 21 SpA / 27 SpD / 28 Spe
Adamant Nature
- Outrage
- Earthquake
- Dragon Dance
- Fire Fang

I used psypoke to know the IVs.
I didn't really use Dragon Dance, except against Forretress so I guess a Earthquake - Fly - Outrage - Fire Fang set could be better.
Argenta's first Pokémon was Blissey and her second one was Muk with Acid Armor.

1 : Ice
2 : Water
3 : Dark
4 : Rock
5 : Steel
6 : Ground
7 : Psychic
8 : Bug
9 : Normal
10 : Flying
11 : Ghost
12 : Dragon
13 : Fighting
14 : Electric
15 : Grass
16 : Poison (saved the 10th fight for Argenta)
17 : Fire

Tricky Opponents :

Weavile
: The 10th Ice type Pokémon. Interestingly, I've never fought one in the Dark type category.
If you face one, it's over ! This is why you need to go for the ice first.

Walrein : The other 10th Ice type Pokémon. Salamence can 2HKO it with Outrage but Walrein's Blizzard can freeze it so be careful. Slowbro is a similar case.

Dewgong : If Dewgong goes for Rest instead of Ice Beam first, it can be dangerous if Salamence gets confused after 2 turns of Outrage.

Scizor : The problem with Scizor is that it's very unpredictable. If you use Fire Fang and it decides to go for Counter+Bullet Punch, it's over. Otherwise you can deal with it by using Earthquake 2 times or Fly and then Fire Fang.
Scyther : Same as Scizor, it's unpredictable. Just don't use Fly on Scyther and it should be okay.

Luxray : The one that ended my run at 173. Salamence used Earthquake, it used Thunder Wave and Salamence got paralysed 2 times.
If you're lucky this shouldn't happen.

Other dangerous opponents : Froslass, Gengar and Whiscash.
Never faced any of them but Gengar is faster (if you fight it late) and can use Hypnosis. I don't know how to deal with Gengar, this is why I've left the 10th Poison fight for Argenta.
Froslass is also faster and is holding the Bright Powder. I guess the only way to take it down is to OHKO it with Outrage after it misses Blizzard or uses Hail.
Whiscash is slower but is holding the Lax Incense and runs Blizzard. I'm glad I haven't encountered any !

It’s completely possible to get gold print with Porygon Z in the hall. I myself haven’t done it, but I have gotten to 169 wins with the following set:

Porygon-Z @ Choice Scarf/Choice Specs
Ability: Adaptability
EVs: 252 SpA / 4 SpD / 252 Spe
Modest Nature
IVs: 3 Atk / 30 SpA / 30 SpD
- Hyper Beam
- Tri Attack
- Hidden Power [Ground]
- Dark Pulse

Basically all that’s required is to switch between choice scarf and specs for specific types, like running specs for types with generally slow Pokémon like Steel and Rock. I ended up losing on the very last battle with Argenta, where she ended up pulling a Latias which can survive a Hyper Beam and can’t be Tri-Attacked since it’ll just activate her Salac Berry. With a little bit of luck it’s definitely possible to get gold print. Just be strategic about what moves and items you use and do research on the Battle Hall sets which can be found on Bulbapedia. Also, I would recommend using both of your battle skips on Dark since Tyranitar is quite common and can be problematic. I wish you luck on your journey.

Proof of Battle Hall streak:
 

Attachments

Last edited:
I haven't looked into it in detail, but one other benefit of Porygon-Z is that it gets some great coverage moves in Ice Beam, Thunderbolt, and Psychic for your more unique situations. Some won't be needed as much with Porygon-Z's raw power, but Thunderbolt might be useful for anything that flies/levitates and resists Normal like Skarmory or Aerodactyl and maybe even Mantine and Gyarados.

In other news, I've been trying to get a 100 win streak in the HG Battle Tower the last few weeks. This team has been very consistent at getting me long streaks into the 70s and 80s only to lose to various forms of hax. The two longest streaks I've had were ended at battle 92 to an Energy Ball Ninetales and an infuriating loss at battle 99 to BrightPowder Vaporeon and Scope Lens Leafeon. I've been using the team below. At this point, I'm willing to change things up. I am somewhat limited in the Pokemon available to me, but any moveset or team suggestions would be appreciated.

Wilford (Mamoswine) (M) @ Focus Sash
Ability: Snow Cloak
EVs: 4 HP / 252 Atk / 252 Spe
Jolly Nature
IVs: 5 Def / 22 SpA / 20 SpD
- Earthquake
- Ice Shard
- Endeavor
- Stone Edge

Percy (Swampert) (M) @ Leftovers
Ability: Torrent
EVs: 240 HP / 220 Def / 48 SpD
Relaxed Nature
IVs: 30 Def / 13 SpA / 23 Spe
- Stone Edge
- Earthquake
- Waterfall
- Protect

Clamps (Scizor) (M) @ Lum Berry
Ability: Technician
EVs: 248 HP / 252 Atk / 8 SpD
Adamant Nature
IVs: 27 Def / 21 SpA / 25 Spe
- Swords Dance
- Bug Bite
- Bullet Punch
- Aerial Ace
 
It’s completely possible to get gold print with Porygon Z in the hall. I myself haven’t done it, but I have gotten to 169 wins with the following set:

Porygon-Z @ Choice Scarf/Choice Specs
Ability: Adaptability
EVs: 252 SpA / 4 SpD / 252 Spe
Modest Nature
IVs: 3 Atk / 30 SpA / 30 SpD
- Hyper Beam
- Tri Attack
- Hidden Power [Ground]
- Dark Pulse

Basically all that’s required is to switch between choice scarf and specs for specific types, like running specs for types with generally slow Pokémon like Steel and Rock. I ended up losing on the very last battle with Argenta, where she ended up pulling a Latias which can survive a Hyper Beam and can’t be Tri-Attacked since it’ll just activate her Salac Berry. With a little bit of luck it’s definitely possible to get gold print. Just be strategic about what moves and items you use and do research on the Battle Hall sets which can be found on Bulbapedia. Also, I would recommend using both of your battle skips on Dark since Tyranitar is quite common and can be problematic. I wish you luck on your journey.

Proof of Battle Hall streak:
Yeah in fact I tried with Porygon-Z because of this video
I've gotten to 159 wins, I had 2 Porygon-Z with Scarf and Choice, like yours, but I used different moves such as Psychic or Ice Beam.
I think I gave up after losing to the Lax Incense Whiscash.
It's unfortunate you lost against Argenta like that, I hope you'll be luckier next time.
If you want to know, Latias can be 2hkoed by Porygon Z's Ice Beam and - iirc - Tyranitar can be defeated with Signal Beam.

On an unrelated note, how do you get the Adaptability ability ? My Porygons always get Download.
 
Last edited:
Yeah in fact I tried with Porygon-Z because of this video
I've gotten to 159 wins, I had 2 Porygon-Z with Scarf and Choice, like yours, but I used different moves such as Psychic or Ice Beam.
I think I gave up after losing to the Lax Incense Whiscash.
It's unfortunate you lost against Argenta like that, I hope you'll be luckier next time.
If you want to know, Latias can be 2hkoed by Porygon Z's Ice Beam and - iirc - Tyranitar can be defeated with Signal Beam.

On an unrelated note, how do you get the Adaptability ability ? My Porygons always get Download.
Adaptability is Porygon-Z’s second ability, so just use RNG manipulation to breed one with ability 1 instead of ability 0. The problem is not that Latias can’t be 2HKO’d, but the fact that it has Salac Berry which allows it to outspeed Porygon-Z on the next turn and get a 2HKO of its own. Tyranitar can’t be one shot by Porygon-Z due to its Sand Stream ability, and can do serious damage with Stone Edge on top of the fact it has Quick Claw. It’s winnable, but you have to get pretty lucky. Empoleon is also really bad to face, but it’s rare so I’ve yet to encounter one.
 
Adaptability is Porygon-Z’s second ability, so just use RNG manipulation to breed one with ability 1 instead of ability 0. The problem is not that Latias can’t be 2HKO’d, but the fact that it has Salac Berry which allows it to outspeed Porygon-Z on the next turn and get a 2HKO of its own. Tyranitar can’t be one shot by Porygon-Z due to its Sand Stream ability, and can do serious damage with Stone Edge on top of the fact it has Quick Claw. It’s winnable, but you have to get pretty lucky. Empoleon is also really bad to face, but it’s rare so I’ve yet to encounter one.
If your held item is the Choice Scarf Ice Beam won't activate the Berry.
Empoleon is a living nightmare... I don't even think Choice Specs Thunderbolt ohkos it.

Something I noticed when playing is that when you leave after the ninth fight of a type and then go back to the tenth fight, you can face the same Pokémon 2 times. I'd use it to avoid Empoleon (if it actually works).
 
Last edited:
Update: I did it! It took just about 3 weeks of running nonstop with numerous failures, and I was about to give up, but today, I finally got to 100. In fact, I made it all the way to 204 using 3 of my favorites.

Proof:

Tower Streak.jpeg


The team:

Tower Team.jpeg


Wilford (Mamoswine) (M) @ Focus Sash
Ability: Snow Cloak
EVs: 4 HP / 252 Atk / 252 Spe
Jolly Nature
IVs: 5 Def / 22 SpA / 20 SpD
- Earthquake
- Ice Shard
- Endeavor
- Stone Edge


Percy (Swampert) (M) @ Leftovers
Ability: Torrent
EVs: 240 HP / 220 Def / 48 SpD
Relaxed Nature
IVs: 30 Def / 13 SpA / 23 Spe
- Stone Edge
- Earthquake
- Waterfall
- Protect


Clamps (Scizor) (M) @ Lum Berry
Ability: Technician
EVs: 248 HP / 252 Atk / 8 SpD
Adamant Nature
IVs: 27 Def / 21 SpA / 25 Spe
- Swords Dance
- Bug Bite
- Bullet Punch
- Aerial Ace

Three of my favorites, and they work really well together. Wilford just about always took out the first mon, and if he couldn't Clamps could clean up that one. Now and then, it made sense to switch Percy in instead, but generally, Wilford could handle it. If Wilford was brought down to his Sash, that usually meant Endeavor could bring the next mon into range for Clamps to get the KO with Bullet Punch. From there, Clamps and Percy had good enough synergy to handle the other mon(s).

There were 3 main issues that could arise. Firstly, OHKO moves or critical hits, untimely Quick Claws and Focus Bands, and BrightPowder/Lax Incense misses could be deadly. For example, a previous streak, I lost battle 99 to a missed Endeavor vs. Vaporeon that was set up by a crit on Clamps by Leafeon. The second common issue arose against fast fire types. A downside to only running physical attackers and having pretty much a suicide lead was that a burn on Wilford or Percy could neutralize them, especially one on Percy if Wilford has already gone down.

Thirdly, mons that had coverage for both Percy and Clamps often spelled trouble. Mons that had both Fire and Grass coverage without a set up turn were rare, but Togekiss with (Magical Leaf and Heat Wave) and Ninetales (Flamethrower and Energy Ball) were trouble. I lost a few runs in the 50s to Togekiss and Ninetales ended a run at battle 92 when it burned Percy on a switch. More common, however, were mons that were able to KO Percy or Clamps if damaged and OHKO the other outright. This was especially tough since I wasn't running speed EVs on either mon for easier switches and better protection vs. critical hits and Quick Claws.

Once I got to 100, I didn't care too much, but somehow, the streak just kept going and going and going. Ultimately, my streak came to an end at 204, way more than I ever thought possible. In battle 205, Ace Trainer Charlie's lead Porygon-Z burned Wilford with a Tri Attack, getting a OHKO through Focus Sash. Clamps came in to finish it off with Bullet Punch, but in came Magnezone. It was Magnet Pull, so Clamps couldn't escape, and it also had BrightPowder. I went for Swords Dance, but then Bug Bite missed and a second Thunderbolt got the KO. Percy came in and missed an Earthquake, allowing Magnezone to hit 2 Tri Attacks before another Earthquake got the KO. Finally, Gyarados came in and hit a Waterfall while Percy missed a Stone Edge. Gyarados then went for a Dragon Dance while I missed another Stone Edge.

Super unlucky way to end it, but I can't really complain given how many lucky breaks and necessary hits I got during that streak. I never thought I'd even get to 100, so everything beyond that was just icing on the cake. Now I've got a shiny silver trainer card and am 3 Ruby exclusives (Mawile, Latios, and Groudon) away from a 5 star card.
 
Hello, everyone!

At the start of last year, I made a post detailing my Frontier/Tower streaks in Platinum, SoulSilver, and Diamond. I said I would eventually get around to more, and today I'm reporting another ongoing streak of 105 wins in the Pearl Battle Tower on retail.
gyarados.png

(BlueHawaii) Gyarados (M) @ Lum Berry
Ability: Intimidate
EVs: 6 HP / 252 Atk / 252 Spe
Jolly Nature
IVs: 10 HP / 12 Atk / 19 Def / 29 SpA / 7 SpD
- Waterfall
- Earthquake
- Ice Fang
- Dragon Dance
steelix-f.png

(Radio Gaga) Steelix (F) @ Passho Berry
Ability: Sturdy
EVs: 252 HP / 252 Atk / 6 SpD
Brave Nature
IVs: 28 HP / 7 SpA / 13 SpD / 25 Spe
- Earthquake
- Gyro Ball
- Ice Fang
- Explosion
azelf.png

(Ozone Baby) Azelf @ Focus Sash
Ability: Levitate
EVs: 6 Atk / 252 SpA / 252 Spe
Timid Nature
IVs: 21 HP / 10 Atk / 18 Def / 28 SpA / 3 SpD / 29 Spe
- Psychic
- Flamethrower
- Energy Ball
- Explosion
gyarasteelix.jpg

So this is a team I originally put together half for fun, and half to actually attempt 100 wins with. I wanted to mix up my usual Destiny Bond strategy with a similarly-effective "get off my screen" move, my beloved EXPLOSION, in the last gen before BW gutted it (still their biggest sin). Explosion's a lot riskier than DB for all sorts of reasons, but the basic idea was to establish a mon lead with Gyara and then boom on the back two if a DD sweep wasn't in the cards. Of course, it never really worked out quite like that, but the team functioned well enough and beat Palmer 49 just fine.

Gyara lead for Intimidate + DD + I fucking love Gen 4 Gyarados and really strongly associate it with DP in particular since every NPC has one. Lum enables the setup.

Steelix was chosen for boom and defensive synergy; it stuffed pretty much any Electric lead (and pretty much any physical attacker w/o STAB EQ). Sturdy was so liberating vs. OHKO spammers, who often couldn't touch it otherwise. The main threat I anticipated was the handful of Waters with access to Thunderbolt--stuff like Starmie, Lapras, and Lanturn. More generally, while I like Steelix, it always felt too matchup-dependent for a battle facility--too likely to just eat a Surf and die without achieving anything. Passho fixed that. A 1-for-1 trade on the ever-dangerous Waters was totally fine.

Azelf was the revenge killer, with a plan to go 2-for-1 with speed, Sash, and Explosion. Kinda weird how the lake trio doesn't appear as opponents (except in the Battle Hall?) like other low-tier legendaries.

Coverage-wise, the big missing piece was Electric--two Ice Fangs and Energy Ball over TBolt. I'm just a lot more scared of Ground types with the accursed EdgeQuake than a random Gyarados I can boom on. Flamethrower was literally for Shedinja (helps vs. Steels, too). Overall, a weakness of this team is that without setup or boom as options, their offensive output isn't great; their moves all have low base power. And your options can start to thin out awfully fast in the face of hax and bad matchups.

It's important to remember that this is the DP Battle Tower and not the the Pt/HGSS one. In a lot of ways, it resembles the Emerald meta: slower, bulkier, trickier. No Move Tutors means a lot fewer nasty coverage moves to watch out for (Steelix wouldn't be nearly as effective if they had better special options), but also a lot more hax strategies like Double Team, which kind of ruins the whole Explosion plan. It also means a lot of bizarre fucking sets.

slaking.png

wtf is this
eons.png

wtf are these

Bizarre sets, besides being very on-brand for me to be fighting, were usually a good thing, but also could occasionally screw you over. They're harder to keep track of because they're not built into turskain's Damage Calculator, and--as I learned--the Natures are random! Again, mostly good, but also creates even more uncertainty. The theme of the DP Tower is mostly smooth sailing punctuated by moments of abject terror.

...I say that, but I had a lot of really consistently nasty Sets of 7 this time around. More on that later.
Achieved on July 13th.
cresselia.png

(Holy) Cresselia (F) @ Choice Scarf
Ability: Levitate
EVs: 252 HP / 6 Def / 252 Spe
Calm Nature
IVs: 21 HP / 2 Atk / 28 Def / 20 SpA / 29 SpD / 29 Spe
- Trick
- Thunder Wave
- Moonlight
- Flash
registeel.png

(Euro) Registeel @ Leftovers
Ability: Clear Body
EVs: 252 HP / 126 Def / 132 SpD
Careful Nature
IVs: 29 HP / 25 Atk / 5 Def / 22 SpA / 15 SpD / 25 Spe
- Iron Head
- Curse
- Amnesia
- Substitute
salamence.png

(Bloodline) (Salamence) (F) @ Lum Berry
Ability: Intimidate
EVs: 252 Atk / 6 Def / 252 Spe
Naughty Nature
IVs: 9 HP / 26 Def / 14 SpA / 2 SpD / 29 Spe
- Outrage
- Earthquake
- Substitute
- Dragon Dance

...Man, this team sounds like medieval royalty or something.

Call me a coward, but I eventually changed course back to the trusty Trickscarf team for the 100-streak, an executive decision I made after beating Palmer 49 with the Legion of Boom. It's not that I didn't believe in their ability to get there--it'd be tough and would take a lot of attempts, especially vs. bulky legendaries, but I honestly believe they were good enough. The trouble is that I put the boom team together in part because DP are so damn slow. I figured that Exploding on everything would help pick up the pace considerably, but between boom getting shut down somehow and having to constantly look up and manually type sets into the calculator, it didn't really end up any faster than the relative autopilot of Trickscarf. A whole lot of extra stress and mistake potential without the expected perks. But hey, they got their ribbons, and I'm proud of them.

As for this squad, it's the same as prior Trickscarf teams, except I used Cresselia instead of Latias--honestly just for variety. That, and I was real sick of Latias drawing Ice moves and having to sweat out a Registeel permafreeze. It's a tradeoff, for sure--Cress draws more Fire and Electric moves, the latter of which are especially bad because the team has no resist for them. It doesn't get Charm, either, making Struggles (nevermiss after Gen III), strong recoil moves like Brave Bird and Flare Blitz, and even just stalling out Stone Edge much scarier. It draws STAB Water moves, which Registeel also doesn't resist and force Mence to hopefully dodge a few after Para + Flash spam. (It doesn't take them well, as you can surmise.) Moonlight has much fewer PP than Recover. On top of that, it's slower.

But it had its many positives, as well--it's a hell of a lot bulkier, which was nice to be on the other side of for once. That's good for the obvious reason, but also because it meant the AI lost a lot of confidence in its ability to kill it. Unless they had Shadow Ball or something, they often opted for status moves, which are exactly what you want to get Mence in on for a quick fight. Flash also had its perks in helping the other two set up or easing the pressure to heal. I didn't even know Gen IV was when they buffed its accuracy to 100.

Regi and Mence are the same as always. Eating their Shadow Balls and Berries, nursing Subs, dropping fools, getting crit. Just with a lot of extra lag between messages.
So yeah, weird movesets and many difficult Sets of 7. The Legion of Boom got off to a really rough start, nearly dying to Palmer 21's Salac Milotic shenanigans because Gyara crit it. Every Set between that and Fight 49 was bad, as well, featuring several moments of hax and annoying struggles like a DT Drapion spamming Roar (luckily, the entire team was immune to its Toxic Spikes). Gyara ended up in a 1v1 vs. a Magnet Rise Zone and only won thanks to Waterfall flinches. Lead Togekiss got an AncientPower omniboost that forced Azelf to come in and boom. DT Ludicolo was similar, a particularly bad matchup that I always had to bail out to Azelf boom for. There always seemed to be some obstacle in Explosion's way--BrightPowder, DT, Protect, you name it. It kinda sucked getting blue-balled like that and made me miss the simplicity of Destiny Bond.

The Passho-Boom plan vs. Water types worked beautifully, though--it was so gratifying watching Steelix tank Hydro Pumps and then truck through a Starmie (on multiple occasions!). Never got screwed over by a crit, although I did once get screwed by rain and had to stall it out.

Despite many razor-thin victories on the road there, they did lose once to Palmer 49 himself--leadoff Cress ate a Gyro Ball, Explosion, and Waterfall and still had a sliver left, proceeding to Moonlight. It was already CM'd up and I needed Azelf's boom for Gigas, so the fight was over. It was honestly my fault for fearing the Psychic crit and not going for a second Gyro Ball before the boom. True to form for the Tower, the next run had pretty much no bad fights at all, and Steelix got its redemption vs. Cresselia. It put a lot of retroactive confidence in the team after their early struggles had soured me on my building prowess.

Still, after that it was time for Trickscarf. I did finally end up eating the loss I so feared in Diamond, on fight 74--leadoff Scizor X-Scissor crit, and I played risky by going Mence. What comes out second but one of the few than can tank a +4 Outrage--Macho Brace Bronzong with EQ, Trick Room, Gyro Ball, and Explosion. It gave Regi a taste of my own medicine with a boom into Metagross back with Hammer Arm/EQ. I could've played it a lot better and safer, and did exactly that on the next attempt, which went the distance. Two tries isn't bad at all.

And it wasn't easy. The Flow of Calamity is strong, and the misfortune only intensified the higher I climbed. Some brief highlights:
  • lead Blaziken spamming Flare Blitz, critting Cress and Mence, forcing a naked +1 Outrage sweep on the other starters the Idol had (luckily no hax items)
  • that same Macho Brace Bronzong haunting me, appearing multiple times but its shenanigans growing weaker each time; it crit EQ'd a naked Registeel, who lived, but had to switch, and Cress PP Stalled it into Exploding for Gallade last under Trick Room; I remembered just in time that TR was still up and stalled out the remaining turns with Regi sitting at ~10% because it didn't have a Fighting move
  • sweating and PP Stalling with Regi's subs vs. shit like Focus Punch/Counter/Spore Breloom, Sash/Counter/Guillotine Gliscor, Flamethrower Heatran, and boosted-up Meteor Mash Metagross (the revenge!)
  • back Abomasnow Sheer Colding naked Registeel, but with no Ice move for Mence
  • Psych Up Hypno coming in on Registeel...and using it four times in a row
  • three PIs (Gamblers) in the final nine fights, each one more terrifying than the last (but luckily they mostly spammed Rock Polish Probopass instead of OHKO moves)
  • finally having to contend with one Ice move by Set 14: Ice Beam spam from a Feraligatr of all things. No freeze.
  • lead SPIT Starmie in Set 14, Para'd at -6 Acc, breaking four Mence subs and leaving me naked at +1 again. I thought about bailing to Registeel, but it was a Psychic trainer and his mon pool looked squishy, so I just said fuck it and clicked Outrage. Killed the second; back Cress tanked for the kill, but it was 4 attacks w/no Moonlight, so Regi finished the job.
  • reaching Set 15 right before the clock rolled over to midnight when the opponents would've changed. And maybe I should've let them change, because first up for Fight 99 was the final of the three PIs, with fucking RHYDON, and everyone in this thread knows exactly what that means: Quick Claw Horn Drill. And he got the QC, except he picked Megahorn and stuck with it next turn, so Regi could safely set up.
  • In the other three Trickscarf streaks, Fight 100 was a breeze, but Black Belt Benny wasn't so charitable: Stone Edge Hitmonlee. SE already sucks because crits, and its low PP means Mence has to risk Struggle crits. Limber meant no Para, so it started out faster than Mence. And the asshole even once crit Mence with Struggle; I had a Sub but was only +1. Luckily, the back two were Flareon and Ninetales. Hilariously, I was so relieved that I didn't check the sets, and Ninetales had a Shuca Berry--only to die to EQ anyway. After the calc, I think it rolled a -Def Nature and got max rolled. It couldn't have done anything had it lived, but just imagine if I threw like that on the very last Poke by not clicking Outrage. Truly an ending only DP could provide.
With Calamity destroyed for good, we were able to Go Beyond and cruise through the final five fights.
pearl battle tower.jpg

pearl trainer card.jpg

pearl trophies.jpg

And just for fun, the Diamond Dex was finished:
diamond trainer card.jpg
I've 100%'d nine games on cart across the last three years, from FireRed to Black 2, and at every turn the experience has highlighted their intricacies, mechanics, and mysteries. Even when I was frustrated by RNG or baffled by obtuse quirks, I was always learning something new. That appreciation also extends to this community and competitive as a whole. The world of Pokémon is deep indeed.

Thanks again for everyone's help. Now that all my playthroughs are finished, I can finally get back to...

Factory attempts.

yyd.png
 
Last edited:
Hello, everyone! Back in 2020 I decided to make a Trick Room doubles team for the SoulSilver battle tower, and after years of battling and tweaking the team I’ve decided to share it here. This is definitely my favorite team I’ve ever bred in any Pokemon game, as it’s super consistent due to the sheer power of Explosion, Water Spout, and Blizzard hitting both opponents, and it features some under-appreciated mons. My goal is to someday get a streak of 500+ wins.

smeargle.png
bronzong.png
octilleryM.png
abomasnowF.png

Smeargle (F) @ Focus Sash
Own Tempo
Level 1
Adamant
-Protect
-Endeavor
-Foresight
-Follow Me

Bronzong @ Lum Berry
Levitate
Sassy 252HP, 8At, 248SpD
IVs: 21/30/31/19/30/20
-Trick Room
-Iron Head
-Psychic
-Explosion

Note: Lum Berry protects against Discharge paralysis and Blizzard freeze so it can safely set up Trick Room. Also protects Bronzong from Hypnosis, Confuse Ray, etc.

Octillery (M) @ Macho Brace
Sniper
Quiet 248HP, 4Def, 252Spa, 4SpD
IVs: 30/26/31/31/31/4
-Water Spout
-Blizzard
-Energy Ball
-Protect

Note: Macho Brace ensures Octillery underspeeds negative nature base 30s like Slowbro, Slowking, and non-Iron Ball Steelix.

Abomasnow (F) @ Iron Ball
Snow Warning
Quiet 4HP, 252At, 252Spa
IVs: 31/31/30/31/25/8
-Blizzard
-Wood Hammer
-Earthquake
-Filler (usually Ice Shard)

Best win streak: 343 wins
Loss: a team full of bulky water/ice types

20230717_002026.jpg
On turn 1, the opponents almost always target the level 1 Smeargle because they can OHKO it and they can’t do much to Bronzong. Smeargle uses Protect and Bronzong gets a free Trick Room. Bronzong has the bulk to take spread moves like Heat Wave, Surf, Discharge, Blizzard, and Rock Slide (though the flinch chance is annoying), and it’s immune to Earthquake.

Turn 2 consists of Smeargle using Endeavor to get one opponent to 12HP, and they are finished off by Bronzong’s Iron Head/Psychic. Iron Head is preferable because if Endeavor misses due to brightpowder at least I have a chance at a flinch. A few pokes take less than 12HP from Iron Head (like Magnezone and Steelix) but they fall to Psychic. Some sitrus berry holders can survive this combo but I simply target their partner instead.

Turn 3 is usually when Bronzong explodes. If there are any pokes with Damp while Smeargle is still on the field, I first try to KO them with Endeavor + Psychic. Otherwise, Smeargle uses Endeavor on whichever opponent is more likely to survive an Explosion or uses Foresight on a ghost or a Double-Team spammer. I really don’t mind Explosion taking out Smeargle: it has done its job by this point.

If Smeargle is KOed before Bronzong, I send out Octillery, who can Protect while Bronzong explodes. Against physically defensive rock and steel types I may have Octillery use Water Spout while Bronzong supports with Iron Head/Psychic. But in general, I want Bronzong to explode soon before the opponent can send out a ghost type or even worse, a Pokemon with Damp. Bronzong’s Explosion, even if resisted, let’s me safely bring in Abomasnow. A Bronzong that can’t explode due to Damp is passive and can lose me the match.

For the rest of the battle, Octillery and Abomasnow clean up and virtually always have enough time in Trick Room. Water Spout is wicked strong and Abomasnow’s hail enables them both to spam Blizzard. The only type that resist these attacks is water, which is weak to Octillery’s Energy Ball and Abomasnow’s Wood Hammer. Abomasnow’s Earthquake doesn’t hurt Octillery too much and is its best bet against steels, especially Magnezone and Heatran. Earthquake also can help against Tentacruel and Empoleon.

Here I will mention that if the opponent leads with any group 2 fire type except Ninetales, Flareon, Houndoom, or Entei, Smeargle will need to use Follow Me. This protects Bronzong from being killed by a strong fire move like Flare Blitz or Overheat before it can use Trick Room. Fortunately, Octillery can come in and KO the fire type with Water Spout (unless it has the Passho berry!) or it can Protect and let Bronzong explode like usual. Losing Smeargle turn 1 before it can Endeavor may sound bad, but these battles tend to go perfectly fine.

If the opponent leads with Dewgong, Lapras, or Walrein, I also use Follow Me so Bronzong doesn’t get killed before getting up Trick Room. The Sheer Cold Walrein set has lax incense so it’s a huge threat, and the Sheer Cold Lapras set has the quick claw. I only hope I can land an explosion ASAP.
Poliwrath: decent bulk, immune to either Explosion or Water Spout depending on its ability, resists Water Spout and Blizzard, and can dodge hits with the lax incense or tank a grass move with the rindo berry. Poliwrath can have Vacuum Wave to take down Smeargle (with sash broken) before it can Endeavor. Best dealt with via Endeavor - if it hits.

Other pokes with Damp: Politoed is just like Poliwrath but at least it doesn’t have any priority. Quagsire and Golduck are less threatening but Cloud Nine is something to pay attention to.

Bulky, evasive ice and steel types: Blizzard never misses in the hail and is generally my go-to move for evasive Pokemon, but it does little damage to these. Examples: lax incense Walrein, Double-Team Regice, brightpowder Magnezone, brightpowder Metagross, brightpowder Heatran.

All quick claw users, including Lapras, Quagsire, Metagross, and Heatran.

Pokemon that can OHKO Bronzong turn 1 with a spread move (unaffected by Smeargle’s Follow Me): Rampardos with Earthquake via mold breaker and Heatran with Heat Wave. Both are rare (only on one set) and only OHKO with a crit, but it is possible.

I’m beginning to think that Heatran is pretty good ;)
Here are some Pokemon that might be perceived as threats, but this team handles just fine.

Opposing Trick Room users: sometimes they use Trick Room to cancel your Trick Room. This means they spent a turn not attacking Smeargle, so you can have Smeargle use Protect and setup Trick Room once again. Or you can eliminate Trick Room opponents with Endeavor + Iron Head.

Double-Team spammers: Smeargle has Foresight to make any turn spent using Double Team worthless. Plus Blizzard never misses in the hail.

Changing weather: Hippowdon and Tyranitar hate Water Spout and Wood Hammer, and if the opponent uses a weather move they usually wasting a turn.

Traditionally strong Pokemon: most of these rely on their high speed, which is worthless in Trick Room. Also many strong Pokemon like Zapdos and Garchomp just get decimated by Blizzard spam.
Abomasnow’s last move is basically filler. Ice Shard can finish off a weakened foe and even goes before other priority or the dreaded quick claw! It can also help if Trick Room has worn off. However, Ice Shard is weak and rarely ever useful.

Other moves worth considering:
-Grass Knot for power against bulky waters without recoil
-Magical Leaf to never miss against brightpowder bulky waters (but it’s pretty weak)
-Focus Punch for niche situations (if you know they’ll attack Octillery)
-Protect for when you know they’ll attack you to give Octillery a free turn or for a little bit of hail stall
-Fling for a stronger attack on Dusknoir (but you lose your low speed)
-HP Fire is nice for Scizor/Forretress, but Octillery’s Water Spout handles them. Also everything you would think to use it on may have the Occa berry
-Grasswhistle or Sheer Cold if you’re desperate

Conclusion: If you read all of this, any feedback is greatly appreciated!
 
After many failed attempts, I finally got one where I got past Gold Print and achieved a 202 win streak with the following Porygon-Z set in the Battle Hall:

Error 404 (Porygon-Z) @ Choice Scarf/Choice Specs
Ability: Adaptability
Shiny: Yes
EVs: 252 SpA / 4 SpD / 252 Spe
Modest Nature
IVs: 3 Atk / 30 SpA / 30 SpD
- Tri Attack
- Dark Pulse
- Hyper Beam
- Hidden Power [Ground]

Even with a Choice Scarf equipped, the combination of Hyper Beam and Adaptability coming off a monstrous 135 base special attack stat allows Porygon-Z to OHKO almost any Mon in the game with the 4 level advantage. With Choice Specs, no Mon is safe from Porygon-Z apart from Focus Sash holders. Tri-Attack is there for Focus Sash users, mons Hyper Beam can’t kill with scarf equipped, and just in general as a more accurate option against frailer mons like Jynx and Infernape. Hidden Power Ground helps take care of the bulky steel and rock types that resist Porygon-Z’s STAB, such as Magnezone, Tyranitar, and Heatran. Last but not least, Dark Pulse allows for Porygon-Z to hit Ghost types for respectable damage. The following order was chosen up until Gold Print, as well as what item was being held:

STEEL(Choice Specs)/ROCK/BUG/PSYCHIC(Choice Scarf)/DARK/FIGHTING/NORMAL/GROUND(Choice Specs)/DRAGON(Choice Scarf)/ICE/FLYING/FIRE/GHOST/POISON/WATER(Choice Specs)/GRASS/ELECTRIC(Choice Scarf)

Order was chosen this way to help minimize the amount of times I would have to fight steel and rock types, since those mons seems to pose the biggest threat. Speaking of threats, let’s go over what posed a threat to my streak:

Hyper Beam: Funnily enough, the thing that allowed my friend Error 404 to make it so far in the Battle Hall often lead to its downfall. A 10% of missing doesn’t seem bad at first, but with the amount of battles you end up needing to use Hyper Beam for those odds start stacking up real quick. Throw Brightpowder into the mix and things can get dicey fast.

Brightpowder: Literally anything with this forsaken item can pose a threat to Porygon-Z. Jynx is able to put it asleep if Error 404 manages to miss, and Togekiss and fire back with a brutal Aura Sphere.

Tyranitar: Thanks to the sandstorm it creates upon entering battle, Tyranitar gets a 1.5x multiplier to its special defense, making it one of the only things Porygon-Z can’t OHKO even with specs equipped. Combine that with Quick Claw and sandstorm chip damage, and it pretty much makes it a dice roll on whether you’ll win or not.

Blissey: I actually never ended up facing a Blissey or Chansey for that matter, but you can pretty easily see why it would pose a threat to a special attacker, so I’m not going to explain this one.

As for how I ended up losing, it all just came down to unfortunate RNG. On battle 203, Error 404 was up against Scyther which was able to live a Tri-Attack thanks to its Focus Sash and fire back with a critical hit Ariel Ace, thus ending my streak. I’m still really happy with how far I got with one of my favorite mons with only one moveset none the less. I probably won’t be trying to go for a higher win streak after this one, but it certainly felt nice to get this far.

Proof of Streak:
 

Attachments

Last edited:

atsync

Where the "intelligence" of TRAINERS is put to the test!
is a Pokemon Researcheris a Contributor to Smogon
I have updated the thread. Please let me know if you spot any mistakes.

I'm still playing Hall mostly. I've recently achieved 170+ streaks with Absol and Aerodactyl and am currently working on my next project: the Aggron family.
 
Hello!

Last year, my gold print winning streak died to a Quick Claw Machamp at battle 94, just inches away from the triple digit achievement. I wasn't really aiming for it, I just kept playing to see how far the streak goes, and yet, losing this close to 100 was...sour. But now I got more time and motivation to come back to the Battle Tower and with a vengeance! Same team as before:

show.png

Garchomp (F) @ Focus Sash
Ability: Sand Veil
Level: 50
EVs: 252 Atk / 4 SpD / 252 Spe
Jolly Nature
IVs: 31/31/26/30/30/31
- Earthquake
- Outrage
- Fire Fang
- Swords Dance

356px-Pokedex_Image_Weavile_SV.png

Weavile (F) @ Life Orb
Ability: Pressure
Level: 50
EVs: 252 Atk / 4 SpD / 252 Spe
Jolly Nature
IVs: 31/31/31/23/23/31
- Ice Punch
- Night Slash
- Low Kick
- Fake Out

p02_02.jpg
???
Suicune @ Chesto Berry
Ability: Pressure
Level: 50
EVs: 252 HP / 252 Def / 4 SpD
Bold Nature
IVs: 15/8/24/28/29/25
- Surf
- Ice Beam
- Calm Mind
- Rest

All three complement each other fantastically: Garchomp is the lead and she tends to end the battle all by herself, few mons can outspeed it or are capable of taking a +2 STAB. Weavile has a higher speed tier, can take on resisted Ice attacks, and hit back with Fake Out+Low Kick. Plenty of mons faster than Garchomp are also Psychic or Ghost (like the dangerous Starmie), which Weavile can also resist and KO back. And Suicune, another Ice resist, physical wall and setup sweeper all at once. It does amazing against plenty of stallmons, since they lose PP quickly due to Pressure and Suicune can shrug off status and heal back to full.

I didn't have much trouble during most of the run, but I did run into some threats: Lapras2 (the quick claw Sheer Cold + Fissure one) appeared in battle 65 and took out Garchomp, but Weavile picked it off with a heavy Low Kick. Umbreon2 (the one with Double Team) showed up at battle 68, but Suicune is capable of handling it with Rest and Pressure, healing off the Toxic statuses while Umbreon runs out of Confuse Rays and Toxics and becomes a sitting duck until I eventually hit it. And then came Charizard1 at battle 89 and...ooh boy.


352 | Charizard | Modest | Petaya Berry | Flamethrower | Air Slash | SmokeScreen | Scary Face | SpA/Spe
932 | Latias | Timid | Brightpowder | Psychic | Ice Beam | Energy Ball | Shadow Ball | SpA/Spe
587 | Flygon | Jolly | Razor Fang | Fissure | Fire Punch | ThunderPunch | Aerial Ace | Atk/Spe

Yeah I didn't know what to do here. I didn't want to stay in and risk going for Outrage with reduced speed (which hardly mattered bc Latias outspeeds anyways...), so I switched to Suicune, which didn't fare any better. The relief I felt when I saw Flygon as the last mon, both Chomp and Weavile were capable of knocking it out. This was the closest match in this streak no doubt.

Now, at Battle 98 I thought I had to battle Palmer again (since it was 49 battles after the previous one), but I was wrong and I got another stall trainer who wasn't fun at all...

612 | Milotic | Impish | Leftovers | Toxic | Confuse Ray | Double Team | Aqua Ring | HP/Def
450 | Starmie | Timid | Lum Berry | Surf | Psychic | Confuse Ray | Thunder Wave | SpA/Spe
823 | Golduck | Modest | Wacan Berry | Hydro Pump | Psychic | Ice Beam | Signal Beam | HP/SpA

Garchomp was close to beat that Milotic but she could only land one EQ before going down to Toxic. So Milotic it was and just like Umbreon, it couldn't do much against Rest+Pressure, but unlike the Umbreon it had better staying power due to Aqua Ring. THANKFULLY Suicune lands the +6 Surf critical hit at the best timing and knocks out the Milotic. Good riddance. And then Starmie went for more confusion shenanigans, hopefully I knocked it out quick too. Golduck fortunately didn't have confuse ray like its teammates and Suicune took it out. Only two more wins to go.

Battle 99 started out with this Rhydon set.
532 | Rhydon | Adamant | Focus Sash | Earthquake | Fire Punch | ThunderPunch | Ice Punch | Atk/Def
I didn't want to set up in front of it bc of the possibility of sash or quick claw, so Garchomp went for the Earthquake 2HKO, taking the Ice Punch thanks to sash. Nidoking came next and went down quickly, Steelix took the EQ but Suicune finishes the job.

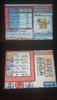
And finally...Battle 100:
455 | Espeon | Timid | Lum Berry | Psychic | Reflect | Calm Mind | Baton Pass | SpA/Spe
805 | Slowbro | Quiet | Leftovers | Psychic | Surf | Ice Beam | Trick Room | HP/SpA
933 | Latios | Timid | Brightpowder | Psychic | Thunderbolt | Ice Beam | Energy Ball | SpA/Spe

Espeon lead can potentionally outspeed Garchomp so I switched to Weavile and yup, it was the Calm Mind set. One Night Slash and down it goes. Slowbro was next and Weavile 2HKO it with Night Slash, bu went down too after a Surf and life orb recoil. With the sash still intact I sent out Garchomp against whatever mon it was left to win the fight and it was...

2297c7dee8decdfb7b09b9d29e5a07bcc6408a6d_hq.gif

Latios. This guy has showed up at the most tense moments during my frontier runs, like the final Thorton fight. And watching him here again, at Battle 100 of the Tower, was a fitting choice. Garchomp can take it on but he strikes first, it's Latios3 with Timid nature and Ice Beam! I was hoping so hard that I don't get the freeze hax and I didn't! I land the Outrage (it had brightpowder, that could've gone wrong...) and finally I MADE IT TO 100 WINS!!! Looking back at the fight, if I got haxed there and lost Garchomp, it would've come down to Suicune, and with Tbolt on his set I would've been pretty susceptible to lose to a crit or parahax...

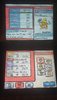
Unfortunately, I forgot to record this fight, I got caught up in the excitement. But I did record battle 105, it was pretty one sided :smogonbird:.


That's Vileplume4, but I dunno about the others since they died so quickly...
792 | Vileplume | Modest | Wise Glasses | Sludge Bomb | Energy Ball | Hyper Beam | Synthesis | HP/SpA

And that's all for today, I'm so glad that I can check off this achievement after my frustrating previous defeat. I'll continue this streak to see how far I can get!

20230817_191421.jpg
20230817_160402.jpg


20230817_160058.jpg

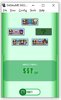
I never saw this many stars on my console before...

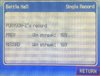
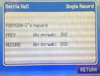
Also, my Battle Hall streak already died months ago to Weavile, but I forgot to post it, so here it is.

20220208_223637.jpg


UPDATE: Lost the streak with 113 wins to Feraligatr4 getting a freeze on Suicune and managing to set up.

20230820_231931.jpg
 
Last edited:
After 4 attempts I would like to report an ongoing streak for the Battle Hall. This was with the following Dragonite set:
Dragonite @ Focus Sash
6 HP/252 Atk/252 Spe
Adamant Nature
- Extremespeed
- Fire Punch
- Outrage
- Earthquake

I just reached 170 wins but I plan on continuing at some point (I have played this game for 4 hours straight and I need some sleep lol). This was actually in the context of a Heartgold POC, I just felt like torturing myself some more by attempting to get the Golden Print on the Battle Hall.

Shoutout to user geogeo for his 171 streak with a Dragonite because I pretty much copied the moves lol. I have some more observations to contribute in addition to the ones in his streak:

• Focus Sash is pretty much mandatory and I would not recommend swapping it for anything else, Dragonite is a chunky boi and as such not that fast. A lot of Pokemon will outspeed you and OHKO without it. Some Pokemon will also survive an Outrage and threaten a KO as well even if you outspeed them and as such Sash is superior to, say, Choice Scarf.

• 2x Super Effective Fire Punch: 150 base power. STAB Outrage: 180 base power. I almost lost to a Piloswine that I left on a sliver of health because I couldn't be bothered to do basic math

• Sharpedo was a sleeper threat and I actually lost an attempt to it, it hits like a truck with Ice Fang, holds a Focus Sash (the dirty cheat!) and obviously its ability will nullify your own Sash. As long as you complete the Water and Dark streaks early enough it won't outspeed you and it can be beaten with 2 Earthquakes

• There's a couple Pokemon with Counter + Focus Sash. I'm 99% sure your own Focus Sash would hold up in a scenario like that but just in case I would open with E-Speed and then go for the kill

• My recommended order (the one I followed) is: Ice, Dark, Water, Ground, Ghost, Psychic, Steel, Rock, Poison, Flying, Electric, Normal, Fighting, Fire, Grass, Bug, Dragon. When deciding to swap some of those around keep in mind the mechanics of the Battle Hall (Bulbapedia is your friend!), such as the fact that every round the Pokemon increase slightly in levels. You might not notice too much of a difference going from Round 1 to Round 2 but you will notice it from Round 1 to, say, Round 7.

• What Pokemon Argenta pulls out for the Silver print is based on the BST of your own Pokemon. Because Dragonite has 500+ BST she will pull from the Group 4 pool. I got so "lucky" that I had to fight Regirock for the silver and Suicune for the gold and pretty much lucked out on both fights (Regirock isn't a 2HKO but it missed a Stone Miss, and with Suicune the confusion damage plus its Hydro Pumps added up)

• When using the damage calculator and setting your attack to -1 (to simulate Intimidate users for instance) please remember to reset it afterwards. I almost lost to an Armaldo on fight 160 because of that

• Argenta will override whatever fight you pick so use that to your advantage. For silver I picked getting rid of Ghost Rank 10 but Psychic would've been fine too, for gold there's pretty much no better choice than Dragon as the big boy dragons only show up on Rank 9 and 10

• What Pokemon shows up depends on the Rank, with each of the 4 Groups showing up after a certain number of battles (Group 1 is Rank 1-5, Group 2 is Rank 3-8, Group 3 is rank 6-10 and Group 4 is 9-10). Obviously the higher the rank the generally harder Pokemon you'll find. The trick is that the distribution isn't "balanced" and some types permeate certain groups more than others (for example there's a lot more Fighting-types that you should watch out for in Group 3 than 4, while the selection of Group 3 Fire-types is more lackluster than the selection of Group 4 Fire-types). Keep this in mind when deciding the order as like I said the levels increase every round (and with it the opposing Pokemon's stats)

• This didn't end up playing a role in my successful run but: keep in mind how much Pokemon mechanics have changed over time. In this generation (amongst many other things) Gengar has Levitate and Extremespeed has only +1 priority, meaning if a faster Pokemon uses a priority move of their own it will move faster (wink wink nudge nudge Weavile and its Focus Sash). Double check the base power, accuracy, PP, and other characteristics of anything and how they were back in Gen 4 before you dive into Theorymoning

There's probably some other close calls I'm forgetting about but like I said I am tired lol I'll update it I remember anything else. Here's the link to the Bulbapedia page with the list of Pokemon by Group

Here's the picture of the streak
IMG_20230821_070053.jpg

Aaaaaand I lost. My streak ended at 171 battles, exactly the same as the other Dragonite record lol. First battle was Ice-type Walrein, 2 Outrage kill easily and I could've survived Blizzard with my Focus Sash even tho it missed, the only thing that could've killed me here would've been a Blizzard freeze. I was then killed by the god awful trolly Umbreon set, stalled out by Leftovers + Moonlight and chipped down by Sucker Punch + confusion damage. This is why I always box Umbreon when I play Pokemon Colosseum.

Picture:
IMG_20230822_132732.jpg
 
Last edited:
Hello everyone!

I am really struggling trying to put this whole experience onto words but let's start saying i am submitting what must be the luckiest run in the Battle Hall (Singles) yet: 354 wins in a row with the shiny event Raikou.

I know it sounds crazy (i am myself on disbelief after hours and weeks of failed attemps) but please bare with me while i try to tell you how it happened.

First of all i must say that i come from having played the longest streak in the Battle Pyramid and those of you who are also in the Gen III Battle Frontier thread may already know the tragic way it ended (basically my GBA SP battery died while playing).

So after comming to terms with that, i thought that a great way to continue this "rennaisance" of my pokémon journey was to tackle the Gen IV frontier.
And as much as i felt blessed and that i stumbled upon a fantastic run by sheer luck on the pyramid, this time i felt the determination to try and prove myself that i could replicate something similar on the DS games. So that’s what brought me to the Batlle Hall, where i felt it was somewhat easier to prepare for and attempt a good enough run given the nature of the challenge itself.

So i started to read the top posts there and decided to try Garchomp as it had the best performing run after all. It worked pretty well (for what i remember from playing here as a child) and in not so many runs i could get the gold print, but not much more than that. I couldn’t get any to past far from the 180s and started to feel discouraged. (Weavile was the main culprit but don't want to linger here, as i might do another post later with the most notable close calls, and run enders) So i almost left it there. But before quitting i wanted to try Raikou too and oh boy i'm glad i did.

With Raikou i got to gold on one of the first attemps and even consistently in later ones (i feel that the difference was there as many of Garchomp's runs ended early and that was soul crushing but with Raikou it felt rare when the run was cut before the final battle with Argenta) so i knew that if kept playing, one of those post-gold print runs could be lucky enough and give me a good spot on the ranking. But most importantly i had a lot of fun obliterating most mons in one hit with these choice specs beasts.

Yeah i used 2 of them, so it might be time to present them and give the credit to those who deserve it. First to Rodripped as his was the raikou i replicated to start the run (and the one used every time from battles 1-170) this is a 31/30/30/31/31/31 IVs and 252 Sp.Atk/ 252 Speed and 6 SP. Def Rash natured with choice Specs as the item and Thunderbolt, Aura Sphere, Shadow Ball and Hidden Power Ice as its moves.

And then to Atsync for suggesting in one of his replies to instead allocate some of the Speed Evs to Sp Def as that made it survive Camerupt's Earth Power (leaving it as a 252 SpA/32 SpD/224 Spe). So that's what i used every time i beat Argenta the second time and seemed to work. Also wanted to say that i really respect his commitment to try the limits of as much mons and evolutionary families as possible on the Hall as i feel that's a great way to encourage others to try and have fun with their favorites.

Now for the reasons this run in particular was so long. First and foremost a lot and i repeat a lot of luck. The main threats for this mon (which i feel there are 3 big ones) didn’t appear a single time after gold. These are Whiscash, Gastrodon and the well known Weavile. If they appear early in the run you can deal deal with them most of the time (even weavile albeit much less frecuently so) due to the lower levels. But later they almost always block progress (only praying for a crit or trying to paralize weavile usind TB instead of the most intuitive Aura Sphere could get you out of the situation).

The order i ended up using to tackle the types before the gold was ice and dark firts (because of Weavile), then water (because of Gastro and Whiscash), later fire (so low leveled Camerupt doesn't end this "non-prepared for him" variant of Raikou) and lastly ground (again for Gastro and Whiscash) so i get the 3 big threats out of the way and from then on pretty much any order trying to get rid of Psychics early as some high leveled Wobbufet gave me trouble with Mirror Coat. I tend to leave poison for last so i could skip a maybe Crobat double team encounter but most of the time this latter part was pretty easy.

So after gold i change Raikous and at first i started leaving the dreaded 4 types (ice, dark, water and ground) for last each rotation, so i could get bigger streaks but after eventually reaching 252 twice (i say again that i'll provide more detail on some loses and threats on a later reply), i knew that even though it would mean that most runs were going to end earlier than should, i was fishing now for a very lucky one, so if i had to lose let it be quick so i can get there again faster. And that’s how after many tries, in my Heart Gold copy, this holy grail of a run happened finally.

After surpasing my previous personal best, i started leaving the 4 awful types for last once again and in this specific order: water and ground as i felt there was a bigger pool of mons so less probability of encountering the run reapers, and the dark and ice the last ones for the same reason as I thought it was easier that weavile was generated there on the smaller pool. So being blessed without facing any of them, and after a Shiftry fest on the dark slot, what finished this adventure was indeed a Water/Ground type, but their usually better behaved cousin and no, not the slow and friendly Quagsire (which i don't recall giving me any problem) but the starter, Swampert himself (which tends to use a substitue and Rest combo most of the time) that this time (as in one of the 252 runs) decided to use Mud Shot followed by a Torrent powered Muddy Water that landed and finished my business here.

Oh, another thing i wanted to point out is that i also attempted this run on my Platinum copy, roughly the same amount of times (can't tell you how many they were after so many attempts, just that i tried to alternate them, one run on HG, then another on Platinum) and i have the feeling that the HG performed better, like i overall saw many less deadly threats and the runs there were longer (for instance here i got my top 3, this one and the two 252s, but the bigger in platinum was like 220). But all of this might just be anecdotical and pure coincidence because as far as i know the pool is the same and i don't recall any difference in movesets.

I must say i cannot in anyway be mad as this might be the luckiest thing here as of now, and that plus my sheer obstinace for this type of things as long as i don't feel bored (thanks to my past of shiny hunting i guess) are what have let me here having lived it and writing this today.

I know this is not the most difficult facility nor does this mean that i'm nowhere near the best players here, but i feel now more than elated to know that after years of struggling to get any gold symbol/print as a child, my enjoyment of these games and the great help of this community, have let me to re-experience those years once again and now that i've reached top spot on 2 facilities in the singles category (once on each of my 2 most favorite gens) i can only hope to inspire others to keep playing these fun and well crafted (although frustrating a lot of times) post games. And yeah if you want to give it a try here, use Raikou, trust me, it really works.

As of now and though i had a lot of fun i'm pretty tired after trying so hard to get a good run here, i won't try nor post any more runs on any facility for a long time. I even have other streaks still running just after gold, but i know i won't commit as hard as this one so i will leave them there for when i feel like playing and enjoying them in the future. And even then it will probably be a one and done thing.

That being said, thanks a lot to everyone and have a great day!
 

Attachments

Last edited:
Hello everyone!

I am really struggling trying to put this whole experience onto words but let's start saying i am submitting what must be the luckiest run in the Battle Hall (Singles) yet: 354 wins in a row with the shiny event Raikou.

I know it sounds crazy (i am myself on disbelief after hours and weeks of failed attemps) but please bare with me while i try to tell you how it happened.

First of all i must say that i come from having played the longest streak in the Battle Pyramid and those of you who are also in the Gen III Battle Frontier thread may already know the tragic way it ended (basically my GBA SP battery died while playing).

So after comming to terms with that, i thought that a great way to continue this "rennaisance" of my pokémon journey was to tackle the Gen IV frontier.
And as much as i felt blessed and that i stumbled upon a fantastic run by sheer luck on the pyramid, this time i felt the determination to try and prove myself that i could replicate something similar on the DS games. So that’s what brought me to the Batlle Hall, where i felt it was somewhat easier to prepare for and attempt a good enough run given the nature of the challenge itself.

So i started to read the top posts there and decided to try Garchomp as it had the best performing run after all. It worked pretty well (for what i remember from playing here as a child) and in not so many runs i could get the gold print, but not much more than that. I couldn’t get any to past far from the 180s and started to feel discouraged. (Weavile was the main culprit but don't want to linger here, as i might do another post later with the most notable close calls, and run enders) So i almost left it there. But before quitting i wanted to try Raikou too and oh boy i'm glad i did.

With Raikou i got to gold on first attemp and even consistently in later ones (i feel that the difference was there as many of Garchomp's runs ended early and that was soul crushing but with Raikou it felt rare when the run was cut before the final battle with Argenta) so i knew that if kept playing, one of those post-gold print runs could be lucky enough and give me a good spot on the ranking. But most importantly i had a lot of fun obliterating most mons in one hit with these choice specs beasts.

Yeah i used 2 of them, so it might be time to present them and give the credit to those who deserve it. First to Rodripped as his was the raikou i replicated to start the run (and the one used every time from battles 1-170) this is a 31/30/30/31/31/31 IVs and 252 Sp.Atk/ 252 Speed and 6 SP. Def Rash natured with choice Specs as the item and Thunderbolt, Aura Sphere, Shadow Ball and Hidden Power Ice as its moves.

And then to Atsync for suggesting in one of his replies to instead allocate some of the Speed Evs to Sp Def as that made it survive Camerupt's Earth Power (leaving it as a 252 SpA/32 SpD/224 Spe). So that's what i used every time i beat Argenta the second time and seemed to work. Also wanted to say that i really respect his commitment to try the limits of as much mons and evolutionary families as possible on the Hall as i feel that's a great way to encourage others to try and have fun with their favorites.

Now for the reasons this run in particular was so long. First and foremost a lot and i repeat a lot of luck. The main threats for this mon (which i feel there are 3 big ones) didn’t appear a single time after gold. These are Whiscash, Gastrodon and the well known Weavile. If they appear early in the run you can deal deal with them most of the time (even weavile albeit much less frecuently so) due to the lower levels. But later they almost always block progress (only praying for a crit or trying to paralize weavile usind TB instead of the most intuitive Aura Sphere could get you out of the situation).

The order i ended up using to tackle the types before the gold was ice and dark firts (because of Weavile), then water (because of Gastro and Whiscash), later fire (so low leveled Camerupt doesn't end this "non-prepared for him" variant of Raikou) and lastly ground (again for Gastro and Whiscash) so i get the 3 big threats out of the way and from then on pretty much any order trying to get rid of Psychics early as some high leveled Wobbufet gave me trouble with Mirror Coat. I tend to leave poison for last so i could skip a maybe Crobat double team encounter but most of the time this latter part was pretty easy.

So after gold i change Raikous and at first i started leaving the dreaded 4 types (ice, dark, water and ground) for last each rotation, so i could get bigger streaks but after eventually reaching 252 twice (i say again that i'll provide more detail on some loses and threats on a later reply), i knew that even though it would mean that most runs were going to end earlier than should, i was fishing now for a very lucky one, so if i had to lose let it be quick so i can get there again faster. And that’s how after many tries, in my Heart Gold copy, this holy grail of a run happened finally.

After surpasing my previous personal best, i started leaving the 4 awful types for last once again and in this specific order: water and ground as i felt there was a bigger pool of mons so less probability of encountering the run reapers, and the dark and ice the last ones for the same reason as I thought it was easier that weavile was generated there on the smaller pool. So being blessed without facing any of them, and after a Shiftry fest on the dark slot, what finished this adventure was indeed a Water/Ground type, but their usually better behaved cousin and no, not the slow and friendly Quagsire (which i don't recall giving me any problem) but the starter, Swampert himself (which tends to use a substitue and Rest combo most of the time) that this time (as in one of the 252 runs) decided to use Mud Shot followed by a Torrent powered Muddy Water that landed and finished my business here.

Oh, another thing i wanted to point out is that i also attempted this run on my Platinum copy, roughly the same amount of times (can't tell you how many they were after so many attempts, just that i tried to alternate them, one run on HG, then another on Platinum) and i have the feeling that the HG performed better, like i overall saw many less deadly threats and the runs there were longer (for instance here i got my top 3, this one and the two 252s, but the bigger in platinum was like 220). But all of this might just be anecdotical and pure coincidence because as far as i know the pool is the same and i don't recall any difference in movesets.

I must say i cannot in anyway be mad as this might be the luckiest thing here as of now, and that plus my sheer obstinace for this type of things as long as i don't feel bored (thanks to my past of shiny hunting i guess) are what have let me here having lived it and writing this today.

I know this is not the most difficult facility nor does this mean that i'm nowhere near the best players here, but i feel now more than elated to know that after years of struggling to get any gold symbol/print as a child, my enjoyment of these games and the great help of this community, have let me to re-experience those years once again and now that i've reached top spot on 2 facilities in the singles category (once on each of my 2 most favorite gens) i can only hope to inspire others to keep playing these fun and well crafted (although frustrating a lot of times) post games. And yeah if you want to give it a try here, use Raikou, trust me, it really works.

As of now and though i had a lot of fun i'm pretty tired after trying so hard to get a good run here, i won't try nor post any more runs on any facility for a long time. I even have other streaks still running just after gold, but i know i won't commit as hard as this one so i will leave them there for when i feel like playing and enjoying them in the future. And even then it will probably be a one and done thing.

That being said, thanks a lot to everyone and have a great day!
First i want to say that i was waiting to finish a run that i still had on my Platinum copy, just so i could talk now about my whole experience in the Hall.
I also wanted to do a little write up from the notes i had taken until this moment but i feel pretty tired right now and i decided that altering as little as possible these notes might convey a more genuine picture of the feelings and thoughts i was having at each moment of this whole thing. If after reading them you are confused by some or need clarification tell me and i'll try to edit them.

First i'll share the ones about Garchomp even though i ultimately didn’t submit its best run due to not remembering the exact number and feeling i didn’t really poured myself as much as with Raikou's i'll talk about it anyway for the slim chance it'll help someone in the future (although better ones might be worth reading on other posts first). So here they are:

The close calls:

-Sharpedo every time as rough skin keeps chipping away every time outrage lands (until i realize is best to EQ).

-Dewgong freezes but garchomp thaws out
inmediatly.


The run enders:

-Stupid weavile's ice punch, focus sash and ice shard BS.

-Dusclops ice punch freezes.

-Gastrodon freezes.

-Piloswine avoids my attacks (bright powder?).

-Dynamic punch machamp confuses and i attack myself twice in a row (he misses once) and that's it.

-Venusaur survives the first outrage (focush band) and uses toxic then protects from the second one and confusion comes into play. I attack myself next turn and he finishes me off with frenzy plant.

-Moltres burns with fire blast and ruins me by roosting and chipping me away with the burn and my confusion.

-Blastoise yawns and protects, i get confused and asleep. Once i wake up i hit myself like 3-4 turns which combined with returns it ends me.

-Tauros: Outrages at the 180 something streak. This completely kills my desire to keep using garchomp. It was fun though, so don't get discouraged. I might just be bad LOL.


And now for Raikou's close calls:

-Kingler survives with almost no hp a TB (focus band/sash i guess) and digs. The beast lives.

-A honhckrow (lv.88) who is faster (QC i think) uses night slash and crits. Doesnt matter in the end TB does its job.

-A golem (lv.80something?) Attacks first (QC) and crits with stone edge. Dies with the aura sphere OHKO.

-Ampharos (lv.96) with the lightscreen, rest snore shenanigans. It really rests perfectly twice, had it done it once more i would have died.

-I survive a weavile that outspeeds me both times but i get 2 low rolls and with 19 hp i beat him.

-In the winning run at the 310 point in the streak a chansey froze with blizzard but the beast thawds 2 turns later.


Raikou's run enders:

-Argenta's weavile used ice punch and night slash( with crit to rub it even more). It does the expected.

-I missclick and use tbolt against a jolteon! I was not focused and ruined a great run (battle 193). This one felt awful as it was the first time i got gold and past it. What a way to throw it. But i'm determined and trust this cat, we'll make sure to not repeat this mistake ever again.

-Lanturn freezes and Raikou stays that way for4-5 turns :(

-Gastrodon freezes with blizzard.

-Frosslass evades every shadow ball and the blizzards + hail kill me.

-Ninjask avoids TB and digs. It then crits.

-TB fails to KO heracross and activates salac berry, so a CC and facade are enough.(from now on ill shadow ball it which gives me a better chance avoiding the berry range).--->this thing ends up working every time.

-Sharpedo crits with crunch at 252.

-Swampert used mud bomb then muddy water at 252.

-Starmie double teams, TB misses. Turn 2 hydro pump lands for more than half my total hp and i miss again. Next turn i live another hydro pump with like 2 hp i but miss once more. Last turn, hoping for the star to miss itself finally it ends up landing a psychic xD.
Can you guess the streak number? Yeah, it's 252 for the third time. Had this been the run i did before the lucky one i would probably had started to feel that number as my cursed ceiling and may have postponed my progress. I guess is just the way they force you to pass through every type and at that moment one is always bound to be in the 4 dreaded types hot zone, where bad things tend to happen.


And before ending the post keep in mind that some of these happened multiple times like the ones involving Weavile and some others like Gastrodon or Whiscash (which i didn’t even mention as it was already known and it was gastro 2.0, so nothing new to say). Also there were sometimes that what killed was just a lucky crit and or i was just fed up/focused and didn’t feel like writing anything instead of starting a new try without thinking too much (sometimes this is a good way to avoid burnnig yourself out).So the total number of runs is much bigger than these notes may indicate at first glance.

I also recall some other things creating me some kind of PTSD that made me chose their type earlier in the rotation (or later depending on the point of the run as i mentioned in my first post). But as i didn’t write about them in the moment details might be fuzzy and that’s why i give them their own section. Things like Wobbufet's mirror coat or a Gallade surviving a hit then criting or outspeeding due to salac berry, made me think about putting Psychic and Fighting near the other undesired types.

Oh and one very funny thing is that in what ended up being the winning run i had like a streak of like 3 or 4 crits in a row (or very close) in my favor just after the 170th battle but against things that i didn’t need to crit or that even had sash (like scizor) so i felt like all my luck was wasted there. How wrong i was in hindsight.

The thing that really helped me the most in the end was the absence of the big 3 threats. So i even though i think luck was the real deciding factor here, i feel very proud of chasing it consistently until it appeared.

So if you just want a quick way to grab the gold print or want to try get a big streak and can procure yourself one of these raikous i highly suggest you do it as for me this is clearly the best mon for this challenge.

But even if you just want to have fun with your favorite mon go for it, don't fixate on making a big streak from the start, enjoy just battling first and just give it a try before burning yourself out. Use these posts as inspirantion and start having fun.

Goog luck!
 
Last edited:
Hello, haven't posted here in quite a while. In fact, it's been more than a year and a half since I made my only posts here, asking a question about the AI of Factory Doubles. That was the start of an endless grind, trying to beat what's probably one of the worst, if not the worst format in any facility in the Pokemon games. And after all that time, I'm here to submit streaks of 50 wins in Battle Factory Doubles LV50 and 57 wins in Battle Factory Doubles Open Level

Starting with my LV50 record, I only kept notes of my teams from Round5 onwards and only started posting logs of the battles in Discord from Round7 onwards.

My Round5 team at the start was Charizard2/Mismagius3/Roserade2, I was up against Rock specialists in the first two battles. My initial draft wasn't very strong, led Charizard with MIsmagius hoping for only one Rock type lead which Mismagius could potentially kill with Energy Ball with the other one in the back, and got Roserade to deal with them. Roserade2 isn't very good, even more so in Doubles where stall doesn't work as well, but it did its job with the type advantage. After 5-2 I swapped Roserade2 for Mamoswine2 because it has great synergy with Charizard, switch in vs Electric and since both my Pokemon are immune to Earthquake, I could freely spam it. Swapped Charizard for Weavile1 in 5-5 vs Water specialist, Fake Out has insane utility on top of Weavile being a very good Pokemon in its own right, I could have swapped out Mismagius and go Sunny Day Solarbeam with Fake out Support, but went for the Immediate good matchup, wanted to keep Destiny Bond as well, and Icy Wind could slow down something for Mamoswine to come in, outspeed, and kill.

My Round6 team was Aerodactly4/Gyarados4/Electivire3, this team looks very good on paper with Choice Band Aerodactyl and Gyarados both being able to spam Earthquake freely and Gyarados being able to Dragon Dance if given the chance, plus with Aerodactyl being so fast, I could dispatch most Electric types before they even had a chance to touch me. With my team being so front-loaded though, I needed to avoid threats like Jolteon3 and Electrode3 in the lead which would cause massive problems for me. While I did have a switch in with Electivire, both my leads where dead to these two Pokemon, meaning I couldn't know which of my two Pokemon they would target, so I would have to stay in and Earthquake with Gyarados and lock Aerodactyl into Stone Edge, because if I locked into Earthquake then my Electivire would be instantly dead when it came out. (There is an argument to be made about leading Electivire and having Gyarados in the back switch into Ground for it, but if I come up against water ground types I lose, and I can't effectively use Earthquake in case it kills one Pokemon and softens up the other if I lead Gyarados to kill with Waterfall, also I can kill a threat to Gyarados and get a free Dragon Dance if the other Pokemon isn't threatening and play around a potential threat in the back) This situation never happened thankfully, but this is another reason Doubles as a format is so difficult, you can't really play around threats as effectively in 3v3, sometimes you just have to lead your best Pokemon and hope for the best, and this was by far and away the best pair I could lead in this situation. A good example of this was in one of my losing attempts, where in 6-7 I was fighting a grass specialist with Salamence3/Raichu4/Arcanine2 and swapped Raichu for Staraptor3 thinking it was an easy victory, only to get obliterated by lead Froslass4 with Blizzard, literally the only Set4 Pokemon that could destroy me and there was nothing I could do about it other than hope for Blizzard miss, since Arcanine was slower than it, Raichu wasn't killing it and none of my other swap options would help. Anyways nothing of the sort happened in this attempt, it was all smooth sailing until 6-7 where I came up against a Ground specialist, swapped Electivire for my good old friend Roserade2 and won comfortably. It was pretty hilarious to me that Roserade2 came in so handy in this run considering I had lost 2 runs before this with Leaf Storm Roserade losing battles in Round6 vs Ground specialist with Garchomp3. And Roserade wasn't done just yet cause here comes round 7...

My draft for round 7 was Gengar4/Swampert4/Mamoswine4/Gastrodon1/Tauros4(31iv Anger Point)/Absol3, fantastic draft, shame Tauros didn't have Intimidate but things worked out well, led it with Gengar, fast and strong Pokemon plus free Earthquakes, and and kept Swampert in the back, have the Discord logs for the battles as well.

7-1
Flying specialist, opponent led with Set3 Probopass Altaria, Earthquake killed Probopass, did about half to Altaria with Sludge Bomb and it did about half to Tauros with Dragon Rush, Staraptor3 came out, Switched Tauros out because I was locked into Earthquake vs 2 Flying types, killed Staraptor with Thunderbolt while Altaria used Dragon Dance, Gengar was still faster and killed with another Sludge Bomb.

7-2
VS Set3 Flygon Exploud, Tauros barely outsped Flygon thanks to being my elevation and having 31IVs, killed it with Return, decided to switch Gengar out instead of going for the Destiny Bond on Crunch from Exploud in order to be able to switch moves on Choice Band Tauros just in case I had to, Swampert ate the Crunch up and the Life Orb Recoil pretty much guaranteed Return would kill Exploud, which is exactly what I did next turn while Swampert killed the Typhlosion3 that came out with Aqua Tail.

7-3
The most difficult battle in the entire run, I was up against a Psychic specialist and I was terrified of things like Alakazam and Starmie showing up and destroying me. My swaps weren't helping with much either, I could take Exploud for Crunch and significantly weaken my team, and still lose to Alakazam4 with Focus Blast, or take Typhlosion or Flygon that can tank a Psychic from Alakazam and get owned by Starmie4, Slowbro4, Slowking4. Decided that my best bet was keeping my current team and hoping for good matchups. Unfortunately, Alakazam4 and Slowbro4 came out and it was looking like a loss. Alakazam was faster than Gengar and could kill it, and I needed Gengar to kill Slowbro. Tauros could 2hko Slowbro with Choice Band Return but not before dying to Focus Blast from Alakazam, and Swampert could kill it with Mirror Coat but not if I switch it in to take damage and there was still an unknown Pokemon in the back. As I mentioned, Alakazam was faster and could 1hko both Tauros and Gengar, and that's what I ended up gambling on to win. Since Alakazam could target both my Pokemon, if I switched out I needed to win a coin flip for switching out the correct Pokemon and killing Alakazam with the other, but I also ran the risk of achieving absolutely nothing and instantly losing the fight. Let's say I stayed in with Gengar and targeted Alakazam, if it killed Tauros with Focus Blast, I would kill it Shadow Ball and die to Psychic from Slowbro then I would end up in a 2v1 situation with Swampert where I'd have to Mirror Coat Slowbro while the other unknown Pokemon would have a free hit at me. That was not a winning scenario so I decided to pray for Focus Miss and lo and behold, it actually happened! Game didn't hand everything to me though, because Gengar missed the 56.3% range to kill Slowbro and died to Psychic. After that Weavile4 came out, and as Weavile4 usually does, it crit Tauros with Brick Break which meant I could potentially lose to an Ice Punch freeze, but Swampert was having none of that and landed a crit Earthquake on it to win me the battle, finishing Slowbro off in the process. I took Weavile for Swampert here mainly because I didn't want to face it but it could also serve as a switch in for Gengar in case I had to fight something like a Starmie.

7-4
VS Set4 Golduck Roserade. Roserade died to Return, Golduck wasn't so simple, it had Wacan Berry and it wasn't dying to Thunderbolt. It had a 31.3% chance to kill Gengar with either Hydro Pump or Psychic. I decided to go Thunderbolt instead of Destiny Bond, it'd put it in range for Return to finish it off and there's always the chance for para fully para or crit. I did actually crit it but it still didn't die with Wacan (which I mistakenly thought it would so Sludge Bomb would have killed but playing for the para chance was better anyways) but it didn't kill me with Psychic either. Loppuny4 came out and killed Gengar, I killed it with Return and Golduck used Psychic, which I took it to mean that they double targeted Gengar which means the AI doesn't take into consideration that it kills it with Loppuny which is faster and target Tauros with Golduck Hydro Pump? Many aspect of Doubles AI targeting I don't know enough about. But anyways it was Roserade time again because in the next battle....

7-5
I was up against a Water Specialist! Roserade surely wouldn't fail me again with type advantage right? I was up against Politoed3 Feraligatr3, Politoed couldn't really do much to me so I ignored it hoping for Belly Drum and double targeted Feraligatr because Thunderbolt was a 56.3% range to kill. So I killed Feraligatr with Return Thunderbolt while Politoed used Waterfall on Gengar and put it at around half health. Torterra3 came out, I killed Politoed with Return and missed Sludge Bomb because of Lax incense, it crit Tauros and then I killed it with Double Sludge Bomb.

7-6
Having given up Weavile and having it in my mind, I realized that it kills both Gengar and Roserade so I decided to take Feraligatr in the back, it's at least bulky and it can maybe switch in much better than Roserade if I need it to. VS Set3 Ursaring Skuntank, I kill Skuntank with Return and take down Ursaring with Destiny Bond on the Crunch. Remember when I switched in Swampert on a Crunch instead of using Destiny Bond earlier because I wanted to be able to swap moves on Tauros? Well maybe I should have done the same here, because Bastiodon3 comes out and I am locked into Return. It's a good thing Feraligatr has Hydro Cannon right? Well guess again...
252+ SpA Wise Glasses Feraligatr Hydro Cannon vs. 252 HP / 252+ SpD Bastiodon: 128-152 (79.5 - 94.4%) -- guaranteed 2HKO after Leftovers recovery
252+ Atk Choice Band Tauros Return vs. 252 HP / 0 Def Bastiodon: 19-23 (11.8 - 14.2%) -- nice chip damage

I was actually not guaranteed to kill it! That monster is fully invested into Hp and Special Defence, and I had the choice of either risking these ranges, or going for Focus Miss like that Alakazam, miss, get hit by Fissure and complete the circle. So I went for Hydro Cannon and missed the ranges! My heart dropped there but thankfully Bastiodon didn't go for Fissure or Double Team, but Iron Defense. Which is equally as bad because Tauros might as well not exist to it now unless it crits, so now I could still get Fissure on Feraligatr and die. But Bastiodon used Iron Defense once again and Feraligatr killed it with another Hydro Cannon. Survived the scare, and there was just one battle left...

7-7
For the Gold Print, VS Bug specialist. This is the first battle where the opponents can use any Set of Pokemon including Legendaries, so having a hint from the Assistant is great here. Doing some recon work with item scouting, I ruled out Forretress3 Shuckle4 Armaldo3 Yanmega3,4. I considered taking Flamethrower Skuntank for a quick second before deciding against it, Feraligatr beats Bug/Steel and has Ancient Power for Bug/Flying and is in general a better Pokemon, so I ended up not swapping. VS Heracross Scizor, Tauros has an 87.5% chance to kill every Heracross with Return and 2 out of 4 Scizor Sets have Night Slash for Gengar, so I go for it with Return Destiny Bond and get both of them, and have a 2v1 vs the last Pokemon. I pray for no Ghost and get something almost as bad, Bronzong. Item Clause rules out Bronzong2,3 so there's a 50% chance that I am up against a Quick Claw Explosion Pokemon. I am hoping for no Explosion here, and it shouldn't go for it unless it's low on health but a crit from tauros would put it in low health where it should be more likely to use Explosion turn2 and end my run in the most painful way possible. Explosion is actually a range to kill my Feraligatr (62.5% chance to ohko) so I use Return and Ancient Power, hoping for an omniboost that would allow me to tank an unexpected turn1 Explosion, I don't get it and... it uses Extrasensory, meaning that it is Bronzong1, which dies to Return Hydro Cannon afterwards and hands me the Gold Print!!!

My draft for Round8 was Heatran4/Zapdos3/Nidoqeeun1(poison point)/Mr. Mime3/Nidoking2/Typhlosion2, bad draft, getting Physical Zapdos was a kick in the teeth, but even though my team was looking bad vs Water (and I was up against an Ice specialist which could very easily mean 2 Water types) there was at least one thing I could do. Lead Focus Sash Explosion Heatran with Endure Reversal Typhlosion. This strategy can win battles in an instant, but I am not exactly working with Heracross4 or Medicham1 here. I went for it and took Mr. Mime in the back, which may be extremely frail but it has Psychic Thunderbolt Energy Ball, which means it can deal with almost every Water type right? Well we'll see...

8-1
VS 31IV Mamoswine Glaceon. No Water Types was nice. I ruled out Glaceon3 with item clause. I could only ohko Glaceon4 with Flash Cannon from Heatran, so I killed Mamoswine with Blast Burn and risked Magma Storm on Glaceon, hoping for no miss or Water Pulse crit on Typhlosion or Water Pulse confusion on Heatran. Mamoswine died to Blast Burn and Magma Storm missed, Water Pulse went into Typhlosion and nothing bad happened, so Explosion was open to me here. From the damage Water Pulse did on Typhlosion, it looked like I was up against Glaceon4 with Wise Glasses, and the Loppuny that came out wasn't Brightpowder because of item clause, so I just used Explosion. Turns out it was Loppuny1 with Focus Band which I didn't think about at all, also I was thinking that even if Glaceon was Lax Incense and not Wise Glasses like I was thinking, I could kill with Endure Reversal, forgetting that I had used Blast Burn and was immobile this turn but whatever, Explosion killed everything so it was all good to me, maybe I didn't play this perfectly but I won, unfortunately this would set a precedent for the next battle...

8-2
VS Water Specialist. I wanted to take Mamoswine for Mr. MIme, but I needed its coverage moves now even if it would instantly die to pretty much any Physical Pokemon that outspeeds it. VS 31IV Golem Walrein, I killed Golem with Flash Cannon. I knew it wasn't Golem1 and thankfully no Quick Claw activated if it was Golem4, and used Reversal from full on Walrein to slightly chip it for Explosion on turn2 while it used Hail. This is where I played really badly but at the end of the day I would have lost the game anyways so I am not too disappointed. Politoed comes out, I go for Explosion hoping for attack on Typhlosion while I Endure completely forgetting that it can have Damp as an ability, and also not considering Politoed2, which has Dive and is exactly what happened, both Dive and Damp. I also messed up on recognizing which Walrein I was fighting because I didn't check and confused it with Dewgong4. (They have the same moves other than Hail/Rest and I thought Walrein was the one with Rest so I assumed Walrein3 is the one with Hail which is wrong, yeah I was all over the place) Anyways I messed up big time, but I would have lost regardless because Surf crit Heatran and Politoed used Dive on Heatran slot, which meant Mr. Mime took a hit next turn, also Walrein showed no Ice Body in Hail which means that I wasn't killing it with Blast Burn Flash Cannon, and for Blast Burn Flash Cannon to go off I needed Politoed to be Set1,2 or not instantly kill me by targeting Heatran. Very complicated explanation but TL:DR: Risking Explosion was most likely the correct play, but I didn't arrive at that decision with the correct thought process.

Unfortunately I have no logs or stories to share about my 57 wins in Open Level, only the video of the loss and the teams I used from Round6 onwards. It was something that I got months ago (on March) before I started posting on Discord. To be honest, even if I started doing it now (and I did it give it a whole 3 attempts while blogging!) I wouldn't keep logs of this, Open Level Battle Factory is an impossibly difficult format, which is honestly all about luck, provided you play at a high level from start to finish. For reference, I started doing this in 2021, and I managed to reach Round 7 twice in about 9 months worth of attempts, whereas I got my 50 in LV50 in about a month, and reached Round7 about 8 or 9 times in that time period. LV50 is also extremely difficult compared to SIngles, but it still has nothing on Open Level, you just cannot afford to not know what you're fighting in Doubles.

So what I remember about my streak:
Round6 was the most cracked team ever with Latios4 Garchomp4 Metagross4
Round7 I had Porygon-Z(2) Aerodactyl1 Gastrodon3
Round8 I had Garchomp1 Blaziken1 Regice4, ended up Swapping Regice for Raikou4 iirc, it might have been Raikou1.
Round9 I don't remember the sets but you can see the team in the video

I'm not sure if I'm ok to submit for record with just the video of the losing battle, do tell me if there's any problem :)

LV50 losing Battle:

Open Level losing Battle:

Picture of Streaks:
Doubles.jpg

Oh yeah also I have a 53 in LV50 but I don't have the video of the loss or remember much about it, I got it when I rage quit Open Level after 6 months and literally won on my first attempt that got out of round4. As I said in Discord, I wanted to win it again to submit for Leaderboards and also just play it more, I didn't get to enjoy the early rounds and use a variety of wacky Pokemon combinatons (like Trick Room Bannete Snorlax Self-Destruct Sudowoodo in the back, what a team) because I won quickly.

Also apparently I'm the first person in the world to get Gold Print on all 4 Battle Factory Formats, which probably isn't true but I'm going to pretend like it is and brag about it here so here's an extra picture:
Singles.jpg

As for closing thoughts, I'd like it if more people played Factory Doubles (well LV50 specifically) because it looks like it's only me and one other person, it may not be as skill based as singles in the later rounds especially, because the early rounds require way more skillful playing with Doubles AI being "smart" from the get-go, but it can be incredibly fun and fast paced, and the record is easily improvable. Also having fun in the Server seeing all the posts about Factory, whether it be Gen3 which I don't know much about or Gen4 and love seeing stuff about Battle Hall which is what I'm going back to now, working my way up to the 10K total winstreak, I'm nearly halfway there.

Oh and if the Open Level record isn't accepted because I didn't have much info to share, please beat it The FIrst Letter of the Alphabet, seeing the record not be a gold print win annoys me :)
And if it's accepted beat it anyways and make a cool post about it :)
 
Last edited:
[On an emulator, so pls do not record]

Got a 108 Battle Tower streak with a team so simple even a dunce like me can pilot it.

3 OP Pokemon walk into a Battle Tower

Melon (Event Shiny Raikou) - Rash; Max Special Attack + Speed (Life Orb)
Thunderbolt, Aura Sphere, Shadow Ball, Hidden Power (Ice)

Tiramisu (Gengar) - Timid; Max Special Attack + Speed (Focus Sash)
Shadow Ball, Energy Ball, Counter, Destiny Bond

Katsu (Garchomp) - Jolly; Max Attack + Speed (Choice Band)
Outrage, Earthquake, Fire Fang, Aerial Ace

Melon is always the lead, and he just goes in like a missile, doing as much as damage as he can with his incredible coverage alongside Life Orb. There is an overlap inefficiency with Shadow Ball Raikou and Gengar, but the base of the team is so strong it doesn't really matter for the purposes of getting a 100 streak. Melon is forced out by a Water/Ground pokemon (i.e. Swampert/Gastrodon), whereupon Tiramisu can swoop in with Energy Ball.

Tiramisu with Counter/Destiny Bond is the star of the show, but I liked Melon more for the lead just for his coverage, and because he does provide for the easy earthquake switch-in for Tiramisu. Katsu saved my bacon a number of times with a Choice-Banded Outrage/Earthquake, but in 80% of the matches, Melon and Tiramisu were more than a match for any situation. Fire Fang was for Abomasnow, and Aerial Ace was for Double-Teaming Grass types.

Also got a win for Battle Castle - nothing much to report there outside sticking to established wisdom; i.e. farm Castle Points early, and skip all the trainers in the final round before Gold. Melon was again the lead, and getting some PP-ups on him was helpful as well so he doesn't have to spend time healing.
 

Attachments

QuentinQuonce

formerly green_typhlosion
Quick question re Gen IV's Frontier as there's something I'm interested in trying:

Obviously you can do multi battles with another player in the Frontier facilities - but regarding the Tower specifically, if a copy of DP were to link and partner with a copy of Platinum or HGSS, how does this affect trainer rosters? Would they be drawn from the Frontier pool, the DP Tower pool, or a mix of both?
I've done this for ribbon masters before, and I believe they came from the DP pool IIRC.
 
Ladies and Gentleman, I just lost a 200 streak in Tower Doubles because of an unexpected crash (I'm crying inside fr.) Here's my Team btw. Disquake Team Modified by me

Garchomp @ Choice Scarf
Ability: Sand Veil
Level: 50
EVs: 156 HP / 252 Atk / 4 Def / 4 SpD / 92 Spe
Adamant Nature
- Earthquake
- Dragon Claw
- Crunch
- Iron Head

Zapdos @ Life Orb
Ability: Pressure
Level: 50
EVs: 252 SpA / 4 SpD / 252 Spe
Timid Nature
IVs: 30 HP / 2 Atk / 30 Def
- Discharge
- Hidden Power [Ice]
- Detect
- Thunderbolt

Heatran @ Leftovers
Ability: Flash Fire
Level: 50
EVs: 4 HP / 4 Def / 236 SpA / 12 SpD / 252 Spe
Modest Nature
IVs: 0 Atk
- Flamethrower
- Earth Power
- Protect
- Substitute

Azelf @ Focus Sash
Ability: Levitate
Level: 50
EVs: 36 Atk / 252 SpA / 220 Spe
Naive Nature
- Psychic
- Energy Ball
- Protect
- Explosion

That's what happened to my dsi 20 minutes ago :(( I guess I have to start all over again. R.I.P World Record run
1694527749857.png
 

Users Who Are Viewing This Thread (Users: 1, Guests: 0)

Top